046-07-GA_Oxi_B-a_eng 8
5.
Calibration and measurement accuracy
5.1.
Calibration using ambient air
1.
Switch on the OxiQuant B
2.
Hold the sensor away from the body.
3.
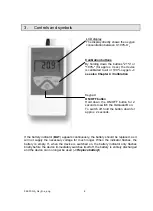
By holding down the calibration button "21%" for approx. 3
seconds, the device is automatically calibrated to ambient air.
The indicators "CAL" and "21" will appear alternately on the
display for approx. 5 seconds.
The concentration of oxygen in ambient air is 20.95 %O
2
.
The
calibration value is therefore set to 20.9% O
2
. Ambient
pressure, humidity and temperature can have an effect on
the displayed value (see Chapter 6).
4.
?
The device is ready to take measurements!
5.2.
Calibration to 100% O
2
At high oxygen concentrations (50-100% O
2
), it is recommended that the
calibration be performed using a calibration gas consisting of 100% O
2
. In this
case, it must be ensured that the connection between the oxygen sensor and the
inlet when supplying gas to the sensor is tight enough to prevent any possibility
of ambient gases entering the mixture.
1.
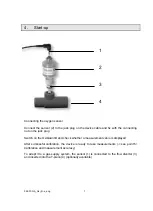
Connect the T-piece to the oxygen supply and insert the sensor
with the flow diverter into the T-piece.
2.
Adjust the oxygen flow to the recommended 2 l/min at the
oxygen supply.
3.
By holding down the calibration button "100%" for approx. 3
seconds, the device is automatically calibrated to pure oxygen.
The indicators "CAL" and "100" will appear alternately on the
display for approx. 5 seconds.
4.
Remove the sensor from the supply and check, using clean
ambient air, that a value of 21% O
2
is displayed after approx. 60
seconds.
Hold the sensor away from the body when doing this (away from
breath!) and wave it around (unscrew the flow diverter if
necessary).
5.
?
The device is ready to take measurements!
The relevant calibration process should be checked and, if
necessary, repeated before each new measurement!
If the calibration cannot be carried out correctly, see Chapter 5 /
Errors during calibration and measurement, or contact your dealer.

