Nanoenvi IAQ WiFi 1.3.1
User Manual
Capítulo 6. Installation
Pág. 17
7. Press the Update settings (5). If everything went well, you will see a green ‘success’ message displayed in your browser,
and the lights on the device will flash cyan again. At this time Nanoenvi IAQ
™
, has just been configured: the device is
starting up and making its first connection.
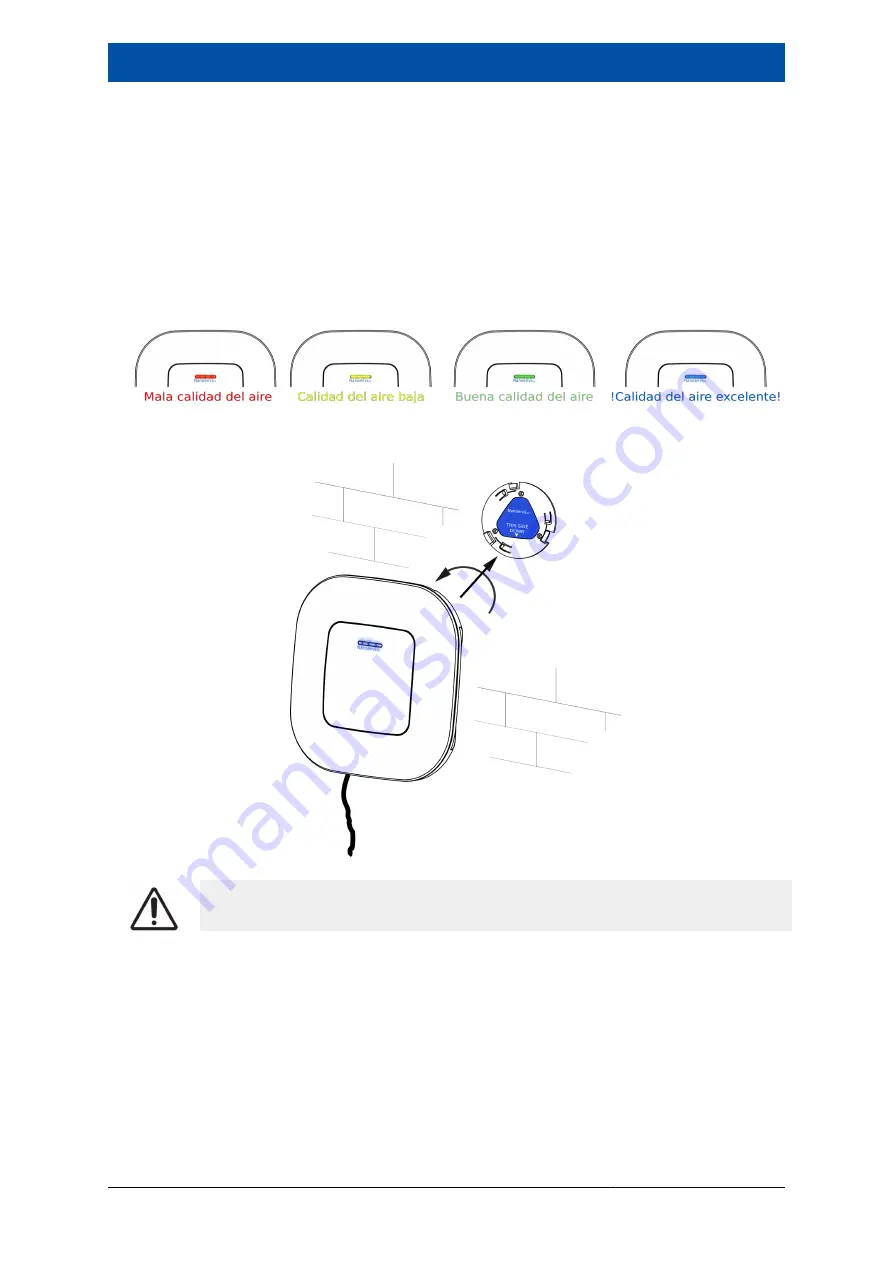
8. After a few minutes, all three lights on the device should be lit blue, yellow, green or red depending on the air quality (see
Apéndice B, Nanoenvi IAQ Status lights). This means that Nanoenvi IAQ
™
is connected to the Internet, can send data
without problem and the device's LEDs show the air quality. If this does not happen (only one of the three lights is lit, red
or yellow), see Sección 9.1, “Troubleshooting” [21].
9. 10. You can now place the device on the wall bracket. To do this, align your housing with the bracket and turn clockwise.
You can also reconnect your smartphone or PC to the network you normally use.
Make sure the device is properly secured.
You can find the following supporting videos on Envira IoT's Youtube
channel [https://www.youtube.com/channel/
UC1bQfcxdMtxACN0fhLRDHVA/videos]:
• Nanoenvi IAQ
™
initial configuration from Android device.
• Nanoenvi IAQ
™
initial configuration from PC.
• How to update the Nanoenvi IAQ
™
configuration.
Содержание Nanoenvi IAQ
Страница 1: ...User Manual 1 3 1 Envira Sostenible S A...
Страница 23: ...Nanoenvi IAQ WiFi 1 3 1 User Manual Cap tulo 6 Installation P g 18...
Страница 35: ...www enviraiot es...


