background image

Amulet  High Definition Television Receiver User’s Guide


Copyright 

 2007 Entone, Inc. All rights reserved

30 


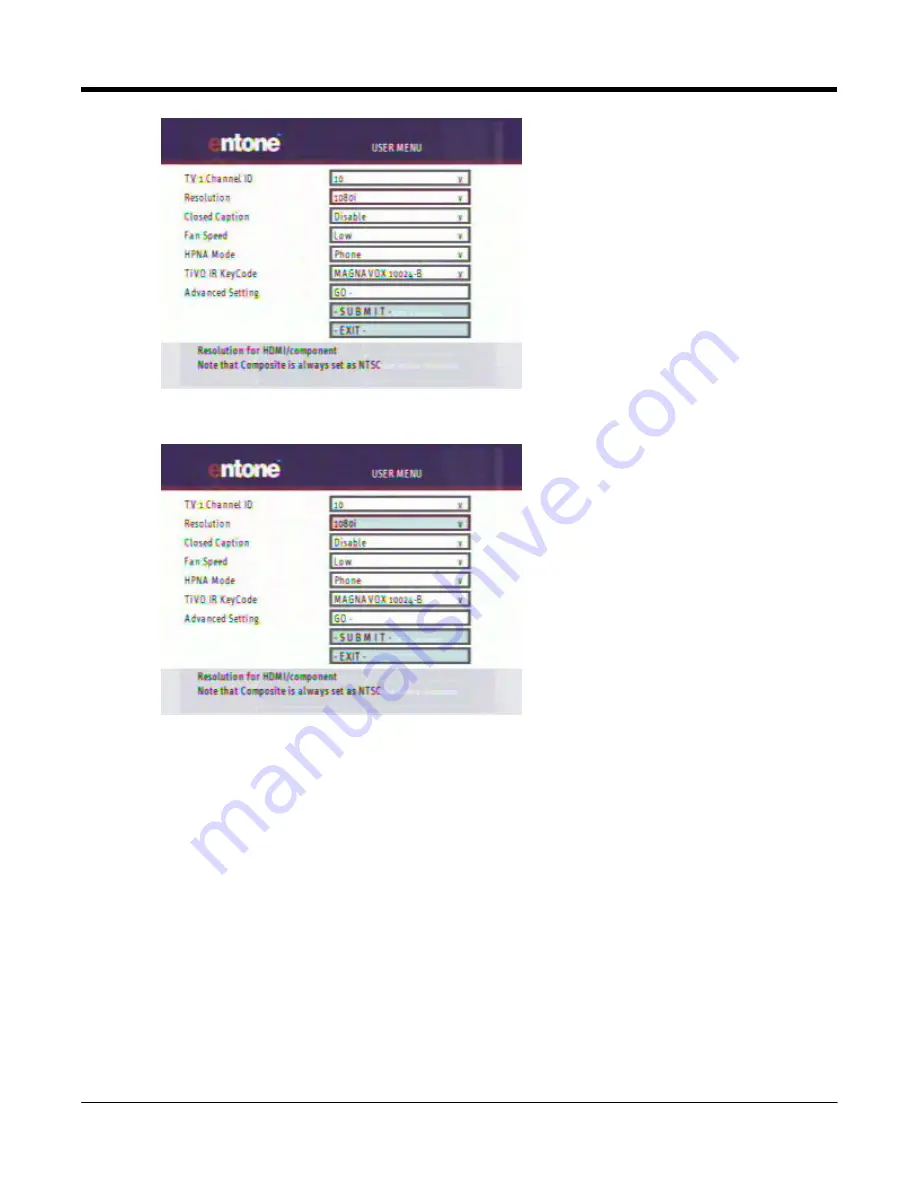
Figure 10-3 User Menu - Feature in Focus 


0-1 

Figure 10-4 User Menu - Feature selected for choice selection 

3.  Use remote control “UP” and “DOWN” arrow to loop through available choices.  
4.  Press “OK’ again when your choice is selected. 
5.  If you have other features to set up, repeat the above procedures. 
 

Содержание Amulet

Страница 1: ...Amulet HighDefinitionTelevisionReceiver User s Guide P N 95 80xxxx xx ...

Страница 2: ...one and the tagline Connecting the Home are trademarks of Entone Inc All other trademarks or registered trademarks belong to their respective owners CHANGES The material in this document is for information only and is subject to change without notice While reasonable efforts have been made in the preparation of this document to assure its accuracy Entone Inc assumes no liability resulting from the...

Страница 3: ...XIAL CABLE 12 SETTING UP TV TO USE CATV 12 CONNECTING THE TV USING RCA COMPOSITE OR S VIDEO 13 CONNECTING THE TV USING HDMI OR COMPONENT 15 SETTING HDMI AND COMPONENT OUTPUT RESOLUTION 17 5 1 Connecting Audio System 18 6 1 Powering Up Amulet 20 7 1 Remote Controls 22 LOADING BATTERIES 22 CONTROLLING THE AMULET 23 CONTROLLING YOUR TELEVISION AND OTHER A V DEVICES 25 8 1 Closed Captioning 26 9 1 Asp...

Страница 4: ... device must accept any interference received including interference that may cause undesired operation This equipment has been tested and found to comply with the limits for a Class B digital device pursuant to Part 15 of the Federal Communication Commission FCC Rules These limits are designed to provide reasonable protection against harmful interference in a residential installation This equipme...

Страница 5: ...n is not practical the telephone company will notify you as soon as possible You will be advised of your right to file a complaint with the FCC if you believe such action is necessary If you experience trouble with this equipment do not try to repair the equipment yourself The equipment cannot be repaired in the field Contact your ISP for further instructions The telephone company may make changes...

Страница 6: ...Before installing this equipment users should ensure that it is permissible to be connected to the facilities of the local Telecommunication Company The equipment must also be installed using an acceptable method of connection The customer should be aware that compliance with the above conditions may not prevent degradation of service in some situations Connection to a party line service is subjec...

Страница 7: ... is too long to be shown in its entirety NOTE TIP A note or a tip describes actions or conditions that can help you obtain optimum performance from IOM WARNING A caution or a warning describes conditions that can result in an error IMPORTANT An important note OVERVIEW OF THIS USER S GUIDE This User s Guide provides generic information about connecting Amulet to your audio and video equipments Some...

Страница 8: ...ified personnel To help prevent electric shock plug the power cable into properly grounded sources Use only properly grounded extension cords and adaptors if they are needed Make sure nothing is lying on any of the cables Be sure the cables are located where they will not be stepped on or tripped over Do not spill food or liquids onto the unit Do not push any objects into the free slots Doing so w...

Страница 9: ...let High Definition Multi Television Residential Gateway Amulet 1 RF Cable with F type connectors 6 feet 1 RJ45 Ethernet Cable 10 feet 1 3 Color RCA A V Cable 6 feet 1 3 Color Component Cable 6 feet 1 Power Supply with 6 feet power cord 100 240V output 12V 2A 5V 5A 1 URC PLUS Remote Control Universal Remote Control 1 Battery AA size 2 ...

Страница 10: ...ger remote registration mode Other usage according to middleware 7 Reset Pin Hole Restart Amulet Figure 2 2 Amulet Rear Panel Part Name Description 1 DIGITAL AUDIO S PDIF digital coaxial RCA audio output 2 S VIDEO S Video output 3 AUDIO LEFT RIGHT Composite audio output 4 VIDEO Composite video output 5 Y Pb Pr Component video output 6 OPTICAL AUDIO S PDIF digital optical audio TOSLINK output 7 HDM...

Страница 11: ...e channel 11 PREVIOUS NEXT CHAPTER Goes to previous or next movie chapter for VOD 12 FAST REVERSE FORWARD Starts fast reverse or fast forward for VOD or live channel 13 RED 14 GREEN 15 NUMBER KEYS Allows direct access to specific channels and menu items 16 ENTER 17 DTV Returns to live programming 18 Movies Displays the VOD menu 19 Record it Displays the digital recorder menu 20 Promos Displays the...

Страница 12: ...s Amulet s internal hard drive option allows service providers to offer advanced services such as PVR without the hassles of installing new equipment The optional PVR provides up to 400 hours of SD content or 200 hours of HD content With Amulet operators can now deliver more compelling services and an enhanced user experience to their subscribers With Amulet subscribers can blend and connect a var...

Страница 13: ...ed to HDMI version 1 1 specifications HDMI and component video output support high definition video signal They will provide the best quality video signal for HD ready TV sets S Video output will provide the best quality video signal for late model TV sets The RCA A V composite S Video and RF TV output jacks only support 480i pictures The following table shows the video and audio output jacks and ...

Страница 14: ...F TV it is factory set to use channel 10 To set RF TV to another channel ID please refer to section Setting Channel ID Figure 4 1 Connecting TV using Coaxial Cable SETTING UP TV TO USE CATV In order for the Amulet to feed video signal to TV using RF TV your TV must be configured to receive signal from CATV rather than from the antenna Most TVs use either a physical switch located on the rear of th...

Страница 15: ...eo signal output that you plan to use 2 Connect the video and audio cables to the Amulet 3 Connect the opposite end of the video and audio cables to the matching input in the TV 4 Plug in your TV and turn on the power using your TV remote control Use your TV remote control to select the respective video input that has connected to the Amulet Consult your TV owner s manual for instructions as requi...

Страница 16: ...h Definition Television Receiver User s Guide Copyright 2007 Entone Inc All rights reserved 14 Figure 4 3 Connecting TV using S Video and Composite Audio NOTE Composite and S Video outputs are always set to 480i ...

Страница 17: ...to use 2 Connect the video and audio cables to the Amulet HDMI does not require separate audio cable connection 3 Connect the opposite end of the video and audio cables to the matching input in the TV 4 Plug in your TV and turn on the power using your TV remote control Use your TV remote control to select the respective video input that has connected to the Amulet Consult your TV owner s manual fo...

Страница 18: ...d by your TV disconnect the HDMI cable and then connect it again or turn off the TV and then turn it on again Analog DVI is not supported If your TV supports digital DVI but not HDMI you can use an HDMI to DVI convector cable or adaptor to connect the Amulet HDMI to the TV DVI In this case you need to connect the audio cable separately Be sure to use an HDMI cable with the HDMI logo If your TV doe...

Страница 19: ...ss and hold the Amulet front panel UP arrow for 5 seconds 2 Keep on pressing the UP arrow the resolution indicator in the Amulet front panel display will illuminate in a round robin manner from 1080i 720p 480p 480i 3 When your desired resolution is illuminated release the UP arrow Then both the HDMI and Component outputs will be set to the selected resolution Figure 4 6 Setting HDMI and Component ...

Страница 20: ...the 75ohm digital audio coaxial output or the digital optical audio output Figure 5 1 Connecting Amulet to Audio System Consult your audio system user guide for connection Take necessary precautions when working with electric equipment Remove the devices from wall power and be sure to use caution when moving equipment to prevent injury If your connected TV or A V equipment does not support AC 3 yo...

Страница 21: ... AC 3 Enable Normal Audio Track Only PCM PCM Analog audio Analog audio AC 3 Disable With Normal Audio Track Normal audio track selected and output in PCM Normal audio track selected and output in PCM Normal audio track selected and output in Analog audio Normal audio track selected and output in Analog audio AC 3 Disable AC 3 Track Only Down mixed PCM Down mixed PCM Down mixed analog audio Down mi...

Страница 22: ... unit using the Ethernet cable comes packaged with the Amulet Figure 6 1 Connecting Amulet 2 Plug the socket end of the AC DC adapter into the wall socket and the DC jack into the power connector on the Amulet 3 The Amulet front panel power indicator will illuminate in orange color 4 Within 10 seconds the Amulet front panel will display BOOT and then WELCOME Figure 6 2 Amulet Starting 5 Within 60 ...

Страница 23: ...ng on the middleware application and the service provider environment ATTENTION If your Amulet is equipped with a hard drive disk formatting may be required when the Amulet boots up for the first time Message will be showing in the splash screen when the disk is being formatted Do not power off the box during the disk formatting Figure 6 4 Amulet Formatting Hard Drive Do not Power Off ...

Страница 24: ...nc and do not mix batteries of different kinds Alkaline batteries last longer than carbon zinc WARNING Mixing old and new batteries or different types of batteries poses a fire hazard To load batteries to remote control 1 Press down on the battery cover s top latch and slide the cover off 2 If you are changing out batteries take out all of the old batteries 3 Put the new batteries in Make sure you...

Страница 25: ...e control signals IR signals travel only short distances 40 feet or less and cannot go through walls or other solid objects You must point the remote control to the Amulet with no objects blocking the line of sight Figure 7 2 IR Reception Range ATTENTION Amulet must use new URC PLUS remote controls Old remote controls without the URC PLUS logo do not work with Amulet ...

Страница 26: ...Mode Step 1 for Amulet using IR mode 2 On the URC PLUS press STB once again Both the STB and AUX button backlight will illuminate Figure 7 4 URC PLUS in Remote Registration Mode Step 2 for Amulet using IR mode Figure 7 5 URC PLUS in Remote Registration Mode Step 3 for Amulet using IR mode 3 Press 0 to set URC PLUS to IR mode only The URC PLUS will not send any RF signal The STB button backlight on...

Страница 27: ...emote controls use infrared IR light signals to control other devices that the remote is programmed to control IR signals travel only short distances 40 feet or less and cannot go through walls or other solid objects You must point the remote control directly at these devices with no objects blocking the line of sight For details of how to program the Amulet remote controls and the supported devic...

Страница 28: ...cannot control captioning through your TV To turn on or off closed captioning press the LANG button on the remote control The LANG button will toggle captioning on and off alternatively Figure 8 1Controlling Closed Captioning NOTE Captioning on RF TV HDMI Component S Video Composite outputs is toggled on or off at the same time NOTE Control of captioning may vary for different service providers Fo...

Страница 29: ...ervice provider for options available and detailed operation Typically aspect ratio is provided in following 3 modes 1 Mode 4 3 You choose this mode when your TV is a traditional 4 3 TV 4 3 Content 16 9 Content 4 3 TV Normal Left and Right are cropped 2 Mode 4 3 Letter Box 4 3 LB You choose this mode when your TV is a traditional 4 3 TV 4 3 Content 16 9 Content 4 3 TV Normal Letter Box with black ...

Страница 30: ... Available Options TV 1 Channel ID CATV Channel ID Resolution 1080i 720p 480p 480i Closed Captioning Enable Disable Fan Speed High Middle Low Off HPNA Mode Coax Phone TiVo IR Key Code MAGNAVOX 10224 B CENTURION 00092 B Toshiba TSR 202 Satellite Receiver Hitachi HDS 100R Satellite DTRV Receiver NOTE The features available in User Menu may vary in different middleware Some of the features can also b...

Страница 31: ...nu 1 Press INPUT and then MENU in sequence within 1 second Figure 10 1 Triggering the User Menu Figure 10 2 Amulet User Menu To set up a feature 1 Use remote control UP and DOWN arrow to select the feature you want to set The selected feature will be highlighted by a red rectangle 2 Press OK the feature will be highlighted in navy blue color ...

Страница 32: ...erved 30 Figure 10 3 User Menu Feature in Focus 0 1 Figure 10 4 User Menu Feature selected for choice selection 3 Use remote control UP and DOWN arrow to loop through available choices 4 Press OK again when your choice is selected 5 If you have other features to set up repeat the above procedures ...

Страница 33: ...hts reserved 31 To save your setup or exit 1 If you have made any setup and want to save the settings select SUBMIT in the User Menu You will be notified the saving of your settings Figure 10 5 User Menu SUBMIT highlighted for saving changes Figure 10 6 User Menu Changes successfully saved ...

Страница 34: ...tone Inc All rights reserved 32 2 Select EXIT to quit the User Menu Figure 10 7 User Menu Exit User Menu ATTENTION If you exit the User Menu without doing the SUBMIT your changes will be lost and will not take effect NOTE If you want to give up the changes simply select EXIT ...

Страница 35: ... Menu to make the changes Please refer to section Setting HDMI and Component Output Resolution for details of setting resolution SETTING CLOSED CAPTIONING You can use User Menu to control closed captioning You can also use remote control LANG button to control closed captioning The setting made in both ways is the same To use User Menu to set closed captioning follow procedures in section Using Us...

Страница 36: ... Follow procedures in section Using User Menu to make the selection SETTING TIVO IR KEYCODE Amulet is equipped with an IR receiver at the front panel If you have TiVo or Sling box you can use the IR blaster provided by TiVo or Sling to control Amulet for actions such as channel switching for recording or remote network viewing Amulet has implemented the following 2 IR keycodes You can configure Ti...

Страница 37: ...rovision v7 1 L1 protection SDTV or HDTV resolution 1080i60 720p60 480p60 480i60 Audio Input Formats MPEG 1 Layers I II mono stereo joint stereo and dual channel MPEG 2 5 1 Dolby digital 5 1 channel AC 3 6 channel Audio Output Formats Dolby Digital 5 1 channel AC 3 6 channel PCM and S PDIF IEC 1937 IEC 958 Dolby Digital or MPEG 2 5 1 down mixed to Dolby Prologic or 2 channel PCM Analog stereo Clos...

Страница 38: ... Operating current 1 35A RMS max Operating frequency Range 47 63Hz Output voltage 12V 2A 5V 5A Operating temperature 10 to 35 C 50 to 95 F Relative Humidity non condensing Regulatory compliance UL CE IEC65 FCC part 15 pending Security controls Anti Taping Macrovision optional Parental Controls Provided through middleware partner integration NOTE Above specification for reference only ...

Страница 39: ...ected properly to the DC INPUT connector Check that there is power from the power source Make sure you have pressed the Standby button at the top of the box and that the Standby On light is green Section 6 Powering up Amulet Standby indicator on the front panel stays orange for more than 60 seconds Check that the ADSL cable is properly connected between the ADSL connector and the ADSL modem The AD...

Страница 40: ...heck with service provider that programs contain multi channel AC 3 signal Check that AC 3 is enabled in the Amulet Check your TV or A V equipment for AC 3 multi channel setup Section 5 Connecting to Audio System No sound poor sound or popping noise on HDMI HDMI is an evolving technology so it is possible that some TVs may not operate properly with Amulet In case of problem use component video out...

Отзывы: