
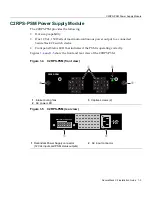


Connecting the PSM Cables and AC Power Cords
2-6 Installation
Connecting the PSM Cables and AC
Power Cords
The
PSMs
are
connected
to
the
SecureStack
C2
Ethernet
switch
devices
using
C2RPS
‐
PSM
Cables.
To
connect
the
PSMs,
proceed
as
follows:
1.
Connect
one
end
of
the
C2RPS
‐
PSM
Cable
(shown
in
Figure 2
‐
3
)
to
the
Redundant
Power
Supply
connector
on
the
switch
device.
Then
connect
the
other
end
to
the
Redundant
Power
Supply
connector
at
the
rear
of
the
PSM
as
shown
in
Figure 2
‐
4
and
Figure 2
‐
5
.
2.
Connect
a
standard
AC
power
cord
to
the
AC
input
power
connector
on
the
PSM
shown
in
Figure 2
‐
4
,
then
plug
the
AC
power
cord
into
the
main
AC
power
outlet.
3.
The
green
Power
LED
on
the
front
of
the
PSM
will
illuminate
to
indicate
a
successful
connection.
If
the
LED
remains
off,
proceed
as
follows:
a.
Check
the
AC
power
cord
connection
at
the
AC
power
source
and
make
sure
the
power
source
is
within
specification.
b. Check
the
AC
power
connection
to
the
PSM.
c.
Swap
the
AC
power
cord
with
a
known
good
one.
d. If
the
green
LED
continues
to
remain
off,
contact
Enterasys
Networks.
Refer
to
“
Getting
Help
”
on
page 1
‐
5
for
instructions.
Otherwise,
proceed
to
step
4.
4.
If
installing
two
PSM
power
supplies,
repeat
steps
1
through
3
for
the
second
PSM.
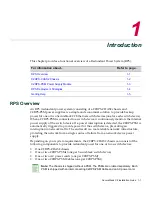
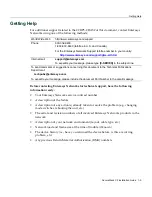
Figure 2-3 C2RPS-PSM Cable
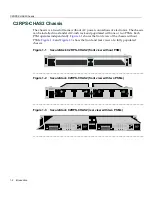
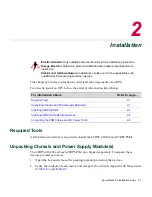
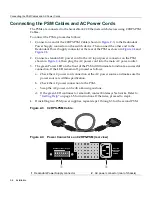
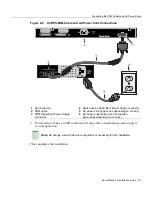
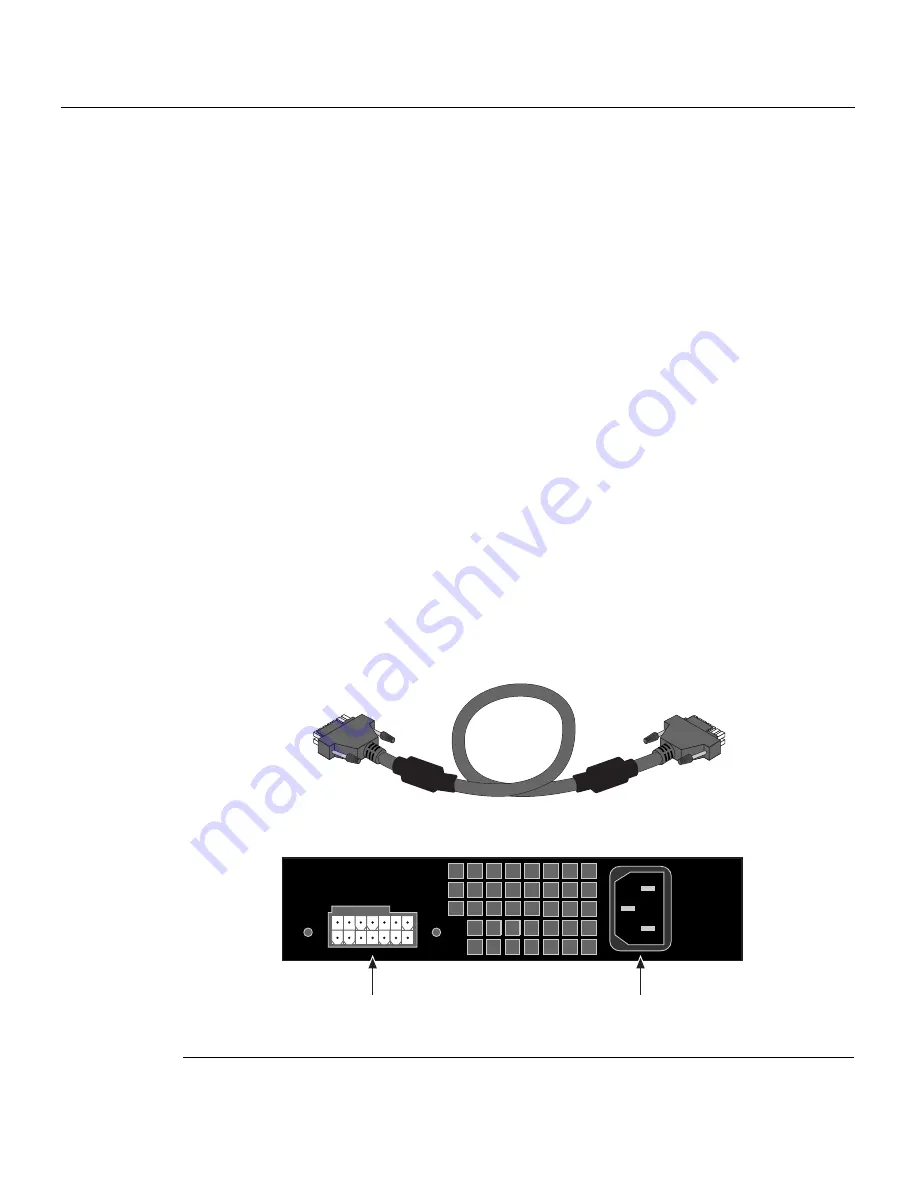
Figure 2-4 Power Connectors on C2RPS-PSM
(rear view)
1
Redundant Power Supply connector
2
AC power connector (rear of chassis)
AC LINE
100-240 VAC
50-60 Hz
2A MAX
Redundant Power Supply
À
Á
Содержание SecureStack C2 C2RPS-CHAS2
Страница 2: ......
Страница 10: ...viii...
Страница 16: ...Conventions Used in This Guide xiv About This Guide...
Страница 22: ...Getting Help 1 6 Introduction...
Страница 30: ...Connecting the PSM Cables and AC Power Cords 2 8 Installation...
Страница 34: ...Compliance Standards A 4 Specifications...


