background image

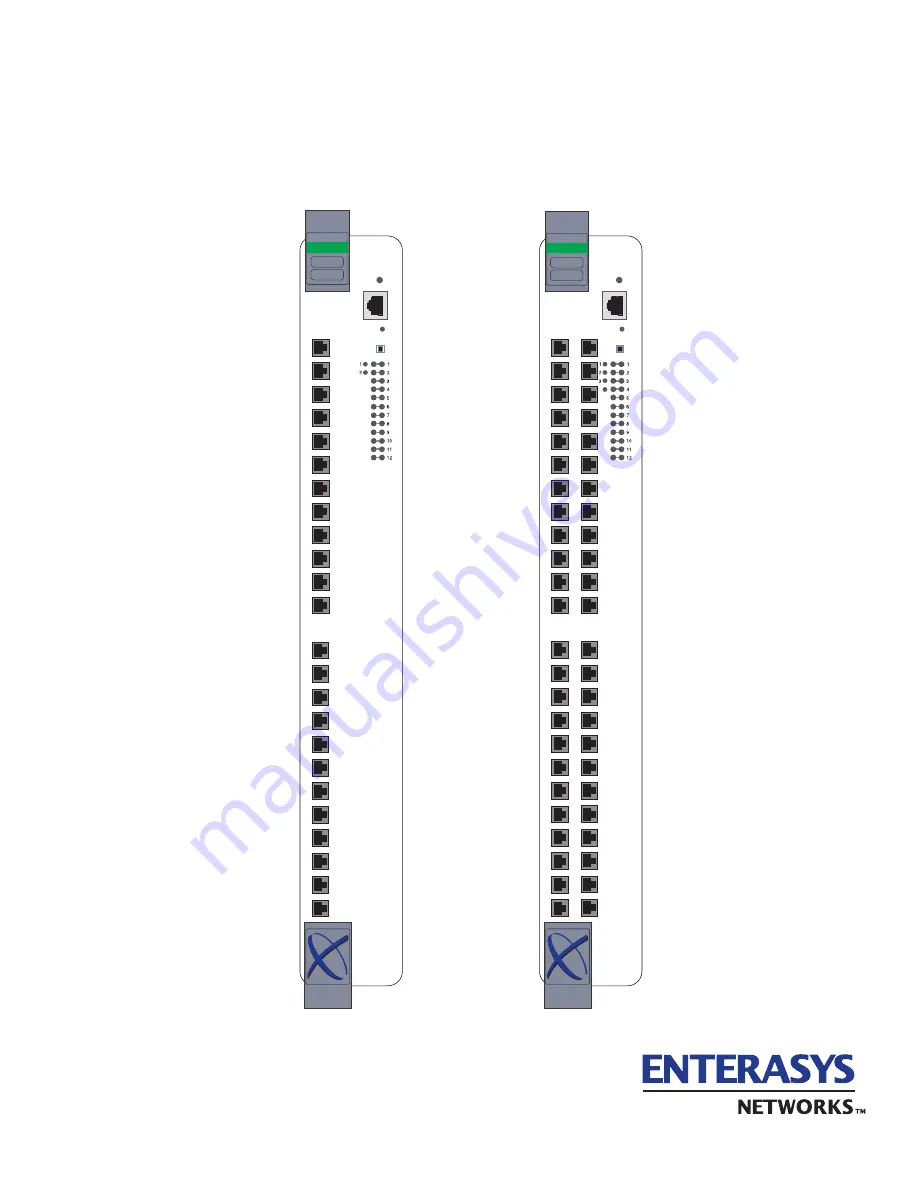
6E308-24 and 6E308-48 Ethernet 

Modules Installation Guide

RESET

C

O

M

CPU

1X

12X

1X

12X

G

R

O

U

P

1

G

R

O

U

P

2

GROUP

GROUP

SELECT

FAST ENET

6E308-24

RESET

C

O

M

CPU

GROUP

GROUP

SELECT

4

1X

12X

G

R

O

U

P

3

1X

12X

G

R

O

U

P

4

1X

12X

G

R

O

U

P

2

1X

12X

G

R

O

U

P

1

FAST ENET

6E308-48

9033544

Содержание 6E308-24

Страница 1: ...llation Guide RESET C O M CPU 1X 12X 1X 12X G R O U P 1 G R O U P 2 GROUP GROUP SELECT FAST ENET 6E308 24 RESET C O M CPU GROUP GROUP SELECT 4 1X 12X G R O U P 3 1X 12X G R O U P 4 1X 12X G R O U P 2 1X 12X G R O U P 1 FAST ENET 6E308 48 9033544 ...

Страница 2: ......

Страница 3: ...N IF ENTERASYS NETWORKS AND ITS LICENSORS HAVE BEEN ADVISED OF KNOWN OR SHOULD HAVE KNOWN THE POSSIBILITY OF SUCH DAMAGES Enterasys Networks Inc 35 Industrial Way Rochester NH 03866 5005 Enterasys Networks Inc is a subsidiary of Cabletron Systems Inc 2001 by Enterasys Networks Inc All Rights Reserved Printed in the United States of America Order Number 9033544 May 2001 LANVIEW is a registered trad...

Страница 4: ...r modifications made to this device which are not expressly approved by the party responsible for compliance could void the user s authority to operate the equipment INDUSTRY CANADA NOTICE This digital apparatus does not exceed the Class A limits for radio noise emissions from digital apparatus set out in the Radio Interference Regulations of the Canadian Department of Communications Le présent ap...

Страница 5: ...merce which prohibit export or diversion of certain technical products to certain countries unless a license to export the product is obtained from the U S Government or an exception from obtaining such license may be relied upon by the exporting party If the Program is exported from the United States pursuant to the License Exception CIV under the U S Export Administration Regulations You agree t...

Страница 6: ...umentation and media ENTERASYS DISCLAIMS ALL WARRANTIES OTHER THAN THOSE SUPPLIED TO YOU BY ENTERASYS IN WRITING EITHER EXPRESS OR IMPLIED INCLUDING BUT NOT LIMITED TO IMPLIED WARRANTIES OF MERCHANTABILITY AND FITNESS FOR A PARTICULAR PURPOSE WITH RESPECT TO THE PROGRAM THE ACCOMPANYING WRITTEN MATERIALS AND ANY ACCOMPANYING HARDWARE 7 NO LIABILITY FOR CONSEQUENTIAL DAMAGES IN NO EVENT SHALL ENTER...

Страница 7: ...tive Address Enterasys Networks Ltd Nexus House Newbury Business Park London Road Newbury Berkshire RG14 2PZ England Conformance to Directive s Product Standards EC Directive 89 336 EEC EC Directive 73 23 EEC EN 55022 EN 55024 EN 60950 EN 60825 Equipment Type Environment Networking Equipment for use in a Commercial or Light Industrial Environment Enterasys Networks Inc declares that the equipment ...

Страница 8: ......

Страница 9: ...artTrunk 1 3 1 4 Remote Monitoring RMON 1 4 1 5 Broadcast Suppression 1 4 1 6 Port VLAN Redirect Functions 1 4 1 7 Rate Limiting 1 4 1 8 Flow Control 1 5 1 9 GARP Switch Operation 1 5 1 10 802 1 Port Priority 1 6 1 11 Distributed Chassis Management 1 6 1 12 Management 1 6 1 13 Switching Options 1 7 1 14 Standards Compatibility 1 7 1 15 LANVIEW Diagnostic LEDs 1 7 2 NETWORK REQUIREMENTS 2 1 SmartTr...

Страница 10: ...ting the Installation 3 10 4 TROUBLESHOOTING 4 1 Using LANVIEW 4 1 4 2 Troubleshooting Checklist 4 5 4 3 Using the RESET Button 4 7 A SPECIFICATIONS A 1 Module Specifications A 1 A 2 Fiber Budget A 2 A 3 COM Port Pinout Assignments A 3 A 4 Regulatory Compliance A 3 B MODE SWITCH BANK SETTINGS AND OPTIONS B 1 Required Tools B 1 B 2 Setting the Mode Switches B 2 B 3 FLASH Upgrade B 4 B 3 1 Locating ...

Страница 11: ...ling the Module into the MATRIX E7 Chassis 3 4 3 2 Installing the Module into the 6C105 Chassis 3 7 3 3 Connecting a Fiber Optic Segment to the Module 3 9 4 1 LANVIEW LEDs 4 2 4 2 RESET Button 4 7 B 1 Mode Switch Location B 2 B 2 FLASH Module Location B 4 B 3 Installing the FLASH B 5 ...

Страница 12: ...age 3 1 Contents of Module Carton 3 2 4 1 LANVIEW LEDs 4 3 4 2 Troubleshooting Checklist 4 5 A 1 Module Specifications A 1 A 2 Transmitter Power 850 nm A 2 A 3 COM Port Pin Assignments A 3 A 4 Compliance Standards A 3 ...

Страница 13: ...s Guide USING THIS GUIDE Read through this guide to completely understand the product capabilities and how to install the modules A general working knowledge of Ethernet and IEEE 802 3 type data communications networks and their physical layer components is helpful when using this module Important Notice Depending on the firmware version used in the 6E308 24 or 6E308 48 module some features descri...

Страница 14: ... quickly diagnose network operational problems Appendix A Specifications contains information on functionality and operating specifications connector pinouts environmental requirements and physical properties Appendix B Mode Switch Bank Settings and Options describes how to set the Mode Switch and install options RELATED DOCUMENTS The following Enterasys Networks documents may help to set up and m...

Страница 15: ...tion that may be of special importance TIP Conveys helpful hints concerning procedures or actions CAUTION Contains information essential to avoid damage to the equipment ELECTRICAL HAZARD Warns against an action that could result in personal injury or death due to an electrical hazard WARNING Warns against an action that could result in personal injury or death ...

Страница 16: ...olved Enterasys Networks products in the network A description of your network environment layout cable type etc Network load and frame size at the time of trouble if known The device history i e have you returned the device before is this a recurring problem etc Any previous Return Material Authorization RMA numbers World Wide Web http www enterasys com Phone 603 332 9400 Internet mail support en...

Страница 17: ...led in the MATRIX E7 Both DCM and SFS are supported for this module when installed in the 6C105 SmartSwitch 6000 chassis The module ports can be configured to control traffic in several ways including prioritizing traffic flow according to protocol type The module can also be configured to establish 802 1Q Virtual Local Area Networks VLANs and control the flow of frames associated with each VLAN a...

Страница 18: ... U P 3 1X 12X G R O U P 1 3544_01 Group Select LEDs Port Status LEDs Group Select Switch COM Port System LED RESET C O M CPU FAST ENET 6H308 24 GROUP GROUP SELECT Group Select LEDs Port Status LEDs Group Select Switch COM Port System LED 24 10BASE FL Fiber Optics Ports 10 Mbps 1X 12X G R O U P 1 13X 24X G R O U P 2 13X 24X G R O U P 2 37X 48X G R O U P 4 25X 36X ...

Страница 19: ...erval remains at 300 seconds The RAD requests continue until an IP address is received from a RARP or BootP server or an IP address is entered using Local Management 1 3 SMARTTRUNK Traditional 802 1D Spanning Tree bridges only allow one active data path between any two switches all other parallel data paths are in Standby or Blocking mode If one interface or path should fail then the other interfa...

Страница 20: ... within the module This feature allows frames including those with errors to be copied and sent to an analyzer or RMON probe The analyzer or RMON probe will see the data as if it were directly connected to the LAN segment of the source port The VLAN redirect function is similar to the port redirect function except that the frames received by the module are redirected to a designated destination po...

Страница 21: ...he following two types of flow control which can be enabled or disabled on a port by port basis Frame based 802 3x which is supported on all Ethernet ports operating in the full duplex mode Back Pressure which is supported on all Ethernet ports operating in the standard mode of operation 1 9 GARP SWITCH OPERATION Some or all ports on the switch may be activated to operate under the Generic Attribu...

Страница 22: ...ss or the modules can be managed separately by individual IP addresses When the IP address of the chassis is used system wide settings can be entered from the chassis menu in Local Management while module settings are entered by selecting the specific module to be modified and changing the settings for that module 1 12 MANAGEMENT Management of the module can be either in band or out of band In ban...

Страница 23: ...802 1D Spanning Tree Algorithm STA support to enhance the overall reliability of the network and protect against loop conditions The module supports a wide variety of industry standard MIBs including RFC 1213 MIB II RFC 1573 MIB II RFC 1757 RMON RFC 1493 Bridge MIB RFC 1354 FIB MIB and RFC 1190 Path MTU Discovery A full suite of Enterasys Networks Enterprise MIBs provide a wide array of statistica...

Страница 24: ......

Страница 25: ...6000 Series Modules Local Management User s Guide for additional information 2 2 10BASE FL FIBER OPTIC NETWORK The front panel ports of the module provide a connection that supports 10BASE FL fiber optic cabling The device at the other end of the fiber optic segment must meet 10BASE FL Ethernet network requirements for the devices to operate at 10 Mbps Make sure to check your network diameter spec...

Страница 26: ... cable length the fiber optic budget and total network propagation delay should be calculated and taken into consideration before fiber runs are incorporated in any network design Fiber optic budget is the combination of the optical loss due to the fiber optic cable in line splices and fiber optic connectors Propagation delay is the amount of time it takes a packet to travel the distance from the ...

Страница 27: ...ction 3 1 Installing Optional FLASH Upgrade Section 3 2 Installing the Module into the MATRIX E7 Chassis Section 3 3 Installing the Module into the 6C105 Chassis Section 3 4 Connecting to the Network Section 3 5 Completing the Installation Section 3 6 ELECTRICAL HAZARD Only qualified personnel should install the 6E308 24 or 6E308 48 NOTE Read the Release Notes shipped with the module to check for ...

Страница 28: ...ion of the module for any signs of physical damage Contact Enterasys Networks if there are any signs of damage Refer to the Getting Help section in About this Guide for details 3 2 INSTALLING OPTIONAL FLASH UPGRADE If the module is to be installed with an optional FLASH upgrade refer to Appendix B for installation instructions Table 3 1 Contents of Module Carton Item Quantity The 6E308 24 or 6E308...

Страница 29: ...ent the module must be reshipped Observe all precautions to prevent damage from Electrostatic Discharge ESD CAUTION Failure to observe static safety precautions could cause damage to the module Follow static safety handling rules and wear the antistatic wrist strap provided with the MATRIX E7 chassis Do not cut the non conductive bag to remove the module Sharp objects contacting the board or compo...

Страница 30: ... 1 2 3 Backplane Connectors POWER OK REDUNDANCY FAN STATUS 6C207 1 ACON 1 0 AC ON POWER OK REDUNDANCY FAN STATUS 6C207 1 ACON 1 0 AC ON 6C407 Metal Back Panel Circuit Card Card Guides Slot Number RESET C O M CPU FAST ENET 6E308 24 1X 12X 1X 12X G R O U P 1 G R O U P 2 GROUP GROUP SELECT Plastic Locking Tab Plastic Locking Tab ...

Страница 31: ...op and bottom plastic locking tabs as shown in Figure 3 1 Take care that the module slides in straight and properly engages the backplane connectors 7 If the chassis in which the module is installed was powered down for the installation turn it back on Check to see that the CPU LED settles at solid green after a few minutes If the LED does not turn solid green see Chapter 4 for details CAUTION To ...

Страница 32: ...nstalled in any of the slots that are available To install a module refer to Figure 3 2 and proceed as described in Section 3 3 CAUTION Failure to observe static safety precautions could cause damage to the module Follow static safety handling rules and wear the antistatic wrist strap provided with the 6C105 chassis Do not cut the non conductive bag to remove the module Sharp objects contacting th...

Страница 33: ... CPU FAST ENET 6H308 24 1X 12X 1X 12X G R O U P 1 G R O U P 2 GROUP GROUP SELECT RESET C O M CPU FAST ENET 6H308 24 1X 12X 1X 12X G R O U P 1 G R O U P 2 GROUP GROUP SELECT 1 2 3 4 5 PS1 PS2 Slot Number 3544_03 Circuit Card Card Guides Metal Back Panel Backplane Connector RESET C O M CPU FAST ENET 6E308 24 1X 12X 1X 12X G R O U P 1 G R O U P 2 GROUP GROUP SELECT Plastic Locking Tab Plastic Locking...

Страница 34: ...MT RJ connector to a module port 1 Remove the protective covers from the fiber optic ports on the applicable port on the device and from the connectors on each end of the cable 2 Insert the MT RJ fiber optic cable connector on the cable into the MT RJ connector on the device until it clicks into place See Figure 3 3 NOTE If the module is being installed in a network using SmartTrunking there are r...

Страница 35: ...that the transmit fiber optic strand is connected to the receive port and the receive fiber optic strand to the transmit port To remove the cable connector press on its release tab and then pull the connector out of the MT RJ connector on the device RESET C O M CPU 1X G R O U P 1 GROUP GROUP SELECT RX TX RX TX RX TX RX TX RX TX RX TX RX TX RX TX RX TX RX TX RX TX RX TX RX TX 12X MT RJ Port Fiber O...

Страница 36: ...0BASE FL standards Refer to Appendix A If a link is not established refer to Chapter 4 for troubleshooting instructions before contacting Enterasys Networks Refer to Getting Help in About This Guide for details 3 6 COMPLETING THE INSTALLATION After installing the module and making the connections to the network proceed as follows 1 If the chassis is installed in a rack that has strain relief brack...

Страница 37: ... 4 1 allow quick observation of the network status to aid in diagnosing network problems Viewing Receive and Transmit Activity Only one group of segments may be viewed at a time To view the receive and transmit activity on a group of segments press the GROUP SELECT button see Figure 4 1 to step to the group of interest Group 1 or 2 Each time the GROUP SELECT button is pressed the GROUP LED lights ...

Страница 38: ... Table 4 1 indicate the following Flashing LED is flashing randomly Blinking LED is flashing at a steady rate approximately 50 on 50 off Solid LED is on steady and not pulsing 3544_05 RESET C O M CPU GROUP GROUP SELECT 4 1X G R O U P 3 1X G R O U P 1 RX TX RX TX RX TX RX TX RX TX RX TX RX TX RX TX RX TX RX TX RX TX RX TX RX TX RX TX FAST ENET 6E308 48 GROUP GROUP SELECT Port 1 Group 1 LEDs RX TX ...

Страница 39: ... Amber Blinking Crippled Contact Enterasys Networks for technical support Solid Testing If the LED remains amber for more than several minutes contact Enterasys Networks for technical support Green Solid Functional None Amber and Green Booting Blinks amber and green while booting None RX Receive Off No link No activity or port in standby Port enabled or disabled None Green Solid Link port enabled ...

Страница 40: ...ng Indicates activity Rate indicates data rate None Amber Blinking Port in standby Port may be disabled due to Spanning Tree 1 Ensure that the port is not disabled 2 Contact Enterasys Networks for technical support Red Flashing Indicates collision rate None unless there is a high amount of activity In this case check for network configuration problems or a defective device Solid Diagnostic failure...

Страница 41: ... Press ENTER RETURN may take up to four times Incorrect terminal setup Refer to the MATRIX E7 and SmartSwitch 6000 Series Modules Local Management User s Guide for proper setup procedures Improper console cable pinouts Refer to Appendix A for proper COM port pinouts Corrupt firmware image or hardware fault If possible attempt to download the image to the module again Refer to Section B 2 for instr...

Страница 42: ...tch 6000 Series Modules Local Management User s Guide for the instructions to set the type of STA Review the network design and delete unnecessary loops If the problem continues contact Enterasys Networks for technical support User parameters IP address Device and Module name etc were lost when the module power was cycled or the front panel RESET button was pressed Position of Mode switch 7 NVRAM ...

Страница 43: ...rmed by the module is halted A network downtime of up to two minutes will result from this action for any devices connected to the module NOTE Pressing the RESET button while the module is already in reset mode is not recommended If the RESET button is pressed while the module is in reset mode the module will enter an extended diagnostic procedure which is unnecessary for normal operation This ext...

Страница 44: ......

Страница 45: ...e A 1 provides the I O ports processors and memory physical and environmental module specifications for the 6E308 24 and 6E308 48 Table A 1 Module Specifications Item Specification I O Ports 6H308 24 Ports 1 through 24 Ethernet 10 Mbps 10BASE FL compliant with 24 MT RJ connectors 6H308 48 Ports 1 through 48 Ethernet 10 Mbps 10BASE FL compliant with 48 MT RJ connectors Processors Memory Processors ...

Страница 46: ...17W x 18 5D in Approximate Weight Unit 2 04 kg 4 5 lb MTBF Predicted 6E308 24 6E308 48 216 347 hours 206 593 hours Environmental Operating Temperature 5 C to 40 C 41 F to 104 F Storage Temperature 30 C to 73 C 22 F to 164 F Operating Relative Humidity 5 to 90 non condensing Table A 2 Transmitter Power 850 nm Cable Type Worst Case Budget Typical Budget 62 5 125 m Fiber 9 0 dB 12 dB Table A 1 Module...

Страница 47: ...le A 4 Table A 3 COM Port Pin Assignments Pin Signal Name Input Output 1 Transmit Data XMT Output 2 Data Carrier Detect DCD Output 3 Data Set Ready DSR Input 4 Receive Data RCV Input 5 Signal Ground GND NA 6 Data Terminal Ready DTR Output 7 Request to Send RTS Input 8 Clear to Send CTS NA Table A 4 Compliance Standards Compliance Standards Safety UL 1950 CSA C22 2 No 950 73 23 EEC EN 60825 EN 6095...

Страница 48: ......

Страница 49: ... Upgrading the FLASH Section B 3 B 1 REQUIRED TOOLS Use the following tools to perform the procedures provided in this appendix Antistatic wrist strap Phillips screwdriver CAUTION An antistatic wrist strap is required provided with the module to perform the procedures in this appendix Use the antistatic wrist strap when performing any of the procedures in this appendix to minimize ESD damage to th...

Страница 50: ...4 For Enterasys Networks use only Switch 5 COM Port Autobaud The default OFF position enables Autobaud sensing on the COM port for Local Management sessions Changing the switch to the ON position disables Autobaud sensing and sets the COM port to 9600 baud for Local Management sessions Figure B 1 Mode Switch Location CAUTION Read the appropriate sections to be fully aware of the consequences when ...

Страница 51: ... in FLASH memory Switch 7 Clear NVRAM Changing the position of this switch resets NVRAM on the next power up of the module All user entered parameters such as the IP address device names etc are reset to the factory default settings Once the module resets you can either use the factory default settings or reenter your own parameters Switch 8 Reset Password Community Names Changing the position of ...

Страница 52: ...r the SmartSwitch to expand from 8 to 16 MB This section explains how to locate and add replace the FLASH module For details refer to Getting Help in About This Guide B 3 1 Locating the FLASH Mode Figure B 2 shows the location of the FLASH module Figure B 2 FLASH Module Location Memory Board Flash Module ...

Страница 53: ... shown in Figure B 3 insert the FLASH module down between the connector 2 Pivot the FLASH module downward so the connector clips align with the two side notches of the FLASH module and the connector clips lock the FLASH module into place Figure B 3 Installing the FLASH CAUTION Observe all antistatic precautions when handling sensitive electronic equipment FLASH 1 2 Connector Clip Clip 2504_91 ...

Страница 54: ......

Страница 55: ...ment 1 6 support 3 3 3 6 Document conventions xiii F FLASH installation B 5 Flow Control 1 5 Front panel 1 2 G GARP Switch Operation 1 5 Getting help xiv GROUP SELECT button use of the 4 1 I Installation connecting to the Network 3 8 into 6C105 chassis 3 6 into MATRIX E7 chassis 3 3 L LANVIEW LEDs 4 1 Local Management introduction to 1 6 M Management use of 1 6 Mode Switch setting B 2 Module unpac...

Страница 56: ...uction to 1 4 RESET button 4 7 Runtime IP address discovery introduction to 1 3 S SecureFast Switching support 3 3 3 6 SmartTrunk introduction to 1 3 Specifications A 1 Standards compatibility 1 7 Switching options introduction to 1 7 T Transmit LEDs viewing of 4 1 Troubleshooting 4 1 checklist 4 5 U Unpacking the module 3 2 V Viewing Receive and Transmit Activity instructions for 4 1 VLAN redirec...

Отзывы: