Operating Instruction
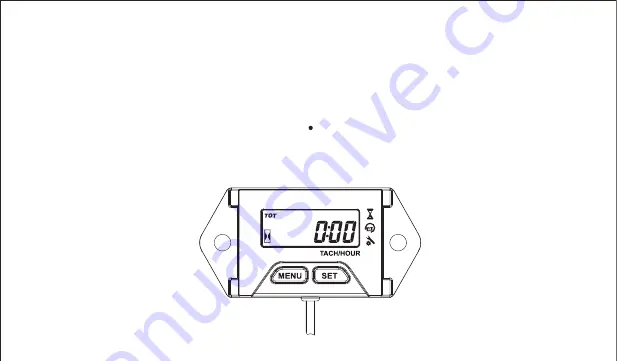
Self Powered Digital Tach / Maintenance / Hour Meter
Страница 1: ...Operating Instruction Self Powered Digital Tach Maintenance Hour Meter ...
Страница 2: ...ease read and understand the following notices carefully and correctly install and operate the product before using Product Accessories List Product Installation Product Operation Specifications Dimension ...
Страница 3: ...ble sided tape or screwed the installation method is as follows a Clean properly the surfaces Note Make sure the surface is flat and the oil is clean enough b Stick the double sided tape on the back of the product Note Before pasting the double sided tape please make sure the back of the product is clean and tidy without moisture or grease c Remove protection from double sided tape Note When remov...
Страница 4: ...erated by different engine types has the difference of strength and weakness By adjusting the turns of winding the appropriate adjustment can be made to improve the accuracy of the RPM and timing data This is a skill that different degree spark plug signal that allows the induction wire to acquire 2 Screw installation 3 Signal wire installation Note Proper position requirement no moisture no greas...
Страница 5: ...ously until display the TOT interface b Press and hold SET button continuously until display the DSP 1 or DSP 2 icon release the SET button and it will automatic return to TOT interface and you have selected the system needed in this way Note DSP 1 and DSP 2 is cyclely selection b The difference between DSP 1 and DSP 2 is that the display mode is different All functions of DSP 1 are directly displ...
Страница 6: ...park plug firing and engine rotate laps RPM Typical RPM display during operation of the engine Programmable firing patterns Determined the amount of pluses sparks per engine revolution a When the tach hour meter detect the engine spark plug signal for more than 1s continuously the LCD will display the current RPM of the engine b The RPM will be refreshed every 0 5s c The RPM can be programmed for ...
Страница 7: ...elease and press SET button or MENU button to toggle through all engine firing patterns setting a Press the MENU button for 3 times until display shows RPM icon and alert RPM numerical value c Stop at correct firing pattern setting for your engine d Wait for 10 seconds and display will return to TOT total hours Tachometer is now ready to use Note If the obtained RPM is not accurate for example the...
Страница 8: ...MENU button once To reset JOB time Press and hold the SET button until display shows 0000 00 starts flashing then release the SET button the JOB display will reset to 0 00 and you will begin to record the next job interval b Total hours can not reset c The total hours max value is 999999 When the total hours range is 0 0 9999hours59min the timing accuracy is 1min When the total hours range is 9999...
Страница 9: ...e contains TOT function JOB function SVC function b The use and settings of the TOT function JOB function and SVC function are the same as described in DSP 1 b Press and hold the SET button until display shows SVC icon and maintenance interval time starts flashing c Press SET or MENU button until you get desired hours release the button the LCD will flash for 10 seconds and return to TOT total hou...
Страница 10: ... or SET button again the LCD screen will be displayed c When LCD screen is closed the historical data will be retained and will not be cleared 5 Other To shut down LCD display 1 a RPM mode contains RPM function alert RPM function MAX RPM function firing patterns choice b The usage and setting of the RPM function alert RPM function MAX RPM function and firing patterns choice is the same way as desc...