• Do NOT attempt to move or store this outdoor stove until ALL ashes and coals are completely extinguished.
• Do NOT remove ashes until they are completely extinguished and cooled, and the stove is completely cooled.
• Do NOT overload this outdoor stove. NOTE: If ANY part of this outdoor stove is glowing red, it is overloaded
and is over-firing.
• Use proper protection if moving or adding any fuel.
• Do NOT place any utensils or any hot parts of this outdoor stove onto combustible surfaces, including grass,
wooden deck or furniture.
• Avoid breathing smoke from the fire. Avoid getting smoke into your eyes.
• This outdoor stove should be thoroughly inspected and cleaned on a regular basis.
• After a period of storage or non-use, check for any signs of damage, and for creosote build-up. Do NOT operate
until all necessary repairs and/or cleaning is completed.
• Do NOT use oven cleaners or abrasive cleaners, as they can damage this product.
• Do NOT clean any part of this outdoor stove in a self-cleaning oven, as it may damage the finish.
• Use only England’s Stove Works, Inc. factory authorized parts. The use of any other part can be dangerous, and
will void your warranty.
• Do NOT force parts together. Doing so may cause injury and may damage the product.
• Death, serious injury or damage to property may occur if the above instructions are not followed.
OPERATION:
CAUTION: Do NOT add gasoline, kerosene, diesel fuel, lighter fluid, alcohol or ANY flammable liquid to light,
enhance or relight a fire.
Operation
of the Rocket Stove is simple by design.
1. Be sure the stove is completely assembled, i
ncluding the cooking grate
on top of the burn area. Position cooking
grate with tiers facing upward, as this will accommodate a variety of sizes of cookware.
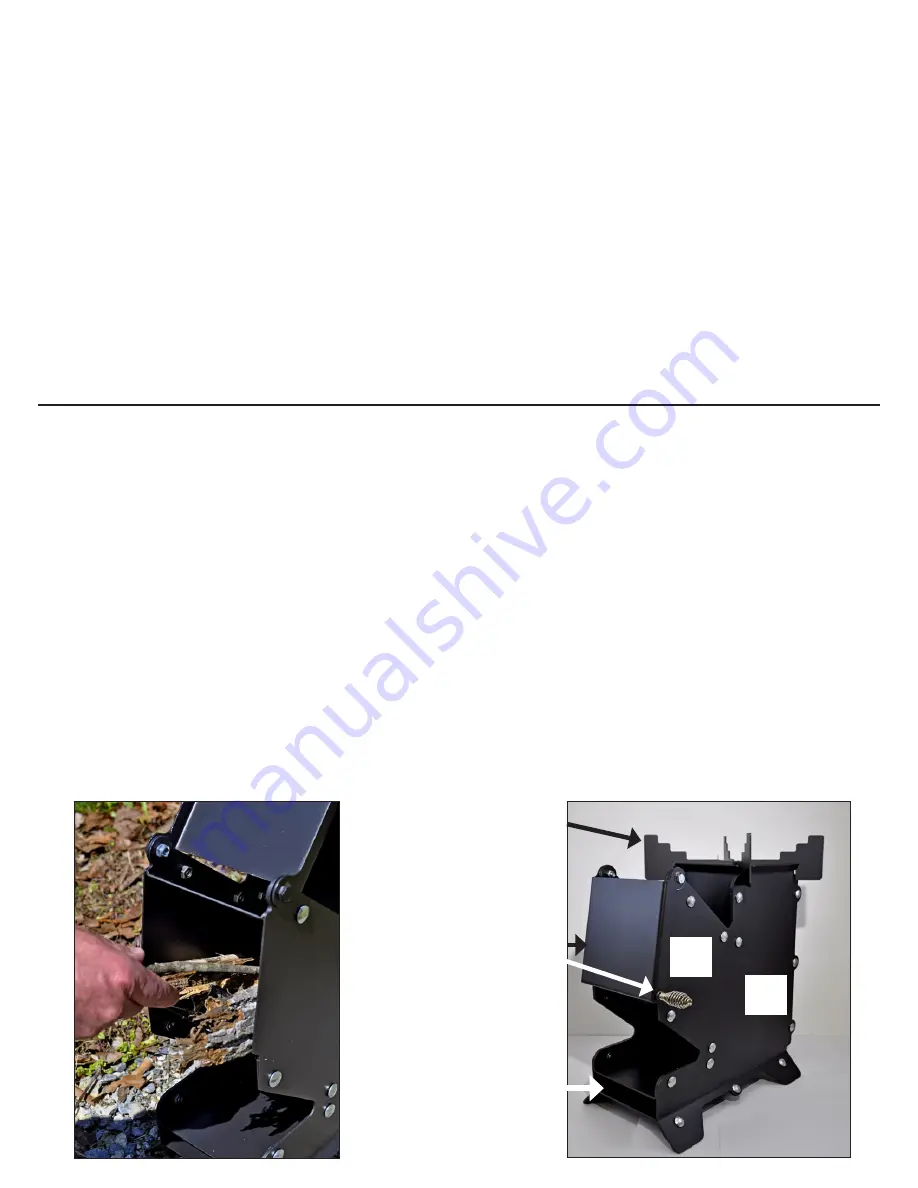
2. Place small twigs or pine cones (and dry leaves or paper for initial ignition, if desired) into the fuel chute, all the
way down to the burn area (see below).
3. Ignite the fire by dropping a match into the burn area (through the cooking grate); use a fire starter if necessary.
4. Feed wood into the fuel chute as often as necessary. Finely chopped wood can be added once a fire is
established, but twigs, pine cones and small branches burn very well.
5. Pots, pans, woks and other cookware may be placed on the cooking grate for cooking. Do NOT overload the
cooking grate or place items on it that may tip over or fall, or are unsafe in any way.
6. AFTER the fire is COMPLETELY cooled, remove the ashes after each use - the stove has a built-in ash grate so
that you can tilt the stove forward and ashes will exit the front of the stove, under the ash grate.
7. Wipe exterior surfaces with a cloth. Mild dishwashing detergent may be used - rinse and thoroughly dry.
8. Creosote cleaner (Part No. RX-CR) and our wood stove cleaner (Part No. RX-WSC) may be used if necessary.
Multi-Tier Cooking Grate
Designed to accommodate
a variety of cookware
Fuel Chute Door
With safety handle
Ash Dump
Tilt stove forward
to dump cooled
ashes
Burn
Area
Fuel
Chute


