


EWS377-FIT Quick Start Guide
System Requirements
• Google Chrome (57.0.2987.110 and later)
• Microsoft Edge (80.0.361.103 and later)
• Mozilla Firefox (52.0 and later)
Web Browser
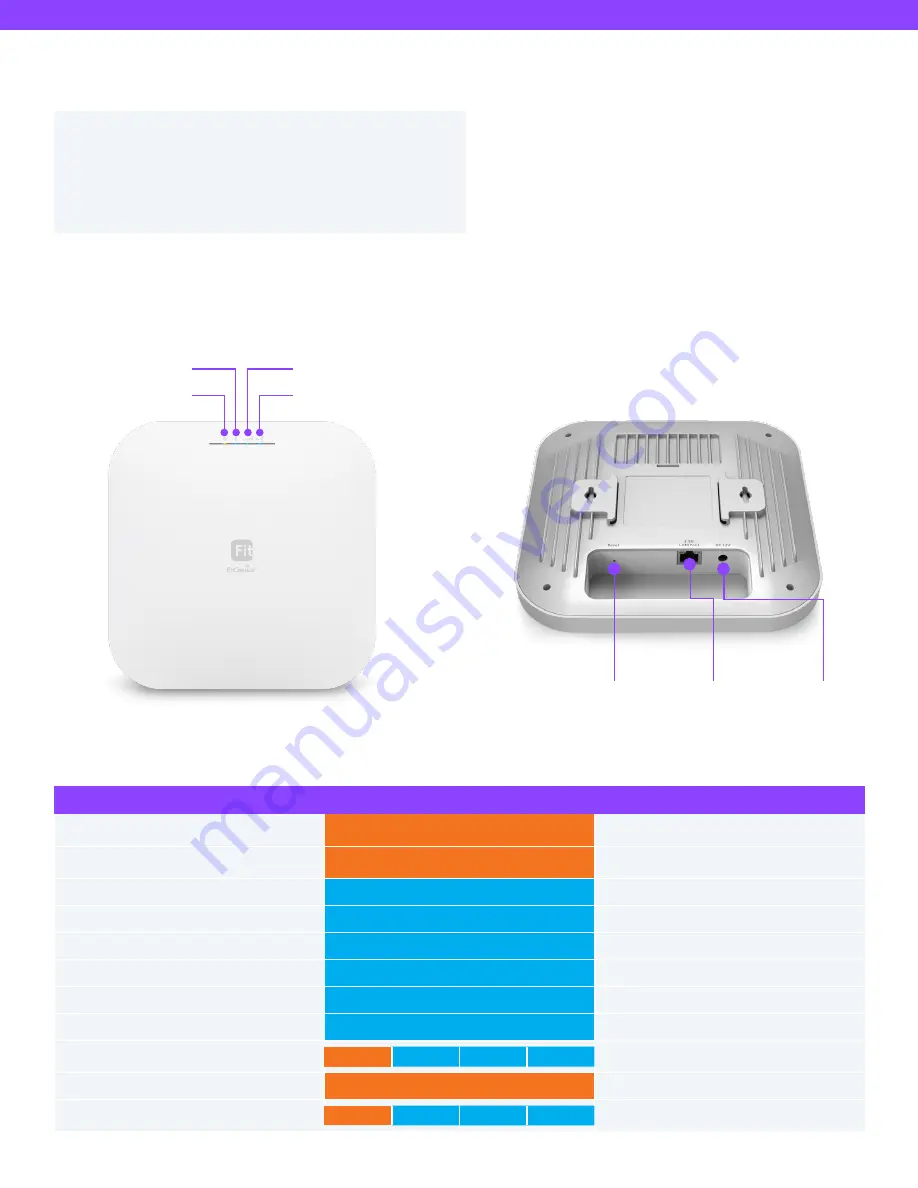
Hardware Overview
Reset Button:
Reset to default:
Press and hold the reset button for over 60
seconds, and the LED (PWR) will start Fast Flashing (0.2 sec).
Then, the device will be reset to factory default settings.
Power LED
5GHz LED
2.4GHz LED
LAN Port LED
2.5 Gbps LAN
(PoE, 802.3af/at)
Power
Connector
Reset
Button
LEDs
STATUS
LED COLOR
LED BEHAVIOR
Connecting to the management
(FitXpress/FitController)
PWR (Orange)
Flashing (0.5 Sec.)
Management Connected
(FitXpress/FitController/Standalone)
PWR (Orange)
Solid On
LAN Connected
LAN (Blue)
Solid On
LAN Transmitting
LAN (Blue)
Flashing
2.4GHz Radio On
2.4GHz (Blue)
Solid On
2.4GHz Transmitting
2.4GHz (Blue)
Flashing
5GHz Radio On
5GHz (Blue)
Solid On
5GHz Transmitting
5GHz (Blue)
Flashing
Firmware Upgrading
PWR
LAN
2.4GHz
5GHz
Flashing (0.5 Sec.)
Reset to Default
PWR (Orange)
Fast Flashing (0.2 Sec.)
AP Location Mode
PWR
LAN
2.4GHz
5GHz
Flashing (1.5 Sec. on ->0.5 Sec. off)


