29
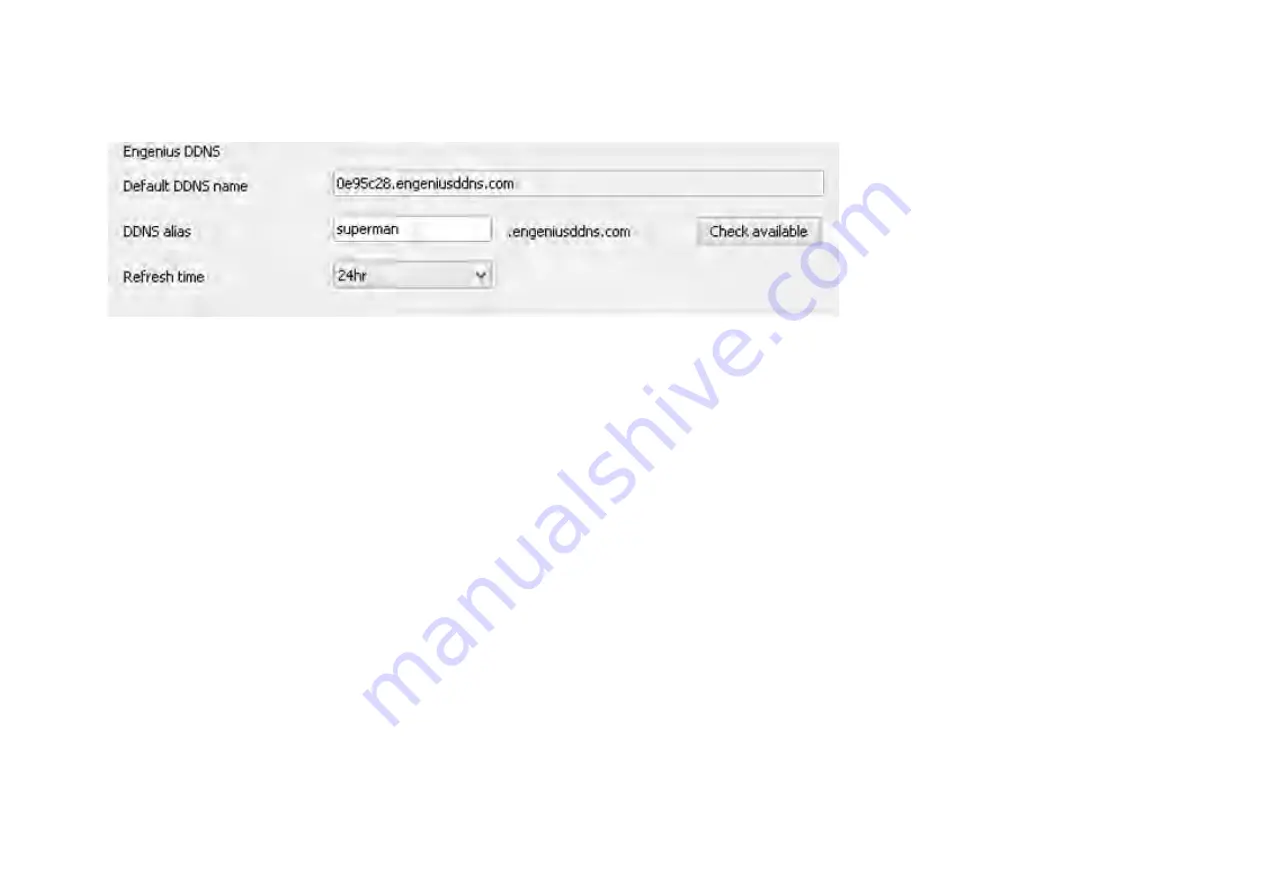
Default DDNS name
: Each camera has a unique DDNS name printed on the back of your camera. It is the default DDNS name.
DDNS Alias
: You may try to rename it (
alias
) to a name so that you can memorize it better. For instance, you can use your initials with your
birthday as a combination; for example,
ab19791220
. Then you need to check whether the name has been taken by someone else by clicking
on
Check Availability
button. If the alias is not being used by others, then you can access the camera with both your default DDNS and the new
alias DDNS (
ab19791220.engeniusddns.com
).
Refresh Time
: options are 3HR, 6HR, 9HR, 12HR and 24HR. DDNS server needs to synchronize with your IP address often so that you can access
your device over the Internet with DDNS name. Depends on your Internet Service provider, your WAN IP address lease time will be different.
You can check with your local Internet Service provider for WAN IP address refresh time. The default setting is
24HR
(which means DDNS server
will check the synchronization
every 24 hours
). Normally, the default setting 24HR is okay for most cases.
Содержание EDS5255
Страница 1: ...0 Business Solutions 2Megapixel Full HD Wireless Bullet Network Camera EDS5255 ...
Страница 10: ...9 1 4 Package Contents The package should contain all of following items shown below ...
Страница 11: ...10 1 5 Physical Description ...
Страница 13: ...12 ...
Страница 15: ...14 B When connecting to a non PoE Switch Connect the camera to a non PoE Switch via PoE Injector optional ...
Страница 24: ...23 EnViewer Finder Network ...
Страница 29: ...28 3 1 1 1 EnViewer Finder DDNS ...
Страница 31: ...30 3 1 1 2 EnViewer Finder Config ...
Страница 42: ...41 If prompted with the following question click on Save Internet Explorer Save the downloaded file ...
Страница 47: ...46 Hostname Enter a new name into this field Click Apply to change the camera name ...
Страница 52: ...51 5 1 Navigation Panel ...
Страница 54: ...53 Logout ...
Страница 55: ...54 5 2 Live View Settings ...
Страница 59: ...58 ...
Страница 60: ...59 5 4 System The System setting menu consists of system related configurations ...
Страница 66: ...65 Select the downloaded new firmware then click on Open ...
Страница 69: ...68 Click Save to store the file to the chosen location ...
Страница 70: ...69 Restore Settings Click on Browse to select the backup file ...
Страница 71: ...70 Choose the configuration file and click on Open Click on Upload to start storing process ...
Страница 75: ...74 5 5 Network The Network setting menu consists of Network related configurations ...
Страница 80: ...79 5 5 2 EnGenius Cloud Service You must Enable EnGenius Cloud first and then choose the Type ...
Страница 93: ...92 5 7 1 Video ...
Страница 96: ...95 5 7 2 1 Light Setting Brightness Contrast ...
Страница 97: ...96 Sturation Sharpness ...
Страница 98: ...97 De noise Please note that some of the effects will be more obvious in higher resolution at real time ...
Страница 101: ...100 None Mirror Flip Vertical None Flip Both Horizontal and Vertical None Both ...
Страница 110: ...109 5 8 1 1 Motion Detection ...
Страница 112: ...111 Therefore you can have a combination of three different detection window sizes ...
Страница 131: ...130 Once all necessary changes are made to the accounts click Apply to make the changes affective ...
Страница 143: ...142 5 12 2 Edit Profile Select the camera profile and then click Edit button to make the changes ...
Страница 145: ...144 5 12 4 Synchronize ...
Страница 148: ...147 Choose Admin and click on Start button Choose the storage device to access the file ...
Страница 150: ...149 Click the file to download it ...
Страница 153: ...152 You can access the media files located under ENGENIUS sda1 IP_Camera Lobby ...
Страница 157: ...156 7 1 1 Step 1 Choose Event Control Please select preferred Event Action for example here E Mail would be suggested ...
Страница 158: ...157 7 1 2 Step 2 Configure Motion Detection Please specify Window of your interest and click Apply ...


