background image

22

23

u

sing

 a

Crobat

 lCD

Using Line Markers with the Camera

The following directions can be used to add/remove 

Line Markers from the Camera:
1.  Press and hold the "Mode" button for at least 3  

 seconds to begin the “Entering Setup” Menu.

2.  The menu will automatically indicate “1. Line  

 Markers.

3.  Press the "Mode" button.
4.  The menu will indicate “1. Line Makers Off” 
5.  Press the “-” button to activate "Line Markers   

On." 

6.  Press the "Mode" button to set line marker.
7.  Next the menu indicates “1. Upper Line ADJ” 
8.  Press the +/- buttons to raise or lower the Upper          

Line Marker.

9.   Press the "Mode" button to set the Upper Line   

Marker.

10.   The menu will now indicate “2. Lower Line 

Marker.

11.  Press the "+/-" buttons to raise or Lower the 

Lower Line Marker.

12.  Press the Mode button to set the Lower Line  

   Marker.

13.  To remove Line Markers repeats steps 1-4.
14.  Press the “+” button to return to the “1. Line  

   Markers Off” Menu.

15.  Press the Mode button to exit the Menu.

Figure 1

ENTERING SETUP

1.Line Markers

1.Upper Line ADJ

or

2.Lower Line Marker

u

sing

 a

Crobat

 lCD

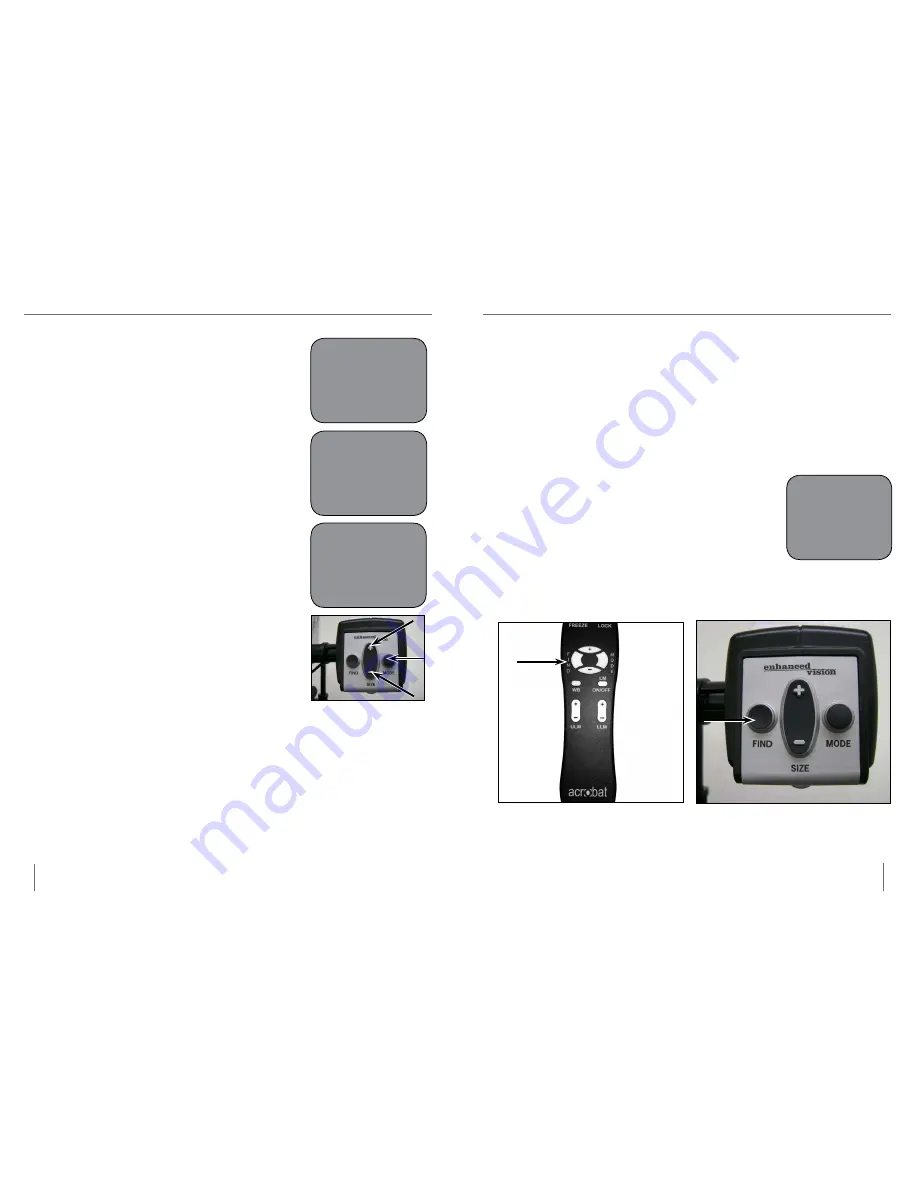
Using the Object Locator

The Acrobat LCD Object Locator feature can help you quickly 

locate something you're looking for on a page, or a specific part of 

an object you want to view more closely. 
The following directions can be used to locate a desired object with 

the Remote and Camera:
1. Press and hold down the "Find" button on Remote (See Figure 1)  

or Camera (See Figure 2).  

The Acrobat LCD will automatically zoom out to 

the widest field of view, and a "target" (as shown in 

Figure 3) will appear in the center of the monitor 

screen.
2. Move your work or reading material until you   

have located the desired item within the        

  "target" area.

3. Release the "Find" button, and it will magnify the item you located 

within the targeted area.

I---I

Figure 3

Figure 1

Figure 2

Содержание Acrobat LCD

Страница 1: ...Users Manual TM...

Страница 2: ...ound to comply with the limits for a Class B digital device pursuant to Part 15 of the FCC Rules These limits are designed to provide reasonable protection against harmful interference in a residentia...

Страница 3: ...store vision correct eye conditions or halt degenerative vision loss An eyecare professional can determine the usefulness and suitability of the Acrobat LCD for a patient s individual condition Please...

Страница 4: ...ons and instructions marked on the product The attached power cord is a disconnect device for electrical equipment The socket outlet should be installed near the equipment and be easily accessible Thi...

Страница 5: ...should not be used adjacent to or stacked with other equipment Acrobat LCD Package Contents All required accessories for operation are included in your Acrobat LCD package Acrobat LCD is comprised of...

Страница 6: ...r cord to an available wall outlet See Figure 2 To offer additional protection during an electrical storm a surge protector may also be used and is recommended 4 Turn the power on On the rear right si...

Страница 7: ...the distance viewing oneself and reading or writing To change the viewing mode simply turn the position of the Camera by rotating it on the arm Distance Viewing Mode The camera can rotate forward to c...

Страница 8: ...position yourself between 7 5 22 away from the Camera Figure 1 7 5 22 Recommended Using Acrobat LCD Reading and Writing Mode The Camera can be adjusted downward for reading writing and enjoying craft...

Страница 9: ...creasing magnification Min Zoom will appear at the minimum magnification NOTE The extent of the magnification is dependent upon the distance of the Camera to the object Figure 1 Figure 2 Using Acrobat...

Страница 10: ...Color Select 2 This mode provides a black background with green text Color Select 3 This mode provides a black background with yellow text Crisp Clear Text Images Crisp Clear Text Images Enhanced Pos...

Страница 11: ...HT BAL COOL 1 3 5 2 4 Using Acrobat LCD Figure 1 3 2 1 4 Using Line Markers with the Remote control Line Markers are used to frame an image between two horizontal lines These lines may be used as a re...

Страница 12: ...ine Markers repeats steps 1 4 14 Press the button to return to the 1 Line Markers Off Menu 15 Press the Mode button to exit the Menu Figure 1 ENTERING SETUP 1 Line Markers 1 Upper Line ADJ or 2 Lower...

Страница 13: ...Place your notepaper stationery checkbook or other writing material on the table 2 Press the Lock button on the Remote See Figure 1 3 The word Focus Lock will appear and remain in the upper left corne...

Страница 14: ...Programming Features menu on the Acrobat This is accomplished using a special key combination sequence 4321 accessed by pressing the and MODE buttons on Acrobat camera head Language selection can be a...

Страница 15: ...ould I do A After ensuring you have fresh batteries installed in the remote control please reset the remote control back to factory settings Simply press and hold the FIND and MODE buttons on the remo...

Страница 16: ...her repair the product or replace it during the warranty period There are no other expressed or implied warranties accompanying this product This warranty does not cover a Defects or damage from misus...

Страница 17: ...ck the Flipper Panel runs up to 4 hours on a single charge The discrete camera projects a full color auto focus image on the screen for both near and distance viewing Magnification 1X 26 4X with optio...

Страница 18: ...of all Enhanced Vision products Battery Rechargeable batteries for Enhanced Vision s low vision devices Notes Notes Other Enhanced Vision Products Contact information US Office Phone 714 465 3400 Fax...

Страница 19: ...store vision correct eye conditions or halt degenerative vision loss An eye care professional can best determine the suitability of the Acrobat LCD for a patient s specific condition For more informat...

Отзывы: