background image


3  Installation 

This chapter describes how to install the DA hardware in step-by-step instructions.  

Preparing for Installation 

Make sure the following are prepared prior to DA installation: 


Tools 


Materials 


Cables and Wires 


Package Inspection 

Tools 

For the installation of the DA, prepare the following tools: 


Anti-static wrist strap 


Anti-static gloves 


Cutting pliers 


Wire cutters 


Electrical cable crimping pliers 

Materials 

For the installation of the DA, prepare the following materials: 


Insulation tape 


Wire buckles 


Wire labels 

Cables and Wires 

For the installation of the DA, prepare the following cables: 


Backup power cable 

The backup power cable and main power cable are required to have matching 
specifications. 

Содержание KB-DA2250

Страница 1: ...KB DA2250 High Efficiency Power Amplifier User Manual M_2000060418_EN_1 0 Easy Installation Easy Info Reading Easy Access Control Easy Maintenance...

Страница 2: ...contents of this document are subject to revision without notice due to continued progress in methodology design and manufacturing Honeywell shall have no liability for any error or damage of any kin...

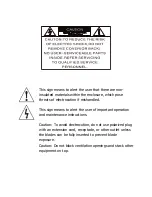
Страница 3: ...dled This sign means to alert the user of important operation and maintenance instructions Caution To avoid electrocution do not use polarized plug with an extension cord receptacle or other outlet un...

Страница 4: ......

Страница 5: ...gh too low or fluctuates too drastically it is recommended to install a stable AC power source The appliance is not waterproof Do not expose the appliance to rain or moisture and avoid splashing it wi...

Страница 6: ...lightning safety logos to prevent an electric shock When the power is turned on do not physically alter the appliance to avoid damaging the equipment Honeywell assumes no liability for appliance malfu...

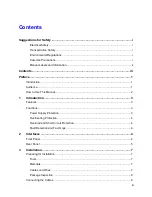
Страница 7: ...Introduction 1 Audience 1 How to Use This Manual 2 1 Introduction 3 Features 3 Functions 3 Power Supply Protection 3 Overheating Protection 4 Overload and Short Circuit Protection 4 Fault Detection a...

Страница 8: ...iv Grounding Cable 8 Audio Input Cable 9 Output Cable 10 Completing Installation and Commissioning 11 Precautions 12 4 Technical Specifications 13 5 Packing List 14...

Страница 9: ...ures functions and applications Chapter 2 Package Contents Package content details of the KB DA2250 High Efficiency Power Amplifier Chapter 3 User Interface KB DA2250 High Efficiency Power Amplifier f...

Страница 10: ...using the KB DA2250 High Efficiency Power Amplifier and pay close attention to all warnings and instructions Keep this manual for later use and reference This manual has been reviewed to ensure its a...

Страница 11: ...CLASS D power amplifier with high efficiency and energy conservation Contains two independent channels The rated output power of each channel is 250W Each channel has 100V or 70V of output Supports b...

Страница 12: ...ad and Short Circuit Protection When the DA power supply detects a circuit overload or if a short circuit occurs the DA automatically disconnects the power The DA remains protected and signals a fault...

Страница 13: ...y If the light is off there is no input signal 6 VOLUME To increasing or reducing the volume level 7 CH2 PROTECT DA protection indicator light When the DA overheats experiences over current over volta...

Страница 14: ...o output 70V 70V high impedance audio output COM Common 5 Cooling fan 6 Main power supply power port Supplies electricity to the main power supply 7 Fuse T10AL250V 8 Grounding terminal Connects the gr...

Страница 15: ...installation of the DA prepare the following tools Anti static wrist strap Anti static gloves Cutting pliers Wire cutters Electrical cable crimping pliers Materials For the installation of the DA pre...

Страница 16: ...t are intact see Chapter 2 If an item is missing please contact the appropriate vendor Connecting the Cables These cables include the grounding cable main and backup power cables audio input cable and...

Страница 17: ...Use Terminal blocks Notice If the audio input cable is supplied by the installation personnel the cable must be shielded DA has a balanced input connection A balanced connection is recommended to red...

Страница 18: ...igure 2 Connecting the input cables to the input terminal 3 Connect the input terminals to their corresponding input ports as shown in Figu Figure 3 Connecting the input terminals Output Cable 1 Pull...

Страница 19: ...ompleting Installation and Commissioning Once the DA hardware and cables are installed complete the following commissioning procedures 1 Set the audio volume to a minimum level 2 Press the DA front pa...

Страница 20: ...Cables section for more information Pay particular attention to which audio input source is selected and configure the output signal level appropriately as this can save electricity Do not connect the...

Страница 21: ...20K ohm Signal to noise ratio 90dB Non linear distortion 0 1 at 1 3 rated power 1kHz Indicator lights 1 power indicator light 2 signal lights 2 peak clipping lights 2 equipment protection lights Numb...

Страница 22: ...14 5 Packing List Name Quantities KB DA2250 High Efficiency Power Amplifier 1 Audio input connector 1 Audio output connector 1 Safety shield 1 Screws 2 AC power cable 1 Product manual 1...

Страница 23: ...Co Ltd No 257 Junye Road Guangzhou GETDD East 510530 China Phone 86 20 2839 9600 Fax 86 20 2839 8706 Website www empertech com Manual_KB D Series_EN1 0 Sep 2011 Subject to change without notice 2011 H...

Отзывы: