


TB-6608
Page 2 of 5
© 2021 DESCO INDUSTRIES INC
Employee Owned
DESCO EUROPE
- 2A DUNHAMS LANE, LETCHWORTH, HERTFORDSHIRE, SG6 1BE, UK
Phone: +44 (0) 1462 672005 • E-mail:
Installation
Installing the Turnstile
220 VAC and Ethernet access are needed at the
location of every SmartLog Pro® with Turnstile prior to
installation.
to download the EDS EDSUKTHH28
Turnstile Operation Manual and see instructions on
anchoring and wiring the turnstile. Use the included
anchors, bolts and washers when anchoring the turnstile
to the ground.
Setting up the SmartLog Pro® SE
See
to learn more about the features and
components of the SmartLog Pro® SE.
1. Open the turnstile’s lid using the included keys.
2. Connect the Ethernet cable to the back of the
SmartLog Pro® SE.
3. Locate the power switch inside the turnstile cabinet,
and set it to ON.
4. Locate the power switch on the back of the
SmartLog Pro® SE, and set it to ON.
5. Locate the foot plate cable at the base of the
turnstile and connect it to the Dual Independent
Foot Plate, so operators can place their feet on it
while performing tests at the turnstile’s entrance.
6. Complete the installation by establishing
communication to the SmartLog Pro® SE via the
Ethernet cable.
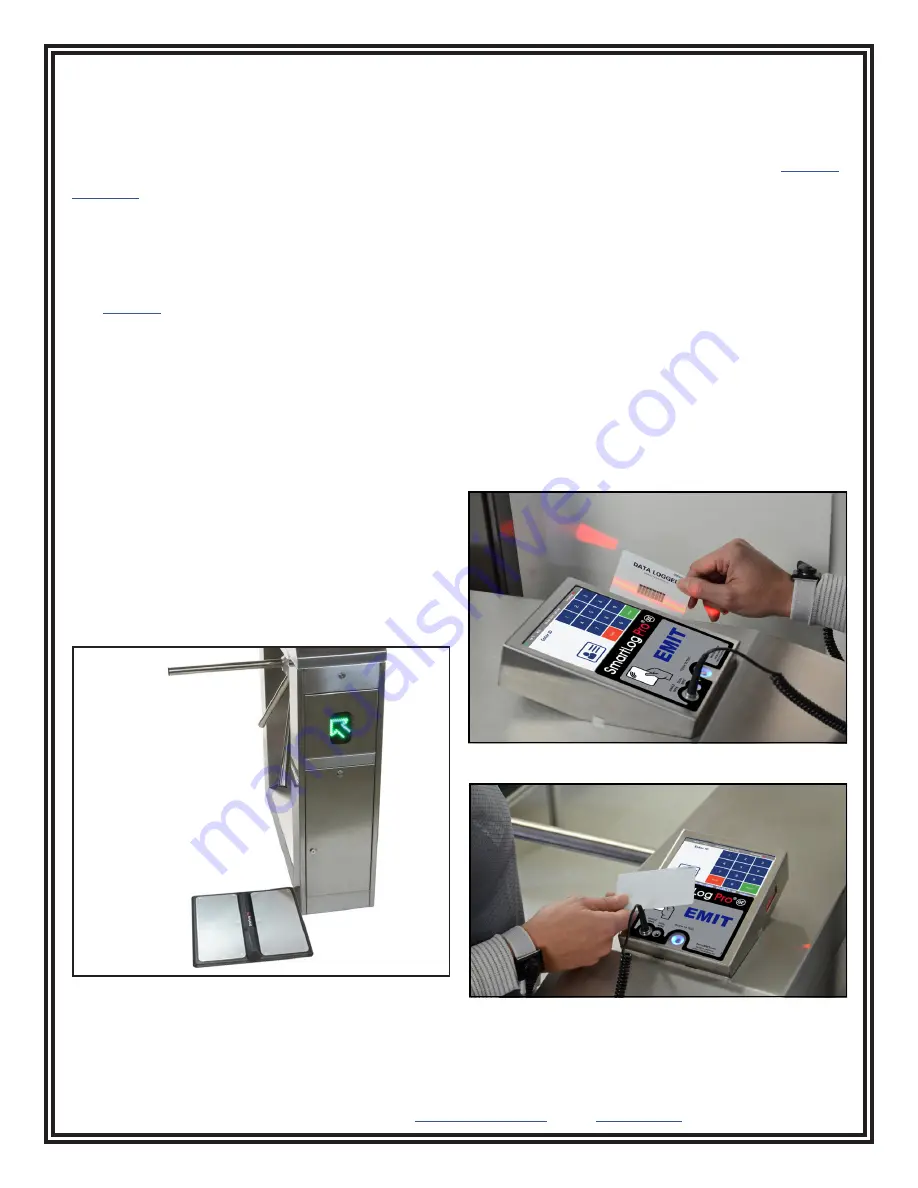
Figure 2. Installing the Dual Independent Foot Plate
Operation
NOTE: The SmartLog Pro® SE must first be
programmed with the user ID table using SmartLog
Pro® Manager before being deployed for employee use,
or the default test settings will be applied. See
for more information.
If the SmartLog Pro® SE is located near a restroom,
sink or other water source, operators will need to be
instructed to thoroughly dry their hands before testing.
Wet hands may cause inaccurate test results and
damage to the tester.
1. A circling light around the test switch indicates when
the SmartLog Pro® SE is on standby and ready to
perform a test.
2. Initiate the test procedure by identifying yourself to
the SmartLog Pro® SE. This may be done using the
touchscreen keypad, barcode scanner or proximity
reader.
NOTE: Hold the proximity badge in front of the RFID
icon for a full second if using proximity badges. See
Figure 4.
Figure 3. Using the barcode scanner
Figure 4. Holding a proximity badge in front of the RFID
icon on the SmartLog Pro® SE