


98 118 US 3.4 - 12 2010
8 / 20
www.santos.fr
OPERATION OF THE MACHINE
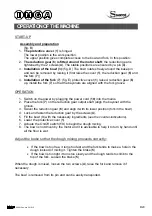
START-UP
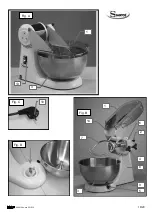
Assembly and preparation
(fig. B)
1.
The protective cover
(
1
) is hinged.
The lower position is the work position.
The upper position gives complete access to the bowl and fork. In this position:
2.
The reduction gear
(
6
)
is fitted around the motor shaft
; the reduction gear is
tightened by the 2 screws (
4
). The stable positions are ensured by a pin (
4
).
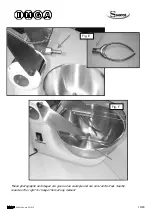
3.
Installation of the bowl (3):
(fig. D) The bowl rotates freely around the base pin
and can be removed by raising it (first raise the cover (
1
), the reduction gear (
6
) and
the fork (
7
))
4.
Installation of the fork
(
7
): (fig. E) protective cover (
1
) raised, reduction gear (
6
)
up, install the fork (
7
) so that the bayonets are aligned with the fork groove.
OPERATION
1. Switch on the power by plugging the power cord (
10
) into the mains.
2. Place the fork (
7
) on the reduction gear output shaft (align the bayonet with the
groove.
3. Swivel the reduction gear (
6
) and align it with its lower position (fork in the bowl).
4. Lock and fasten the reduction gear by the screws (
4
).
5. Fill the bowl (
3
) with the necessary ingredients (
see the counter-indications).
6. Lower the protective cover (
1
).
7. Actuate the On/Off switch (
13
) to begin the dough mixing.
8. The bowl is not driven by the motor and it is advisable to help it to turn by hand until
all the flour is wet.
Adjust the brake so that the dough mixing proceeds correctly:
x
If the bowl is too free, it turns too fast and the fork tends to make a hole in the
dough instead of mixing it. Tighten the brake (
5
)
x
If the bowl is too tight it turns too slowly and the dough tends to climb to the
top of the fork. Loosen the brake (
5
)
When the dough is mixed, loosen the two screws (
4
), raise the fork and remove it if
necessary.
The bowl is removed from its pin and can be easily transported.
408015 en ma 2010.12
8/20