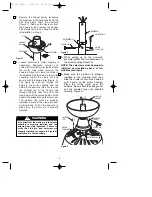
1. Securely attach the hanger bracket to
the outlet box using the two screws
supplied with the outlet box (Figure 11).
How to Hang
Your Ceiling Fan
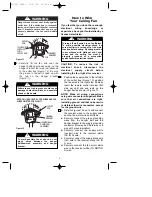
The fan must be hung with at least 7' of
clearance from floor to blades (Figure 10).
!
WARNING
The outlet box and joist must be securely
mounted and capable of supporting at
least 50 lbs. Use only a U.L. outlet box
listed as “Acceptable for Fan Support”.
!
WARNING
To reduce the risk of fire, electric shock,
or personal injury, mount fan to outlet box
marked “Acceptable for Fan Support”,
and use screws supplied with outlet box.
Most outlet boxes commonly used for
support of light fixtures are not
acceptable for fan support and may need
to be replaced. Consult a qualified
electrician if in doubt.
!
WARNING
CEILING
FLOOR
AT
LEAST
7'
Figure 10
8
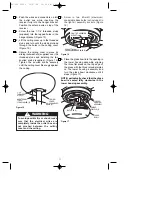
NOTE: Make sure wires are not pinched
between fan motor assembly and lower
housing.
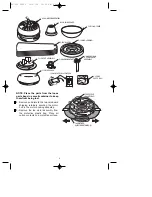
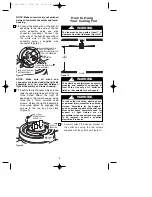
10. Connect the black wire of the light kit
assembly to the blue wire of the fan
motor assembly using one wire
connector (supplied). Connect the
white wire of the light kit assembly to
the white wire of the fan motor
assembly using a supplied wire
connector (Figure 8).
WIRE
CONNECTOR
WHITE WIRE FROM THE
LIGHT KIT ASSEMBLY
WHITE WIRE FROM FAN
MOTOR ASSEMBLY
BLUE WIRE FROM FAN
MOTOR ASSEMBLY
BLACK WIRE FROM THE
LIGHT KIT ASSEMBLY
Figure 8
M4 x 10mm
SERRATED HEAD
SCREW (3)
LIGHT KIT
ASSEMBLY
KEY HOLE
SLOT (2)
Figure 9
NOTE: Make sure all wires and
connector are tucked under the light kit
assembly and not pinched between
light kit assembly and lower housing.
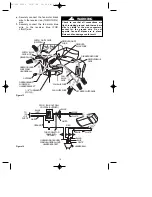
11. Position the light kit assembly onto the
lower housing, aligning each of the the
three holes. Attach the light kit
assembly to the lower housing, using
three M4 x 10mm serrated head
screws. Rotate the light kit assembly
to securely tighten by engaging the
screws in the two key hole slots
(Figure 9).
BP7332 CF930 10/27/06 10:05 AM Page 8


