


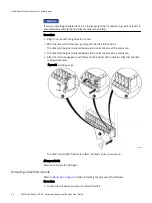

3. If the part is a replacement for a faulted part, save the packing material to return the
faulted part.
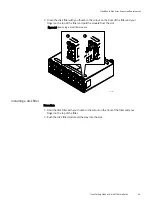
Installing an empty DAE on the rails
Procedure
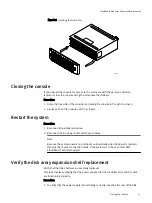
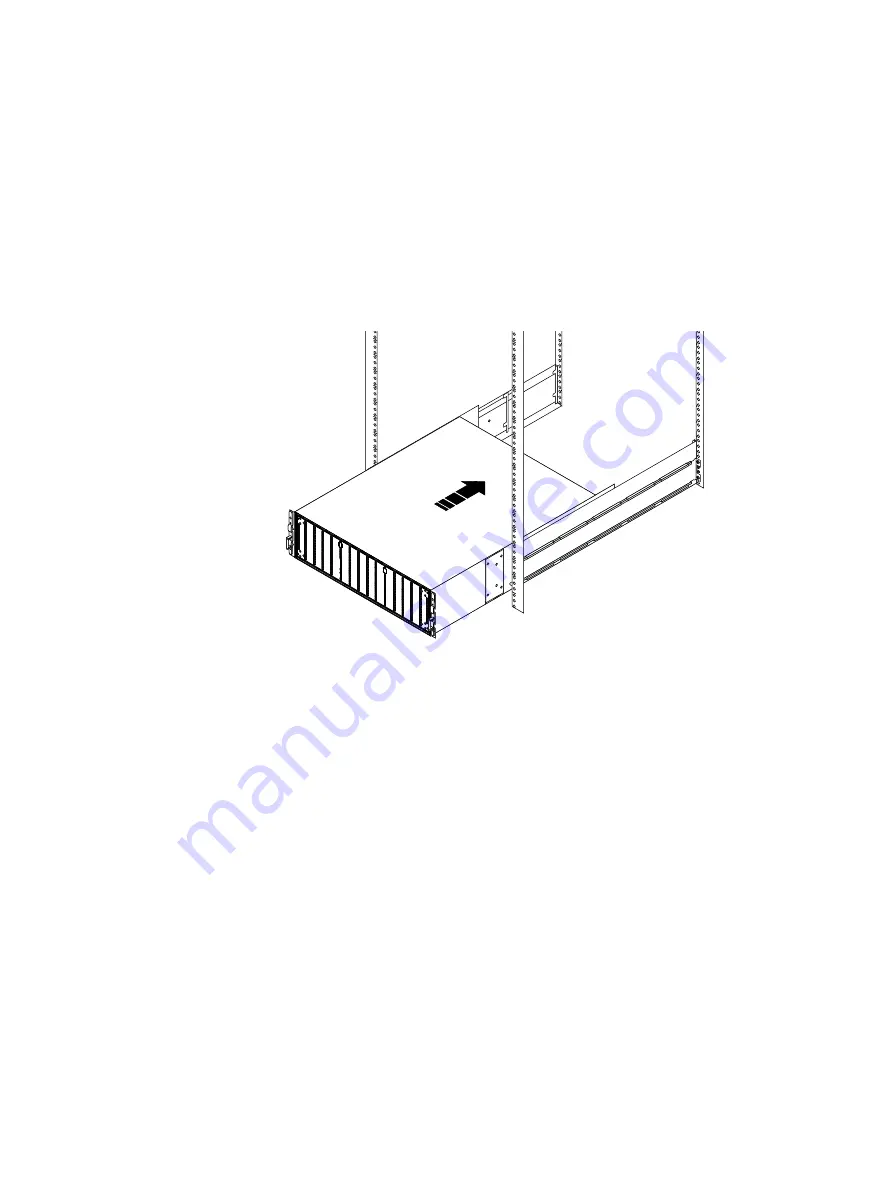
1. Lift the enclosure and, from the front of the rack, slide the enclosure onto the rails
).
Figure 17 Sliding the enclosure onto the rails
CL4729
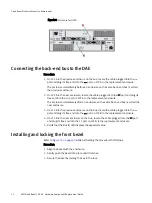
Rear
Front
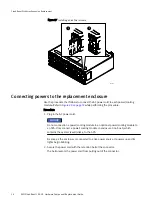
When the enclosure slides into the back of the cabinet, the rear tabs on each rail
insert into the two notches in the rear of the enclosure. The tabs secure and support
the rear of the enclosure (
). If the enclosure does does not
slide all the way into the cabinet, you may need to further loosen the screws that hold
the rear of the rails in place, and then adjust the rails to allow the tabs to fit into the
notches.
CloudBoost Disk Array Expansion Replacement
42
EMC CloudBoost 100
2.0
Hardware Component Replacement Guide
Содержание CloudBoost 100
Страница 1: ...EMC CloudBoost 100 Version 2 0 Hardware Component Replacement Guide P N 302 002 471 REV 02 ...
Страница 6: ...FIGURES 6 EMC CloudBoost 100 2 0 Hardware Component Replacement Guide ...
Страница 8: ...TABLES 8 EMC CloudBoost 100 2 0 Hardware Component Replacement Guide ...
Страница 14: ...CloudBoost 100 Overview 14 EMC CloudBoost 100 2 0 Hardware Component Replacement Guide ...
Страница 20: ...Disk Drive Replacement 20 EMC CloudBoost 100 2 0 Hardware Component Replacement Guide ...


