


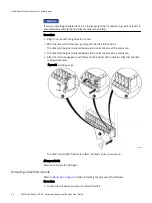
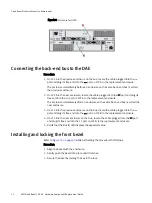

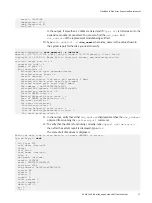

Figure 18 Rail tabs inserted into the enclosure notches
CL5281
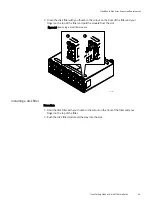
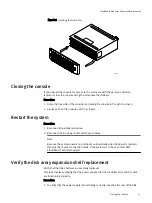
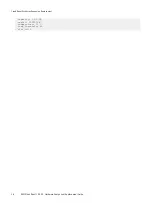
2. Once the enclosure is completely seated into the rear tabs, tighten the screws (two on
each rail) that secure the rails to the channels.
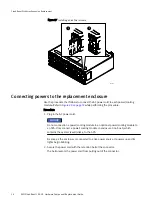
3. Secure the front of the enclosure to the front vertical channels of the cabinet using
four screws - two per side - by installing all four screws, and then tightening them
(
).
Figure 19 Securing enclosure to the front of the cabinet
Screw (2)
Screw (2)
CL4730
CloudBoost Disk Array Expansion Replacement
Installing an empty DAE on the rails
43
Содержание CloudBoost 100
Страница 1: ...EMC CloudBoost 100 Version 2 0 Hardware Component Replacement Guide P N 302 002 471 REV 02 ...
Страница 6: ...FIGURES 6 EMC CloudBoost 100 2 0 Hardware Component Replacement Guide ...
Страница 8: ...TABLES 8 EMC CloudBoost 100 2 0 Hardware Component Replacement Guide ...
Страница 14: ...CloudBoost 100 Overview 14 EMC CloudBoost 100 2 0 Hardware Component Replacement Guide ...
Страница 20: ...Disk Drive Replacement 20 EMC CloudBoost 100 2 0 Hardware Component Replacement Guide ...


