background image

43

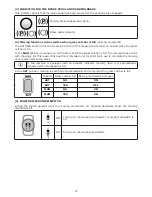
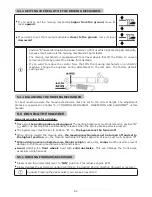
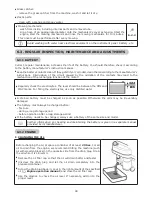
5.3 SHUTTING OFF THE ENGINE

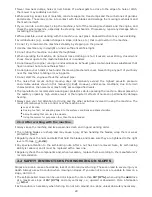
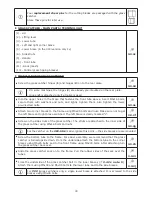
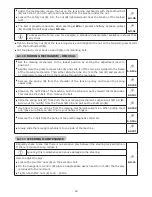
a) Move the fuel control lever to the “

MIN

” position.

b) If the mowing mechanism is turned on, shut it off by pressing the switch downward.
c)  Shut off the engine by turning the key to the “

STOP

” position and remove the key from the ignition.

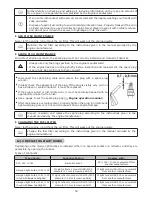
If the engine is too hot, let it idle for a while.

-  Never shut the engine off just by leaving the driver seat. Leaving the key in the 

ignition in “ON” position may damage the electrical system.

-  Always turn the key to the “OFF” position and remove it from the ignition. 

This 

prevents children and unauthorized persons from starting the machine.

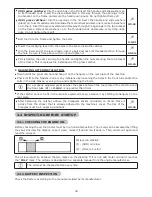
-  Before turning off the ignition, slow the engine to idle 

in the case of self-ignition. Not 

doing this can damage the engine and exhaust.

-  

Never disconnect the battery cables while the motor is running!

 This could damage 

the motor regulator.

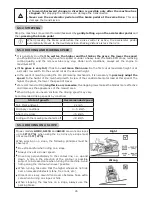
5.3.1 LEAVING THE MACHINE WITH THE ENGINE RUNNING

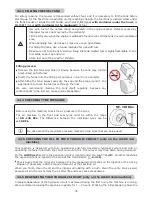
If you want or need to leave the machine for a while (to remove obstacles, etc.) and you intend to continue 

work afterward, you can 

dismount the machine and leave the engine running

. This conserves the 

battery.

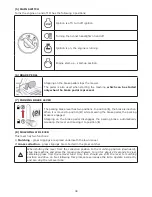
Conditions for dismounting the machine with the engine running:

 the mowing mechanism is off

 the fuel control lever is in the “

MIN

” position

 the gear is in neutral and the hand brake is activated (the brake indicator light is on)

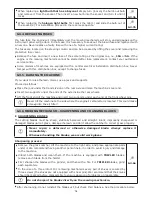
5.4 TURNING THE MOWING MECHANISM ON AND OFF

5.4.1 TURNING THE MOWING MECHANISM ON

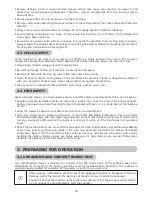
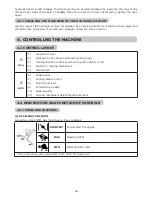
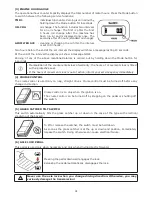
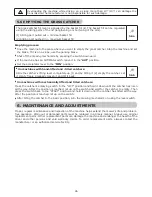
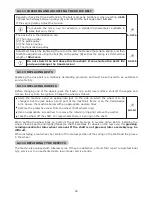
 Move the accelerator lever to “

MAX

” position.

  Use the mowing mechanism height lever to set the mechanism’s working position and thereby the 

cutting height.

 Set the mowing mechanism switch to “

ON

”.

Conditions for turning on the mowing mechanism:

- the driver is sitting on the driver seat
- the mown grass container or the deflector or tunnel opening cover is in place 
-  the AUT/MAN switch (optional equipment) is in the “

AUT

” position and the basket is empty

- the AUT/MAN switch (optional equipment) is in the “

MAN

” position

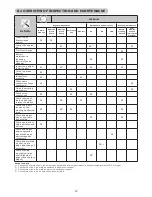
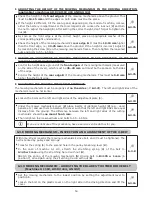
5.4.2 TURNING THE MOWING MECHANISM OFF

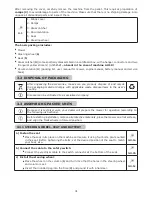
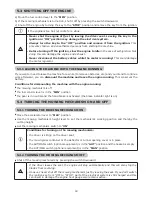
 Shut off the mowing mechanism by pressing the switch downward.

-  If the driver leaves the seat, the engine will stop automatically and this will also stop the 

blades from revolving.

-  However, never shut off the mowing mechanism just by leaving the seat. If you don’t switch 

the ignition key from “ON” to “STOP”, part of the electrical system is still charged and this 

can result in damage.The engine hour gauge also remains active.

Содержание EF106J Starjet

Страница 1: ...anual D Bedienungsanleitung F Manuel d utilisation IT Manuale di istruzioni NL Gebruikershandleiding ES Manual de usuario PL Instrukcja obsługi OM106J OM124J EF106J EF124J STARJET SATR 15 5 H SATR 17 5 H SATR 18 H ...

Страница 2: ...2 1 2 1 3 1 1 3 2a ...

Страница 3: ...3 1 3 2b 1 3 2c 1 3 2d ...

Страница 4: ...4 3 1 3 3 1a 3 3 1b ...

Страница 5: ...5 3 3 1c 3 3 1d 3 3 2a ...

Страница 6: ...6 3 3 2b 3 3 2c 3 3 2d ...

Страница 7: ...7 3 3 2e 3 3 2f 3 3 2g ...

Страница 8: ...8 3 3 2h 3 3 2i ...

Страница 9: ...9 3 3 2j 3 3 2k ...

Страница 10: ...10 3 3 2l 3 3 2m 3 3 2n ...

Страница 11: ...11 3 3 2o 3 4 5 ...

Страница 12: ...12 3 4 6 4 1a ...

Страница 13: ...13 4 1b 4 2 1a ...

Страница 14: ...14 4 2 1b 5 6a 5 6b 6 2 2 ...

Страница 15: ...15 6 3 3a 6 3 3b 6 3 6a 6 3 6b 6 3 7a ...

Страница 16: ...16 6 3 7b 6 3 7c 6 3 7d ...

Страница 17: ...17 6 3 7e 6 3 8 6 3 9a 6 3 9b ...

Страница 18: ...18 6 3 9c 6 3 10a 6 3 10b 6 3 10c ...

Страница 19: ...19 6 3 10d 6 3 10e 6 3 10f 6 3 11 ...

Страница 20: ...20 6 3 12a 6 3 12b 6 3 14 ...

Страница 21: ...21 6 4 ...

Страница 22: ...or if anything is unclear feel free to contact one of our more than 100 authorized well equipped service centres throughout Europe They give you access to factory trained and tested service professionals Symbols used in this manual SYMBOL MEANING These symbols mean CAUTION and WARNING and point to factors that could damage the machine and or severely injure the user This symbol indicates an import...

Страница 23: ...e familiar with it and who have been instructed in safety Only manufacturer approved accessories can be attached to the machine Using non approved accessories will immediately void the warranty 1 2 MAIN PARTS OF THE MOWER AJ102 AJ202 4X4 AJ110 and AG122 lawn mowers consist of the following basic assemblies 1 2 1 Frame and bumper The frame and bumper support most of the machine s main parts 2 Front...

Страница 24: ...C product conformity regulations 7 Product conformity symbol 8 Manufacturer s logo 9 Guaranteed noise level according to regulation 2000 14 EC The vendor will write the serial number of your machine on the back cover of this manual 1 3 2 OTHER LABELS AND THEIR MEANING The following labels and stickers are fastened to your machine Labels on the left side of the mower 1 3 2a Danger Keep feet clear R...

Страница 25: ...ngth x width x height mm 2400 x 1060 x 1100 2480 x 1060 x 1305 2450 x 1270 x 1200 2450 x 1140 x 1200 Weight kg 255 320 according to the type of machine 319 290 302 332 according to the type of machine Speed forward reverse km h 8 4 Cutting height mm 30 90 30 80 40 100 Cutting stroke mm 102 122 110 Grass catcher volume l 300 360 according to the type of machine 360 300 360 according to the type of ...

Страница 26: ...in s 2 Seat Steering wheel Floor BS15 2700 85 0 100 0 16 2 48 1 72 BS16 2800 83 1 100 0 30 1 52 0 73 BS17I 2700 86 0 100 0 94 3 34 BS18 2800 83 3 100 0 50 1 38 1 20 BS18I 2800 83 1 100 0 41 1 75 1 19 BS19I 2700 86 0 100 1 3 0 5 3 7 1 9 BS20I 2800 84 5 100 0 17 2 07 1 59 BS22I 2800 84 0 100 0 9 0 4 6 0 2 4 BS20 2800 86 0 100 0 19 2 75 1 34 BS23 2800 84 0 100 1 6 0 6 2 5 HO16 2800 85 0 100 0 93 2 5 ...

Страница 27: ...n 16 hp VANGUARD V TWIN BS17I Briggs Stratton 17 5 hp INTEK BS18 Briggs Stratton 18 hp VANGUARD V TWIN BS20 Briggs Stratton 20 hp VANGUARD V TWIN BS23 Briggs Stratton 23 hp VANGUARD V TWIN BS18I Briggs Stratton 18 hp INTEK BS19I Briggs Stratton 19 5 hp INTEK BS20I Briggs Stratton 20 21 hp INTEK BS22I Briggs Stratton 22 hp INTEK BS24I Briggs Stratton 24HP INTEK HO16 Honda 16 hp GCV530 TT46 TUFF TOR...

Страница 28: ...excessive vibration repairing the engine or other movable parts also disconnect the ignition cable 2 1 2 Before using the machine Do not use the machine if it is damaged or missing safety equipment All protective covers and safety elements must be in place at all times Do not remove or disable any safety devices Regularly inspect those devices for correct operation Do not use the machine when unde...

Страница 29: ...rain characteristics the noise level may briefly exceed specified levels The manufacturer recommends wearing ear protectors while operating the machine Stress placed on the auditory organs by high volume levels or the long term effects of noise can permanently damage hearing Always give your full attention to driving and the other activities involved in using the machine The most common ways to lo...

Страница 30: ...ll work and fire safety rules relevant to this type of machine Regularly remove flammable materials dry grass leaves etc from the area of the engine exhaust battery and anywhere where they might come into contact with petrol or oil ignite and set the machine on fire Allow the mower s engine to cool before storing it in an enclosed space Use extra caution when working with petrol oil and other flam...

Страница 31: ...ly with applicable waste disposal laws in the user s country Disposal can be entrusted to a specialized company 3 3 ASSEMBLING PACKED UNITS Because it is technical work your dealer will prepare the mower for operation according to the following instructions Before starting installation remove all protective materials place the mower on a flat surface and align the front wheels in forward position ...

Страница 32: ...d for transport and must be assembled first Later chapters give a rough outline on assembling it The complete process is shown on the DVD that is included or can be sent upon request TOOLS NEEDED Prepare the following tools for assembling the catcher A knife for removing packing material A set of hexagonal socket wrenches and hex wrenches Phillips screwdrivers or an electrical hand screwdriver UNP...

Страница 33: ... bolts and nuts Make sure not to get the left brace and right brace switched The left brace is clearly marked L 3 3 2f Screw on the side struts of the grass catcher The struts are attached to the inner side of the grass catcher using M5x16 bolts and nuts 3 3 2g For the catcher on the 360 litre model ignore this point the side braces are premounted Screw the bottom tube to the frame For easier asse...

Страница 34: ...on the hangers on the rear plate of the machine Check its fit to the fenders Correct any imbalance by loosening the bolts in the front tube and or the bolts in the side braces evening it up and retightening the bolts On a properly adjusted grass catcher the space between the rear plate of the machine and the front tube 3 3 3 2c is no greater than 5 mm If the catcher cannot be fit in the manner exp...

Страница 35: ...tank itself regularly because any contaminants in the fuel can cause engine breakdown 3 4 4 CHECKING TYRE PRESSURE Before using the machine check the air pressure in the tyres The air pressure in the front and rear tyres must be within the range of 80 140 kPa The difference between the individual tyres can be 10 KPa Do not exceed the maximum pressure marked on the tyres that are being used 3 4 5 C...

Страница 36: ...4 CONTROLLNG THE MACHINE 4 1 CONTROL LAYOUT 4 1a 1 Accelerator lever 2 Indicator for the brake pedal and parking brake 3 Mowing function control switch when grass catcher is full 4 Switch for mowing mechanism 5 Main switch 4 1b 6 Brake pedal 7 Parking brake control 8 Mulching lid lever 9 Forward drive pedal 10 Backup pedal 11 Mowing mechanism height adjustment lever 4 2 DESCRIPTION AND FUNCTION OF...

Страница 37: ... can fill with clippings For this reason this position is intended only for short term use to complete the mowing of very small remaining areas If the machine is equipped with an acoustic indicator buzzer then it is automatically activated when the basket is full In the AUT position mowing is switched off automatically at the moment the grass catcher is full Position Grass catcher full Mowing mech...

Страница 38: ...ing the brake pedal the parking brake is engaged Stepping on the brake pedal disengages the parking brake automatically releasing the lever and moving it to position 1 8 MULCHING LID LEVER This lever has two functions 1 Mulching grass clippings are spread underneath the lawn mower 2 Grass collection grass clippings are collected in the grass catcher When shifting the lever from the collection posi...

Страница 39: ...e machine goes and vice versa When released the pedal automatically returns to the neutral position and the machine stops For more details 5 5 ATTENTION A forward backward change in direction is possible only after the machine has stopped 10 BACKUP PEDAL This pedal controls the drive wheels and regulates the machine s backward movement The closer to the floor you press the pedal the faster the mac...

Страница 40: ...tly limits the machine s movement when the engine is off The front axle may get overloaded during such a motion attempt and may be damaged In the event that the machine has to be moved with the motor switched off always push with the front axle lightened The by pass lever is mostly used to bleed the air out of the hydraulic system Due to the complicated design it is best to have such repairs done ...

Страница 41: ...s of warranty the hours of movement clock is fitted with a protective seal If the hours of movement clock is out of action inform your service agency immediately 4 CRUISE CONTROL The cruise control is used only on long straight drives Cruise control must be turned off before any change in direction Cruise control is on only when the ignition is on The cruise control can be turned off by stepping o...

Страница 42: ...on 7 c On motorized machines open the fuel cap only on machines with 15 5 hp BS15 engines d Set the accelerator lever as follows On machines with 2 cylinder engines to the MAX position On machines with 1 cylinder engines to the STARTER position e Pull out the starter only on engines with 16 hp or more f Turn the key to the Start engine position to turn on the ignition Let go of the key after start...

Страница 43: ...he battery Conditions for dismounting the machine with the engine running the mowing mechanism is off the fuel control lever is in the MIN position the gear is in neutral and the hand brake is activated the brake indicator light is on 5 4 TURNING THE MOWING MECHANISM ON AND OFF 5 4 1 TURNING THE MOWING MECHANISM ON Move the accelerator lever to MAX position Use the mowing mechanism height lever to...

Страница 44: ...MOWING MECHANISM INSPECTION AND ALIGNMENT of this manual 5 5 DRIVING THE MACHINE General warning before driving Make sure the parking brake is disengaged The parking brake lever must not remain in position 2 4 2 The parking brake automatically releases when the service brake pedal is pressed The bypass lever must be set to position 1 i e the bypass must be turned off When driving toward the mowing...

Страница 45: ...dapt the speed to the height of the mulched growth in view of the considerable motor load at this speed The higher the grass the lower the speed of travel We recommend cutting lengthwise or crosswise Overlapping rows makes the blades more effective and improves the appearance of the mowed area When riding on an uneven surface the driving speed may vary Recommended driving speeds by condition State...

Страница 46: ...p 1 and by tilting it 2 empty the catcher Let it empty freely gradually loosen it and tilt it back 5 6b On machines with mechanically lifted and tilted catchers Press the catcher s emptying switch to the LIFT position and hold it down until the catcher has risen all the way After the position is reached let up on the switch and wait for the catcher to empty Then press the switch back to the START ...

Страница 47: ... Check screw connections Check tension of toothed belt that rotates the blades 4 Check the V belt tension on the mowing mechanism drive 4 Check and adjust play of front axle and steering Check operation of safety switches and devices Check and adjust engine operation transmission and electromagnetic connectors Check and maintain air filter spark plugs and change if necessary 1 2 Check mowing mecha...

Страница 48: ...back in Then unscrew it again and read the oil level The oil level must be between the two marks on the dipstick If it is not add motor oil until it reaches the FULL mark Further information on checking and adding oil is given in a separate manual provided by the engine manufacturer CHECKING CABLES AND SCREW CONNECTIONS Visually inspect the state of the cables and manually check tightness of screw...

Страница 49: ...ly check the electrolytes The level should be between the MIN and MAX marks For filling the electrolytes use only distilled water A drained battery must be charged as soon as possible Otherwise the cells may be irreversibly damaged The battery must always be charged before first use during a long storage period before operation after a long storage period If the battery needs to be changed always ...

Страница 50: ... is soiled or just mildly worn it must be carefully cleaned with an appropriate copper wire brush Use a gauge to set the spark plug gap Engine operation manual After maintenance or replacement properly tighten the plug An improperly tightened plug gets very hot and can cause serious engine damage Inspect maintain and replace the spark plug according to the instructions given in the manual provided...

Страница 51: ...end Insert two supports under the ends of the axle inside the rear wheels Lift the front end of the machine and insert two supports under each end of the front wheel pins Never tilt the machine to the side where the engine s carburettor is located This could make oil seep into the air filter 6 3 6 MOWING MECHANISM SHARPENING AND CHANGING BLADES SHARPENING BLADES The cutting blades must be sharp st...

Страница 52: ...de and place appropriate pads under it We recommend having another person help in order to avoid injury and damage to the machine Unbolt both blades If the machine is equipped with TRIPLEX blades remove each blade from the holder Before installing the new blades check the shear pins that protect the mowing mechanism from damage If the shear pins are damaged replace them immediately Check the new b...

Страница 53: ...thanthe front edge 6 3 7b BALANCING THE MOWING MECHANISM SIDEWAYS The mowing mechanism must be properly set on the sides 6 3 7c The left and right sides of the mechanism must be horizontal Loosen the bolts on the left and right sides of the adjustment plate 1 6 3 7d Under the mower mechanism cover 2 place inserts of identical height 3 e g wood panels etc and use them to balance the cover such that...

Страница 54: ...move it from the machine through the rear plate 6 3 10a Remove the spring 3 from the shoulder of the tension pulley and loosen the spring upward 4 6 3 10b Stand on the right side of the machine Push the tensioner pulley toward the large pulley This loosens the V belt Then remove the belt 6 3 10c Slide the spring pins 7 from both the rear mowing mechanism suspension shaft pin 8 Screw out the nut 5 ...

Страница 55: ...park the tractor on a solid level surface shut off the engine and remove the key from the ignition Change the wheel as follows Raise the machine using an appropriate jack on the side on which the wheel is to be changed Set the jack below a solid part of the machine s frame or on the transmission arm Secure the machine below with an appropriate wooden block Remove the protective cover from the whee...

Страница 56: ...n tank 3 4 5 KANZAKI KXH 10 N SAE 5W 50 API SG synthetic oil according to the level marks in the expansion tank 3 4 5 If there are problems with the transmission get immediate help from an authorized service centre to prevent serious damage 6 3 17 OVERVIEW OF BOLT TORQUE Mowing mechanism Torque Central blade bolt 30 3 Nm M12 nuts for the mowing mechanism drive pulleys 45 55 Nm 10x25 KL 100 RIPP bo...

Страница 57: ...ar half axles for the rear wheel machine AJ102 4x4 Use oil to lubricate the rotating points axle lock pedal brake pedal 7 TROUBLESHOOTING Never perform a service operation if you do not have the appropriate qualifications and equipment The operations below can be performed by the user Service operations other than those shown here will void the warranty when performed by the user The manufacturer ...

Страница 58: ...ensioning mechanism and replace them if necessary The mowing mechanism s drive belt slips If the grass is too tall or wet the mowing mechanism s belt can slip Check to see if the belt is worn out If it is change it Check the belt tension 6 3 8 If necessary adjust the tension Check the tension spring of the turnbuckle mechanism of the mowing belt Replace the pulled or damaged spring The mowing mech...

Страница 59: ...t up procedure has been followed 5 2 Check the fuse If necessary replace it Check to see that the battery s pole voltage is 12 V On a new machine make sure the battery has been activated and charged On new machines remove the spark plugs and make sure that the oil hasn t accumulated in the cylinder due to improper handling Check to see that all wire connectors are in order and that the electrical ...

Страница 60: ...ion of the circle in the filling port and completely charge it A drained battery may freeze and burst If necessary store the battery in a cool dry space Recharge the battery every 30 days and check its charge regularly Cover the mower with a cloth and store it in a clean dry room The best way to keep your machine in top operating condition for next season is to have an authorized service centre ch...

Страница 61: ...u 4 para 1 NV No 616 2006 Coll Council Directive No 2000 14 EC Appendix VIII equ appendix 7 NV No 9 2002 Coll under supervision of a notified person LRQA registration No 0088 Hiramford Middlemarch Office Village Siskin Drive Coventry CV3 4FJ United Kingdom E We confirm that this machine as defined in the data provided complies with the requirements given in the aforementioned technical regulations...

Страница 62: ...5 equ 5 para 2 NV No 176 2008 Coll Council Directive No 2004 108 EC Article 7 equ 4 para 1 NV No 616 2006 Coll Council Directive No 2000 14 EC Appendix VIII equ appendix 7 NV No 9 2002 Coll under supervision of a notified person LRQA registration No 0088 Hiramford Middlemarch Office Village Siskin Drive Coventry CV3 4FJ United Kingdom Compliance was judged by accredited testing laboratory No 1054 ...

Страница 63: ...tive No 2006 42 EC Article 12 paragraph 2 equ 5 para 2 NV No 176 2008 Coll Council Directive No 2004 108 EC Article 7 equ 4 para 1 NV No 616 2006 Coll Council Directive No 2000 14 EC Appendix VIII equ appendix 7 NV No 9 2002 Coll under supervision of a notified person LRQA registration No 0088 Hiramford Middlemarch Office Village Siskin Drive Coventry CV3 4FJ United Kingdom E We confirm that this ...

Страница 64: ...ce Village Siskin Drive Coventry CV3 4FJ United Kingdom E Compliance assessment performed by an accredited laboratory Accredited testing laboratory no 1054 Státní zkušebna zemědělských lesnických a potravinářských strojů a s Molákova 622 11 163 04 Prague 8 Czech Republic F We confirm that this machine as defined in the data provided complies with the requirements given in the aforementioned techni...

Страница 65: ... verkauft wird Wenn Sie irgendwelche Fragen haben oder Ihnen etwas unklar ist scheuen Sie sich nicht sich an eines der mehr als 100 autorisierten gut ausgestatteten Servicezentren in ganz Europa zu wenden Über sie erhalten Sie Zugang zu den im Werk ausgebildeten und geprüften Servicefachleuten Symbole die in diesem Handbuch benutzt werden SYMBOL BEDEUTUNG Diese Symbole bedeuten VORSICHT und WARNUN...

Страница 66: ...nd wenn der 4x4 Antrieb benutzt wird darf die Neigung 15 27 nicht übersteigen Jegliche Anwendung dieses selbstfahrenden Rasenmähers die in diesem Handbuch nicht erwähnt ist oder die den beschriebenen Anwendungsbereich überschreitet ist als eine Anwendung zu betrachten die gegen den Zweck verstößt Der Benutzer trägt die ausschließliche Verantwortung für all solche Benutzungen und der Hersteller ist...

Страница 67: ...asauffänger befindet sich am Hinterteil der Maschine und besteht aus einem Stahlrohrrahmen einem Stoffbeutel und einem Entleerhebel 8 Fahrerbereich Der komfortable Sitz erlaubt den Zugang zu allen Bedienelementen der Maschine 9 Motorhaube Motor Verkabelung und Akku Die Motorhaube besteht aus Kunststoff und Metallabdeckungen die die elektrischen und mechanischen Teile der Maschine entsprechend abde...

Страница 68: ...htigt laufen lassen Vorsicht vor fliegenden Gegenständen Lesen Sie das Handbuch Nicht in der Nähe anderer Leute mähen Keine Fahrer Nicht über einen Hang fahren Halten Sie unbefugte Personen in einem sicheren Abstand Umschalten der Mulchklappe Maximale Arbeitsneigung Es ist streng verboten am Rasenmäher angebrachte Etiketten oder Symbole zu entfernen oder zu beschädigen Etiketten auf der linken und...

Страница 69: ...n des Grasauffängers l 300 360 entsprechend dem Typ der Maschine 360 300 360 entsprechend dem Typ der Maschine Ohne Aufnahme behälter Radabmessungen Vorn 16 x 6 50 8 Hinten 20 x 10 8 Fassungsvermögen des Kraftstofftanks l 7 5 13 15 entsprechend dem Typ der Maschine 13 15 basierend auf dem Typ 13 15 entsprechend dem Typ der Maschine 7 5 13 15 entsprechend dem Typ der Maschine Garantierter akustisch...

Страница 70: ...1 der zum Arm übertragenen Schwingung ahvd nach EN 1033 A1 AJ102 4x4 Rasenmäher Motor U min 100 1 min Erklärter Lärmabgabepegel an den Bediener LpAd dB nach EN ISO 11201 Garantierter akustischer Ausgangspegel LWA dB Gesamtwert der Vibrationsbeschleunigung m s2 Gesamtschwingungen avd übertragen auf den Arm ahvd BS23 2800 86 4 100 0 9 0 5 2 5 BS24I 2800 84 1 8 100 1 0 0 4 2 7 1 4 AJ122 Rasenmäher Mo...

Страница 71: ...hergestellt Der Hersteller bestätigt das in der Konformitätserklärung die am Ende dieses Handbuchs beigefügt ist 10 Wenn diese Maschine richtig und entsprechend dem Handbuch benutzt wird ist sie sehr sicher Wenn der Benutzer die Arbeitssicherheit und die Warnungen in diesem Handbuch nicht beachtet kann dieser selbstfahrende Rasenmäher eine Hand oder einen Fuss abtrennen oder sogar Gegenstände wegs...

Страница 72: ... Maschine wenn Sie unter Schwindel oder Ohnmacht leiden oder wenn Sie sonst geschwächt sind oder sich nicht konzentrieren können Bevor Sie mit der Maschine arbeiten machen Sie sich gründlich mit allen Bedienelementen vertraut und beherrschen ihre Bedienung so dass Sie notfalls die Maschine sofort anhalten können oder ihren Motor ausschalten können Ändern Sie die Einstellungen des Motorreglers oder...

Страница 73: ...se beansprucht werden kann das Gehör dauerhaft geschädigt werden Richten Sie Ihre volle Aufmerksamkeit immer auf das Fahren und auf andere Handlungen die zur Benutzung der Maschine gehören Die meisten Ursachen warum Sie die Kontrolle über die Maschine verlieren sind Verlust der Zugkraft Zu schnelles Fahren Die Geschwindigkeit ist nicht den Oberflächenbedingungen und eigenschaften angepasst Plötzli...

Страница 74: ...n nicht die Bedienung des Traktors Seien Sie in Bereichen mit eingeschränkter Sicht in der Nähe von Bäumen Büschen Wänden usw besonders vorsichtig 2 4 BRANDSCHUTZ Wenn Sie den Rasenmäher benutzen müssen Sie alle Arbeits und Brandschutzsicherheitsbestimmungen beachten die für diesen Maschinentyp gelten Entfernen Sie regelmäßig brennbare Stoffe trockenes Gras Laub usw aus dem Bereich des Motorauspuf...

Страница 75: ...sen und zwei dreieckigen gelben Aufklebern geliefert 3 3 2 fehlt bei der Maschine AJ110 Dokumentation 4 Packliste Benutzerhandbuch für Rasenmäher Motorhandbuch Akkuhandbuch und Servicebuch 3 2 ENTSORGUNG DER VERPACKUNG Entsorgen und recyceln Sie das Verpackungsmaterial nach dem Auspacken des Zubehörs bitte ordungsgemäß Beachten Sie die geltenden Abfallbeseitigungsgesetze in Ihrem Land Die Entsorgu...

Страница 76: ... des Akkus sind die im Akkuhandbuch beschriebenen Anweisungen zu befolgen Es sind auch alle Sicherheitsanweisungen des Handbuchs zu beachten 3 3 2 GRASAUFFÄNGER gibt es nur bei den Typen AJ102 AJ102 4x4 und AG 122 Der Grasauffänger wird in einer gesonderten Kiste geliefert Einige seiner Teile sind für den Transport abgebaut worden und müssen zuerst angebaut werden In späteren Kapiteln werden grobe...

Страница 77: ...d rechte Eckklammer 5 Untere Klammer in der 300 Liter Version nur einmal 6 Seitenstreben 9 Griff 10 Vorderes Rohr 11 Sack Netz 13 Steuerung des Grasablagerunghalters 3 3 2c INSTALLATION DES GRASAUFFÄNGERS Schrauben Sie die Grasauffängerscharniere 1 und 2 an die hintere Platte 3 3 2d An einigen Maschinen sind die Scharniere 1 an der hinteren Platte bereits vormontiert Das Scharnier 2 wird nur angeb...

Страница 78: ...atz Unterlegescheiben auf sie Stecken Sie das auf diese Weise montierte Teil durch die Öffnungen in der oberen Klammer am Rahmen schieben Sie weitere Unterlegscheiben auf die Gewindeenden und sichern alles mit Schrauben Ziehen Sie sie noch nicht fest 3 3 2k Schrauben Sie den Deckel an den Rahmen und ziehen die Schrauben fest 3 3 2l Stecken Sie den Entleerhebel in die Löcher der Klammer im Auffänge...

Страница 79: ...n mit Behälter unter der Motorhaube oder 13 15 l Typen mit Behälter im Kotflügel Kraftstoff auf Benutzen Sie nur Kraftstoff mit der Oktanzahl die im Motorhandbuch angegeben ist Schäden die durch falschen Kraftstoff verursacht werden werden von der Garantie nicht abgedeckt Füllen Sie den Tank nur wenn der Motor ausgeschaltet und kühl ist Füllen Sie den Tank in einem gut belüfteten Bereich Wenn Sie ...

Страница 80: ...en Deckel und die Einlassumgebung mit einem Tuch Reinigen Sie den gesamten Tank weil Schmutz im Öl die Lebensdauer des Ölfilters verkürzt und Ausfälle verursachen kann 3 4 6 ENTLÜFTUNG DES HYDRAULIKKREISES nur an der AJ102 4x4x Maschine Die vollständige Entlüftung des Hydraulikkreises wird während der ersten Betriebsstunden erreicht Wir empfehlen die Maschine 1 2 Stunden leicht einzufahren Wenn si...

Страница 81: ...ist Signal für angezogene Handbremse Bremspedalanzeiger 3 Mähfunktionsüberwachungsschalter wenn Grasauffänger voll ist optionale Ausrüstung Der AUT MAN Schalter schaltet die Mähfunktion des Mähmechanismus an und aus wenn der Grasauffänger voll ist In der Position MAN ist das Mähen die ganze Zeit an Und wenn der Grasauffänger voll ist kann das Absaugrohr ihn mit Schnipseln füllen Aus diesem Grund i...

Страница 82: ...6 BREMSPEDAL Wenn Sie aufs Bremspedal treten hält der Rasenmäher an Das Pedal wird auch beim Anlassen der Maschine die nur bei gedrücktem Bremspedal angelassen werden kann benutzt 7 HANDBREMSHEBEL Der Handbremshebel hat zwei Stellungen In Stellung 1 ist die Bremse inaktiv Wenn sie in Stellung 2 geschoben wird während das Bremspedal gedrückt wird ist die Handbremse eingekuppelt Wenn Sie auf das Bre...

Страница 83: ...n eine Stellung in der die Arbeit nicht behindert wird Damit der Mulchdeckel richtig funktioniert ist der Mähmechanismus nach Beendigung der Arbeit gründlich zu reinigen und Schnipsel und Verunreinigungen sind aus dem Ansaugrohr zu entfernen 9 VORWÄRTSFAHRPEDAL Mit diesem Pedal werden die Antriebsräder gesteuert und die Forwärtsbewegung der Maschine geregelt Je mehr Sie das Pedal nach unten drücke...

Страница 84: ...cht An einem Rasenmäher AJ 102 4x4 ist es aus Konstruktionsgründen nicht möglich den Vorderachsenantrieb abzutrennen das Hydrauliksystem hat kein Leerlaufventil Dadurch ist die Beweglichkeit bei ausgeschaltetem Motor stark eingeschränkt Die Vorderachse kann während solch eines Bewegungsversuchs überlastet und beschädigt werden Wenn die Maschine mit abgeschaltetem Motor mähen muss schieben Sie imme...

Страница 85: ...rbeitsstundenzähler nicht funktioniert informieren Sie sofort Ihren Service 4 TEMPOREGLER Der Temporegler wird nur bei langen geradlinigen Fahrten benutzt Der Temporegler muss ausgeschaltet werden bevor Sie die Richtung wechseln Der Temporegler ist nur an wenn die Zündung an ist Der Temporegler kann ausgeschaltet werden indem Sie aufs Pedal treten oder den Schalter ausschalten 5 SCHALTER FÜR ANKIP...

Страница 86: ... mit Motor den Kraftstoffverschluss nur an Maschinen mit 15 5 PS BS15 Motoren d Stellen Sie den Gashebel wie folgt ein Bei Maschinen mit 2 Zylinder Motoren in die Position MAX Bei Maschinen mit 1 Zylinder Motoren in die Position STARTER e Ziehen Sie den Anlasser heraus nur bei Motoren mit 16 PS und mehr f Drehen Sie den Schlüssel in die Position Start engine um die Zündung anzuschalten Lassen Sie ...

Страница 87: ...N DER MASCHINE BEI LAUFENDEM MOTOR Wenn Sie die Maschine eine Weile verlassen wollen oder müssen um Hindernisse usw zu beseitigen und danach die Arbeit fortsetzen wollen können Sie die Maschine verlassen und den Motor laufen lassen Dadurch wird der Akku geschont Bedingungen zum Verlassen der Maschine bei laufendem Motor der Mähmechanismus ist ausgeschaltet der Kraftstoffkontrollhebel ist in der Po...

Страница 88: ... Gelände anheben und dadurch die Klingen vor Beschädigung schützen Wenn Sie die Steuerkraft verringern wollen mit der der Mähmechanismus an einer AG122 Maschine angehoben wird verschieben Sie das Hilfsfederzusatzteil nach links Die Werkseinstellungen sind 5 4 4 AUSWUCHTEN DES MÄHMECHANISMUS Um beste Mähergebnisse zu erhalten muss der Mähmechanismus auf die richtige Höhe eingestellt werden Der Eins...

Страница 89: ...chter je höher und je dicker das Gras ist desto niedriger sollte die Geschwindigkeit sein mit der Sie fahren Bei zu hoher Fahrzeuggeschwindigkeit oder unter einer schweren Last verringert sich die Drehzahl der Klinge wodurch die Mähqualität schlechter wird und das Absaugrohr verstopft werden kann Unter solchen Bedingungen ist der Motor immer auf maximale Drehzahl einzustellen Wenn das Gras sehr ho...

Страница 90: ...and kann mit den verschiebbaren Teilen des Deckels Verlängerung oder Verkürzung des Arms reguliert werden 1 Verschiebbares Teil herausgezogen minimaler Korbfüllstand 2 Verschiebbares Teil hineingedrückt maximaler Korbfüllstand 5 6a Entleervorgang Fahren Sie mit der Maschine an die Stelle an der Sie den Grasauffänger entleeren möchten Halten Sie die Maschine an und stellen die Bremse ein Wenn es ei...

Страница 91: ...nsdauer und seinen störungsfreien Betrieb zu verlängern Verschlissene oder beschädigte Teile müssen rechtzeitig ersetzt werden Verwenden Sie immer Originalersatzteile Andere Ersatzteile können die Maschine beschädigen und die Gesundheit des Fahrers und anderer Personen gefährden und die Garantieansprüche ungültig machen Um Ersatzteile zu bestellen nehnem Sie immer Kontakt mit dem Hersteller oder e...

Страница 92: ... des Zahnriemens überprüfen der die Klingen dreht 4 Keilriemenspannung am Mähmechanismusantrieb überprüfen 4 Spiel der Vorderachse und Lenkung überprüfen und einstellen Funktion der Sicherheitsschalter und vorrichtungen überprüfen Motorfunktion Getriebe und elektromagnetische Verbinder überprüfen und einstellen Luftfilter und Zündkerzen überprüfen und warten und notfalls wechseln 1 2 Mähmechanismu...

Страница 93: ...sauber stecken ihn wieder ein und schrauben ihn wieder ein Dann schrauben Sie ihn wieder ab und lesen den Ölstand ab Der Ölstand muss zwischen den beiden Markierungen am Ölmessstab liegen Wenn nicht geben Sie Motoröl hinzu bis die FULL Markierung erreicht wird Weitere Informationen zum Überprüfen und Einfüllen von Öl finden Sie in einem gesonderten Handbuch das vom Hersteller der Maschine mitgelie...

Страница 94: ...1 AKKU Die richtige regelmäßige Wartung erhöht die Lebensdauer des Akkus Deshalb sollten Sie ihn entsprechend dem Anweisungshandbuch des Akkuherstellers überprüfen Halten Sie die Akkukontakte sauber Wenn sie schmutzig werden oder korrodieren reinigen Sie sie nach den Anweisungen des Herstellers Die Unterbrechung des Stromkreises die durch Oxidation der Kontakte verursacht wurde kann zur Störung de...

Страница 95: ...n Sie Altöl nie mit gewöhnlichem Abfall und gießen Sie es nicht in die Kanalisation in den Müll oder ins Erdreich WARTUNG DES LUFTFILTERS Lassen Sie den Motor nie ohne Luftfilter laufen Dadurch verschleißt der Motor schnell Warten Sie den Luftfilter entsprechend den Anweisungen die im Handbuch vom Motorhersteller gegeben werden WARTUNG DER ZÜNDKERZEN Damit der Motor perfekt arbeitet müssen die Zün...

Страница 96: ...en wechseln drücken Sie zuerst die Lasche 1 und schieben die Glühbirne aus der Fassung 2 Der Wiedereinbau erfolgt in der umgekehrten Reihenfolge 6 3 3b 6 3 4 WECHSEL DER SICHERUNGEN Wenn eine Sicherung durchbrennt hält der Motor sofort an der Mähmechanismus hört auf zu arbeiten und alle Messanzeigen auf der Instrumententafel werden dunkel Ersetzen Sie eine schadhafte Sicherung nie durch eine mit h...

Страница 97: ... den Mähmechanismus vor Beschädigung schützen Wenn die Scherstifte beschädigt sind wechseln Sie sie sofort Ersatzstifte werden mit der Maschine mitgeliefert 6 3 6b Nachdem die Auswuchtung und die Scherstifte überprüft wurden schrauben Sie die Klingen wieder an Achten Sie bei der Installation der Klingen darauf dass sie in der Abdeckung des Mähmechanismus nicht nach oben zeigen Verwechseln Sie nich...

Страница 98: ...en beschädigt oder abgebrochen sein Wann immer Sie mit Klingen umgehen ziehen Sie feste Arbeitshandschuhe an 6 3 7 MÄHMECHANISMUS INSPEKTION UND AUSWUCHTEN Um beste Mähergebnisse zu erhalten muss der Mähmechanismus auf die richtige Höhe über dem Boden eingestellt werden und beide Seiten des Mechanismus müssen gleichhoch sein Vor der Einstellung Stellen Sie die Maschine auf eine perfekt ebene Fläch...

Страница 99: ...Der Riemen wird durch Riemenscheiben und Federn gespannt Bringen Sie die Feder 1 ins zweite Loch im Riemenscheibenspannhebel 2 Bei der Maschine AJ110 spannen Sie den Spannring 3 der Schraube mithilfe der Spannzugstange mit Mutter 4 auf A 45 1 mm Spannen Sie die Feder des Antriebsbands des Mähmechanismus 5 auf B 135 1 mm in Position 7 wozu Sie wieder die Spannzugstange mit Mutter 6 benutzen 6 3 8 6...

Страница 100: ...ie Hände oder Finger verletzen Nehmen Sie den Keilriemen von der Riemenscheibe des elektromagnetischen Verbinders ab 6 3 10e Schieben Sie den Mähmechanismus auf eine Seite der Maschine 6 3 10f 6 3 11 WARTUNG DER LENKUNG Überprüfen Sie regelmäßig dass es kein zu großes Spiel zwischen der Zahnstange und dem Ritzel gibt Wenn das Spiel zu groß ist verringern Sie es 6 3 11 Wenn Sie diese Wartung nicht ...

Страница 101: ...terlegscheibe Nehmen Sie das Rad von der Welle Bei den Hinterrädern ist eine Feder auf der Welle 6 3 14 Wenn das Rad wieder angebracht wird führen Sie die Montageschritte in umgekehrter Reihenfolge aus Bevor Sie das Rad anbringen reinigen Sie alle Teile und schmieren die Welle etwas ein Besonders bei den Rädern auf der Hinterachse ist das Einschmieren für einen späteren Radwechsel unentbehrlich We...

Страница 102: ...Drehmoment Schraube der mittleren Klinge 30 3 Nm M12 Muttern für die Antriebsscheiben des Mähmechanismus 45 55 Nm 10x25 KL 100 RIPP Schraube für die Schulter der Spannscheibe des Mähmechanismusantriebsriemens 55 65 Nm Lenkung M8x30 Schraube am Lenkteil 15 25 Nm M12 Schraube zum Lenkteil 35 45 Nm Motor Schraube zum elektromagnetischen Verbinder 60 70 Nm Klammerschraube für die Antriebsriemen Spanns...

Страница 103: ...sarbeiten schlecht ausgeführt hat Problem Lösung Die Maschine schneidet ungleichmäßig Entfernen Sie blockierte Schnipsel von der Unterseite des Mähmechanismus Überzeugen Sie sich davon dass die Klingen scharf und nicht deformiert sind Überprüfen Sie ob die Klingen fest sitzen Überprüfen Sie die Höheneinstellung des Mähmechanismus 6 3 7 Wenn sie nicht richtig ist stellen Sie sie neu ein Überprüfen ...

Страница 104: ...fen Sie alle Bereiche der Scheibenführung Überprüfen Sie ob die Riemenbewegung durch einen Fremdkörper behindert wird Wenn das so ist entfernen Sie den Fremdkörper Überprüfen Sie die Riemenscheiben und wechseln sie wenn sie beschädigt sind Überprüfen Sie die Mähhöhe und stellen sie notfalls ein Überprüfen Sie die Riemenspannung 6 3 8 Wenn nötig stellen Sie die Spannung ein Die Klingen bewegen sich...

Страница 105: ...ähnte Segment ein Überprüfen Sie die Kugelgelenke auf Verschleiß Notfalls Gelenke wechseln Der Motor läuft nicht Überprüfen Sie ob Kraftstoff im Tank ist Überprüfen Sie ob das beschriebene Anlassverfahren befolgt wurde 5 2 Überprüfen Sie die Sicherung Notfalls wechseln Überprüfen Sie ob die Polspannung des Akkus 12 V beträgt Überzeugen Sie sich an einer neuen Maschine davon dass der Akku aktiviert...

Страница 106: ...Flächen mit abbröckelnder Farbe und streichen sie neu an um Korrosion zu vermeiden Enfernen und wechseln Sie fehlerhafte oder verschlissene Teile und ziehen Sie alle lockeren Schrauben und Muttern fest Bereiten Sie den Motor gemäß Motorbenutzerhandbuch für die Lagerung vor Schmieren Sie alle Schmierpunkte nach dem Schmierplan 6 4 Lockern Sie den Keilriemen des Mähmechanismus 6 3 8 Nehmen Sie den A...

Страница 107: ...n Schmiermittelreste an Lagern und Zahnrädern Umweltverträgliche Bauteile müssen entsprechend den im Land des Benutzers geltenden Abfallbeseitigungsgesetzen entsorgt werden Zum Beispiel in der Tschechischen Republik ist das das Abfallbeseitigungsgesetz Nr 185 2001 Coll Trennen Sie weggeworfenen Müll entsprechend den Abfallbeseitigungskatalogen indem Sie die entsprechende Verordnung einhalten Umwel...

Страница 108: ...kel 7 entspricht 4 Absatz 1 NV Nr 616 2006 Coll Ratsdirektive Nr 2000 14 EC Anhang VIII entspricht Anhang 7 NV Nr 9 2002 Coll unter Aufsicht einer unterrichteten Person LRQA Registriernr 0088 Hiramford Middlemarch Office Village Siskin Drive Coventry CV3 4FJ Großbritannien E Wir bestätigen dass diese Maschine wie sie in den vorliegenden Daten definiert ist die Anforderungen erfüllt die in den oben...

Страница 109: ...rtikel 5 entspricht 5 Absatz 2 NV Nr 176 2008 Coll Ratsdirektive Nr 2004 108 EC Artikel 7 entspricht 4 Absatz 1 NV Nr 616 2006 Coll Ratsdirektive Nr 2000 14 EC Anhang VIII entspricht Anhang 7 NV Nr 9 2002 Coll unter Aufsicht einer unterrichteten Person LRQA Registriernr 0088 Hiramford Middlemarch Office Village Siskin Drive Coventry CV3 4FJ Großbritannien Die Erfüllung wurde vom zugelassenen Prüfl...

Страница 110: ...ive Nr 2006 42 EC Artikel 12 Absatz 2 entspricht 5 Absatz 2 NV Nr 176 2008 Coll Ratsdirektive Nr 2004 108 EC Artikel 7 entspricht 4 Absatz 1 NV Nr 616 2006 Coll Ratsdirektive Nr 2000 14 EC Anhang VIII entspricht Anhang 7 NV Nr 9 2002 Coll unter Aufsicht einer unterrichteten Person LRQA Registriernr 0088 Hiramford Middlemarch Office Village Siskin Drive Coventry CV3 4FJ Großbritannien E Wir bestäti...

Страница 111: ... CV3 4FJ Großbritannien E Die Erfüllungsprüfung wurde von einem zugelassenen Labor ausgeführt Zugelassenes Prüflabor Nr 1054 Státní zkušebna zemědělských lesnických a potravinářských strojů a s Molákova 622 11 163 04 Praha 8 Tschechische Republik F Wir bestätigen dass diese Maschine wie sie in den vorliegenden Daten definiert ist die Anforderungen erfüllt die in den oben genannten technischen Best...

Страница 112: ... considéré comme faisant partie intégrante de la tondeuse et il doit l accompagner en cas de revente de la machine Si vous avez des questions ou des doutes n hésitez pas à contacter l un de nos 100 centres d assistance agréés à travers l Europe Vous aurez ainsi accès à des professionnels formés et qualifiés Symboles utilisés dans ce manuel SYMBOLE SIGNIFICATION Ces symboles signifient ATTENTION et...

Страница 113: ...e l utilisation de la tramission 4 x 4 la pente ne doit pas dépasser 15 27 Toute utilisation de cette tondeuse auto propulsée qui ne serait pas prévue dans ce manuel ou qui dépasserait le cadre d application spécifié serait considéré comme transgressive L utilisateur porte seul la responsabilité d une telle utilisation et le fabricant n est en aucun cas responsable des dommages éventuels pouvant e...

Страница 114: ...Le récupérateur d herbe situé à l arrière de la machine est composé d un tube en acier d un sac en tissu et d un levier de déchargement 8 Zone conducteur Le siège confortable permet un accès facile à toutes les commandes de la machine 9 Capot moteur installation électrique et batterie Le capot regroupe un ensemble de caches en plastique et métalliques qui recouvrent de façon adéquate les pièces él...

Страница 115: ...manuel Ne tondez pas à proximité d autres personnes Aucun conducteur Ne traversez pas une pente Maintenez les personnes non autorisées à une distance de sécurité Activation du volet de paillage Inclinaison de travail maximale Il est strictement interdit de retirer ou de détériorer les étiquettes ou les symboles figurant sur la tondeuse Si une étiquette est détériorée ou illisible contactez votre r...

Страница 116: ...lume du récupérateur d herbe l 300 360 selon le type de machine 360 300 360 selon le type de machine Sans bac de stockage Dimensions des roues Avant 16 x 6 50 8 Arrière 20 x 10 8 Capacité réservoir d essence l 7 5 13 15 selon le type de machine 13 15 en fonction du type 13 15 selon le type de machine 7 5 13 15 selon le type de machine Niveau de puissance sonore garantie LWA dB 100 105 100 Niveau d...

Страница 117: ...on transmise au bras ahvd selon EN 1033 A1 Tondeuse AJ102 4x4 Moteur T MN 100 min 1 Niveau d émission de bruit déclaré au poste opérateur LpAd dB selon EN ISO 11201 Niveau de puissance sonore garantie LWA dB Valeur récapitulative de l accélération des vibrations m s 2 vibrations totales avd transférées au bras ahvd BS23 2800 86 4 100 0 9 0 5 2 5 BS24I 2800 84 1 8 100 1 0 0 4 2 7 1 4 Tondeuse AJ122...

Страница 118: ... machine est utilisée correctement et conformément à ce manuel elle est très sûre Si l utilisateur ne respecte pas la sécurité dans le travail et ne prête pas attention aux avertissements contenus dans ce manuel cette tondeuse à gazon auto propulsée peut trancher une main ou un pied et même projeter des objets pouvant ainsi entraîner de graves blessures ou la mort ainsi que la destruction de la ma...

Страница 119: ... fonctionnement de façon à pouvoir immédiatement stopper la machine et couper le moteur si nécessaire Ne modifiez pas les paramètres du régulateur ou du limitateur de vitesse du moteur Avant de travailler avec la machine nettoyez la surface de tonte de toutes les pierres branches câbles os ou autres corps étrangers que la machine pourrait projeter lors de la tonte Effectuez toutes les réparations ...

Страница 120: ...a tondeuse pour d autres applications que celles prévues 2 1 4 Après utilisation de la machine Conservez toujours la machine et ses accessoires propres et en bon état de fonctionnement Les lames rotatives sont aiguisées elles peuvent provoquer des blessures Emballez les ou portez des gants lorsque vous les manipulez Contrôlez régulièrement le serrage correct et au bon couple des écrous et boulons ...

Страница 121: ...r en contact avec l essence ou l huile s enflammer et mettre la machine en feu Laissez le moteur de la tondeuse refroidir avant de la ranger dans un espace clos Soyez très vigilant lorsque vous manipulez l essence l huile ou toute autre matière inflammable Il s agit de substances très inflammables dont les fumées sont explosives Ne fumez pas en travaillant Ne dévissez jamais le bouchon du réservoi...

Страница 122: ...ément à la réglementation de gestion des déchets applicable dans votre pays Ces déchets peuvent être confiés à une société spécialisée 3 3 ASSEMBLAGE DES UNITES EMBALLEES Du fait de la technicité de cette opération c est votre revendeur qui se charge de la préparation de la tondeuse conformément aux instructions suivantes Avant de procéder à l installation retirez tous les matériaux de protection ...

Страница 123: ...re réassemblées Les chapitres qui suivent vous apportent les grandes lignes concernant son assemblage Le procédé complet est montré sur le DVD inclus ou que vous pouvez obtenir sur demande OUTILS NÉCESSAIRES Préparez les outils suivants pour pouvoir assembler le récupérateur Un cutter pour retirer l emballage Un jeu de clés héxagonales Des tournevis Phillips ou un tournevis électrique DÉBALLAGE Re...

Страница 124: ...t des boulons M5x25 et des écrous Assurez vous de ne pas intervertir l équerre droite avec l équerre gauche L équerre gauche est clairement marquée d un L 3 3 2f Vissez sur le côté les goujons du récupérateur d herbe Les goujons sont fixé sur le côté interne du récupérateur d herbe en utilisant des boulons M5x16 et des écrous 3 3 2g Pour le récupérateur 360 litres ignorez ce point car les entretoi...

Страница 125: ...rs terminée 3 3 2n ÉQUILIBRAGE APRÈS INSTALLATION Prenez le récupérateur d herbe et fixez le sur les crochets de la plaque à l arrière de la machine Contrôlez qu il s adapte bien sur les garde boues Corrigez tout déséquilibre en dévissant les boulons du tube avant et ou les boulons des entretoises latérales réajustez avant de resserrez les boulons Sur un récupérateur d herbe correctement ajusté l ...

Страница 126: ...ssage Retirez le bouchon du réservoir d essence Ouvrez le doucement car le réservoir peut contenir des vapeurs de pétrole préssurisées Insérez l entonnoir dans le trou de remplissage et versez l essence se trouvant dans le bidon Après avoir rempli le réservoir essuyez toujours le bouchon et la zône environnante Il est recommandé de vérifier le niveau d essence dans le circuit Nous vous recommandon...

Страница 127: ...orsque l huile commence à s écouler régulièrement resserrez les bouchons 3 4 7 VERIFICATION DE L ETANCHEITE DU CIRCUIT HYDRAULIQUE uniquement sur la machine AJ102 4x4x Effectuez une inspection visuelle du système hydraulique pour contrôler l absence de fuite Faites particulièrement attention aux emplacements où les tuyaux et les armatures sont reliés Informez votre après vente en cas de détection ...

Страница 128: ...ateur d herbe est plein équipement en option Le commutateur AUT MAN permet d activer ou de désactiver la fonction Tonte de mécanisme de tonte lorsque le récupérateur d herbe est plein En position MAN la tonte est activée en continu et si le récupérateur d herbe est plein le tube d évacuation peut encore se remplir de chutes de coupe Pour cette raison cette position est prévue uniquement pour l uti...

Страница 129: ...ait d enfoncer la pédale de frein stoppe la tondeuse La pédale est également utilisée au démarrage de la machine qui ne peut se faire que si la pédale est enfoncée 7 LEVIER DU FREIN DE PARKING Le levier du frein de parking dispose de deux positions En position 1 le frein est désenclenché En déplaçant le levier en position 2 tout en enfonçant la pédale de frein vous enclenchez le frein de parking L...

Страница 130: ...osition qui n empêche pas de travailler Pour que le volet de paillage fonctionne correctement retirez absolument tous les résidus de coupe du mécanisme de tonte et du tube d évacuation après chaque tonte 9 PÉDALE DE MARCHE AVANT Cette pédale commande les roues directrices et régule le mouvement en marche avant de la machine Plus vous enfoncez la pédale plus la machine va vite et vice versa Lorsque...

Страница 131: ...ible de déconnecter l entraînement de l essieu avant le système hydraulique ne possède pas de vanne de dérivation Ainsi est considérablement limitée la possibilité de manoeuvre de la machine avec le moteur coupé Dans le cas d une telle manoeuvre l essieu avant est sensiblement surmené et peut être endommagé Dans le cas d une machine devant se déplacer avec le moteur arrêté poussez toujours avec l ...

Страница 132: ...heures de l horloge de mouvement ne fonctionnent pas informez immédiatement votre centre de service 4 RÉGULATEUR DE VITESSE Le régulateur de vitesse ne doit être utilisé que sur les longs parcours en ligne droite Il doit être désactivé avant tout changement de direction Le régulateur de vitesse n est enclenché que lorsque le moteur est en marche Le régulateur de vitesse peut être coupé en enfonçan...

Страница 133: ...s ouvrez l arrivée d essence uniquement sur les machines équipées de moteurs 15 5 hp BS15 d Placez le levier d accélération comme suit Sur les machines avec moteur à deux cylindres en position MAX Sur les machines avec moteur à cylindre unique en position STARTER e Tirez sur le starter uniquement pour les moteurs de 16hp et plus f Tournez la clé en position Démarrage moteur Start engine pour démar...

Страница 134: ...cendre de la machine en laissant le moteur tourné Le mécanisme de tonte est désactivé Le levier qui commande l arrivée d essence est en position MIN la boîte est au point mort et le frein à main est activé le voyant du frein est allumé 5 4 ACTIVATION DESACTIVATION DU MECANISME DE TONTE 5 4 1 ACTIVATION DU MECANISME DE TONTE Déplacez le levier d accélération en position MAX Utilisez le levier de ré...

Страница 135: ...NDUIRE LA MACHINE Avertissement général avant conduite Assurez vous que le frein de parking est désenclenché Le levier du frein de parking ne doit pas rester en position 2 4 2 Le frein de parking est automatiquement désenclenché lorsque la pédale de frein de service est enfoncée Le levier de bypass doit être en position 1 le bypass doit être désactivé Lorsque vous conduisez sur la surface à tondre...

Страница 136: ...ui reduit la qualité de coupe et le tube d évacuation se bouche Dans de telles conditions vous devez régler le moteur à son régime maximum Si le gazon est très haut vous devez le tondre en plusieurs fois Effectuez la première tonte à la hauteur maximum ou en réduisant la largeur entre deux passages Effectuez ensuite une deuxième tonte à la hauteur désirée Dans le cas du hachage avec le mécanisme d...

Страница 137: ...ulissantes du couvercle en allongeant ou raccourcissant le bras 1 Pièce coulissante tirée remplissage du panier minimum 2 Pièce coulissante enfoncée remplissage du panier maximum 5 6a Procédure de vidage Conduisez la machine à l endroit où vous souhaitez décharger le récupérateur d herbe Arrêtez la machine et utilisez le frein Si vous êtes en pente utilisez le frein de parking Coupez le mécanisme ...

Страница 138: ...èces usées et endommagées doivent être remplacées à temps Utilisez toujours des pièces de rechange d origine D autres pièces de rechange pourraient endommager la machine et engendrer des risques corporels pour le conducteur et les autres personnes en plus d annuler la garantie Pour commander des pièces de rechange contactez toujours le fabricant ou tout autre établissement agréé ...

Страница 139: ...age des vis Contrôle de la tension de la courroie synchrone qui fait tourner les lames 4 Contrôle de la tension de la courroie en V de la transmission du mécanisme de tonte 4 Contrôle et réglage du jeu de l axe avant et de la direction Contrôle du fonctionnement des dispositifs et organes de sécurité Contrôle et réglage du fonctionnement du moteur de la transmission et des contacteurs électromagné...

Страница 140: ...ouchon de remplissage Dévissez la jauge essuyez la réinsérez la et revissez la en place Dévissez la à nouveau et contrôlez le niveau d huile Le niveau d huile doit se trouver entre les deux repères sur la jauge Si ce n est pas le cas ajoutez de l huile moteur jusqu à atteindre le repère FULL D autres informations concernant le contrôle et le remplissage de l huile sont données dans le manuel fourn...

Страница 141: ...ntenance correcte et régulière permet d augmenter la durée de vie de la batterie Vous devez donc la contrôler conformément au manuel d instructions fourni par son fabricant Maintenez les contacteurs de la batterie propres S ils sont sales nettoyez les en suivant les instructions du fabricant L interruption du circuit causée par l oxydation des contacts peut conduire à un dysfonctionnement de la fo...

Страница 142: ...un centre de collecte Ne jetez jamais les huiles usagées avec les déchets ménagers et ne les déversez jamais dans les égouts avec les ordures ou dans la terre MAINTENANCE DU FILTRE A AIR Ne laissez jamais tourner le moteur sans filtre à air Cela userait prématurément le moteur Effectuez la maintenance du filtre à air conformément aux prescriptions fournies par le fabricant du moteur MAINTENANCE DE...

Страница 143: ...oules halogènes appuyez d abord sur l oblet 1 et faites sortir l ampoule de la douille 2 Pour l installation procédez dans l ordre inverse 6 3 3b 6 3 4 REMPLACEMENT DES FUSIBLES Si un fusible grille le moteur se coupe immédiatement le mécanisme de tonte s arrête et tous les témoins du tableau de bord s éteignent Dans ce cas il est nécessaire de rechercher quel fusible a grillé et de le remplacer p...

Страница 144: ...ement qui protègent le mécanisme de tonte Si elles sont endommagées remplacez les immédiatement Il vous en a été fourni avec la machine 6 3 6b Après avoir contrôlé l équilibrage et les goupilles de cisaillement reboulonnez les lames en place Lors de l installation assurez vous que les lames ne soient pas montées à l envers à l intérieur du cache du mécanisme de tonte N intervertissez pas la lame d...

Страница 145: ...sme de tonte doit être à la bonne hauteur par rapport au sol et chaque côté du mécanisme doit être de niveau Avant le réglage Placez la machine sur une surface parfaitement plane gonflez les pneus à la bonne pression 80 140 kPa 10 kPa entre chaque pneus et sécurisez la machine contre les mouvements intempestifs avec une cale par exemple Placez le levier de réglage en hauteur du mécanisme de tonte ...

Страница 146: ...ression 3 de la courroie à A 45 1 mm en utilisant la bielle de compression avec l écrou 4 Comprimer le ressort de la courroie d entraînement du mécanisme de coupe 5 à B 135 1 mm mm en position 7 en utilisant à nouveau la bielle de compression avec l écrou 6 6 3 8 6 3 9 MECANISME DE TONTE REGLAGE DE LA COURROIE SYNCHRONE DES LAMES Machines AJ 102 AJ102 4x4 AG 122 Placez le mécanisme de tonte en pos...

Страница 147: ...s blesser en les retirant Retirez la courroie en V de la poulie du contacteur électromagnétique 6 3 10e Inclinez lentement le mécanisme de tonte sur un côté de la machine 6 3 10f 6 3 11 MAINTENANCE DE LA DIRECTION Contrôlez régulièrement qu il n y ait pas de jeu excessif entre la crémaillère et le pignon S il le jeu est trop grand réduisez le 6 3 11 Le fait d ignorer cette opération de maintenance...

Страница 148: ...e 6 3 14 Pour le remontage de la roue effectuez les mêmes opérations dans le sens inverse Avant d installer la roue nettoyez toutes les pièces et graissez légèrement l arbre Pour les roues arrière spécialement cette graisse est indispensable pour que vous puissiez ultérieurement à nouveau retirer les roues Si l arbre n est pas graissé le montage risque d être difficile Lorsque vous installez une r...

Страница 149: ...e centrale 30 3 Nm Ecrous M12 pour les poulies de transmission du mécanisme de tonte 45 55 Nm Boulon 10x25 KL 100 RIPP pour l épaulement de la poulie de tension de la courroie de transmission du mécanisme de tonte 55 65 Nm Direction Boulon M8x30 de la direction 15 25 Nm Boulon M12 de la direction 35 45 Nm Moteur Boulon du contacteur électromagnétique 60 70 Nm Vis de la poulie de tension de la cour...

Страница 150: ... toute responsabilité pour les dommages résultant d une mauvaise exécution par l utilisateur d opérations de maintenance qui lui sont interdites Problème Solution La machine tond de manière non uniforme Retirez les résidus coincés sous le mécanisme de tonte Assurez vous que les lames soient affûtées et non déformées Contrôlez le serrage des lames Contrôlez le réglage en hauteur du mécanisme de ton...

Страница 151: ...ndommagé La courroie de transmission du mécanisme de tonte s use excessivement Contrôlez toutes les zônes du guide de la poulie Contrôlez que le mouvement de la courroie ne soit pas arrêté par un corps étranger Si c est la cas retirez l objet Contrôlez les poulies si elles sont endommagées remplacez les Contrôlez la hauteur de tonte et réglez la si nécessaire Contrôlez la tension de la courroie 6 ...

Страница 152: ... rotule Remplacez les joints si nécessaire Le moteur ne démarre pas Contrôlez la présence d essence dans le réservoir Vérifiez d avoir bien suivi la procédure de mise en route du moteur 5 2 Contrôlez les fusibles Remplacez si nécessaire Contrôlez que la tension de la batterie soit bien de 12 V Sur une machine neuve assurez vous que la batterie a été mise en place et rechargée Sur les machines neuv...

Страница 153: ...nte 6 2 2 N utilisez pas de pétrole pour le nettoyage Utilisez un agent dégraissant et de l eau chaude Remettez en état et repeignez les zônes où la peinture est écaillée pour éviter la corrosion Retirez et remplacez toutes les pièces défectueuses et usées et resserrez les écrous et boulons desserrés Préparez le moteur pour l entreposage conformément au manuel utilisateur du moteur Lubrifiez tous ...

Страница 154: ... l environnement telles que les pièces en caoutchouc rondelles les résidus de lubrifiant sur les roulements ou les engrenages Les composants nocifs pour l environnement doivent être mis au rebut conformément à la réglementation de gestion des déchets applicable dans le pays de l utilisateur Pour la République Tchèque par exemple il s agit de la loi No 185 2001 Coll Séparez les rebuts conformément ...

Страница 155: ...5 para 2 NV No 176 2008 Coll La Directive Européenne No 2004 108 CE Article 7 equ 4 para 1 NV No 616 2006 Coll La Directive Européenne No 2000 14 CE Annexe VIII equ annexe 7 NV No 9 2002 Coll sous la supervision d une personne avisée LRQA No d enregistrement No 0088 Hiramford Middlemarch Office Village Siskin Drive Coventry CV3 4FJ Royaume Uni E Nous confirmons que cette machine comme défini dans ...

Страница 156: ... dans La Directive Européenne No 2006 42 CE Article 5 équ 5 para 2 NV No 176 2008 Coll La Directive Européenne No 2004 108 CE Article 7 equ 4 para 1 NV No 616 2006 Coll La Directive Européenne No 2000 14 CE Annexe VIII equ annexe 7 NV No 9 2002 Coll sous la supervision d une personne avisée LRQA No d enregistrement No 0088 Hiramford Middlemarch Office Village Siskin Drive Coventry CV3 4FJ Royaume ...

Страница 157: ...mément aux procédures décrites dans La Directive Européenne No 2006 42 CE Article 12 paragraphe 2 equ 5 para 2 NV No 176 2008 Coll La Directive Européenne No 2004 108 CE Article 7 equ 4 para 1 NV No 616 2006 Coll La Directive Européenne No 2000 14 CE Annexe VIII equ annexe 7 NV No 9 2002 Coll sous la supervision d une personne avisée LRQA No d enregistrement No 0088 Hiramford Middlemarch Office Vi...

Страница 158: ...088 Hiramford Middlemarch Office Village Siskin Drive Coventry CV3 4FJ United Kingdom E Evaluation de conformité effectuée par un laboratoire accrédité Laboratoire de test accrédité nº 1054 Státní zkušebna zemědělských lesnických a potravinářských strojů a s Molákova 622 11 163 04 Prague 8 République tchèque F Nous confirmons que cette machine comme défini dans les données fournies est conforme au...

Страница 159: ... insieme alla macchina in caso di vendita Per eventuali dubbi o chiarimenti si rivolga senza esitazioni a uno tra i nostri oltre 100 centri di assistenza autorizzati dotati di tutte le idonee apparecchiature sparsi in tutta Europa La metteranno in contatto con consulenti dell assistenza formati presso la fabbrica e sottoposti a test Simboli usati nel manuale SIMBOLO SIGNIFICATO Questi simboli sign...

Страница 160: ...la pendenza non deve superare i 15 27 Qualsiasi uso della falciatrice semovente non indicato nel presente manuale o che ecceda il campo d utilizzo indicato è ritenuto un uso in violazione dello scopo previsto L utilizzatore si assume l esclusiva responsabilità per ogni uso di tale tipo e il produttore non è responsabile dei danni che ne possano derivare L utilizzatore deve inoltre rispettare le co...

Страница 161: ...a Il contenitore dell erba è posto sul retro della macchina e si compone di un telaio a tubo d acciaio un sacco di tessuto e una leva di scarico 8 Area del guidatore Il comodo sedile consente di accedere facilmente a tutti i comandi della macchina 9 Cofano motore cablaggio e batteria Il cofano è composto da un insieme di coperture di plastica e metallo che proteggono adeguatamente le parti elettri...

Страница 162: ... Attenzione agli oggetti volanti Leggere il manuale Non tagliare nei pressi di altre persone Divieto di persone a bordo Non guidare lungo una pendenza Tenere a distanza di sicurezza le persone non autorizzate Spostamento dell aletta del pacciame Max pendenza operativa È severamente vietato rimuovere o danneggiare etichette o simboli applicati alla falciatrice Se risultano danneggiati o illeggibili...

Страница 163: ...300 360 a seconda del tipo di macchina 360 300 360 a seconda del tipo di macchina Senza contenitore di deposito Dimensioni delle ruote Anteriori 16 x 6 50 8 Posteriori 20 x 10 8 Capacità del serbatoio del carburante l 7 5 13 15 a seconda del tipo di macchina 13 15 in base al tipo 13 15 a seconda del tipo di macchina 7 5 13 15 a seconda del tipo di macchina Livello di uscita acustica garantito LWA ...

Страница 164: ...ferite a braccio ahvd secondo EN 1033 A1 Falciatrice AJ102 4x4 Motore giri min 100 min 1 Livello di emissione di rumore dichiarato presso l operatore LpAd dB secondo EN ISO 11201 Livello di uscita acustica garantito LWA dB Valore aggregato di accelerazione delle vibrazioni m s 2 vibrazioni totali avd trasferite al braccio ahvd BS23 2800 86 4 100 0 9 0 5 2 5 BS24I 2800 84 1 8 100 1 0 0 4 2 7 1 4 Fa...

Страница 165: ...iene utilizzata correttamente e secondo le indicazioni del presente manuale è estremamente sicura Se l utilizzatore non rispetta la sicurezza sul lavoro e non tiene conto delle avvertenze riportate nel presente manuale la falciatrice semovente può recidere mani e piedi o perfino lanciare violentemente oggetti provocando gravi lesioni personali o morte danni o distruzione della macchina o di alcune...

Страница 166: ...tamente la macchina o spegnerne il motore Non modificare le impostazioni del regolatore o del limitatore di velocità del motore Prima di lavorare con la macchina occorre liberare la superficie della falciatrice da ogni materiale pietre legno fili ossi rami caduti e altri oggetti estranei che la macchina potrebbe scagliare durante il funzionamento Correggere ogni problema prima di ogni ulteriore ut...

Страница 167: ... falciatrice per scopi diversi da quelli previsti 2 1 4 Dopo il lavoro con la macchina Curare sempre che la macchina e i relativi accessori siano puliti e in perfette condizioni operative Le lame rotanti sono affilate e possono causare lesioni Quando si manipolano le lame avvolgerle con del materiale coprente o indossare guanti protettivi Controllare regolarmente i dadi e i bulloni che trattengono...

Страница 168: ... Attendere che il motore della falciatrice si raffreddi prima di depositarla in uno spazio chiuso Utilizzare la massima prudenza quando si lavora con benzina olio e altre sostanze infiammabili Si tratta di materiali facilmente infiammabili i cui fumi possono provocare esplosioni Non fumare durante il lavoro Non svitare mai il tappo del carburante e non aggiungere carburante mentre il motore è in f...

Страница 169: ... materiale di imballaggio Osservi le norme sullo smaltimento dei rifiuti vigenti nel paese di utilizzo Lo smaltimento può essere affidato a una ditta specializzata 3 3 MONTAGGIO DELLE UNITÀ IMBALLATE Trattandosi di un operazione tecnica il rivenditore predisporrà la falciatrice per il funzionamento in base alla seguenti istruzioni Prima di iniziare l installazione rimuova tutto il materiale protet...

Страница 170: ...e Nei capitoli successivi sarà descritto a grandi linee il processo di montaggio illustrato integralmente sul DVD incluso o che verrà inviato su richiesta UTENSILI NECESSARI Per montare il contenitore preparare i seguenti utensili Una taglierina per rimuovere il materiale di imballaggio Un set di chiavi a brugola ed esagonali Cacciaviti a stella e un avvitatore manuale elettrico DISIMBALLAGGIO Rim...

Страница 171: ...izzando bulloni e dadi M5x25 Fare attenzione a non invertire il perno sinistro e il destro Il fermo sinistro è contrassegnato chiaramente con una L 3 3 2f Avvitare i montanti laterali del contenitore dell erba I montanti sono fissati al lato interno del contenitore dell erba per mezzo di dadi e bulloni M5x16 3 3 2g Per il contenitore sul modello da 360 litri saltare questo punto i fermi laterali s...

Страница 172: ... dell erba e appenderlo ai ganci sulla piastra posteriore della macchina Controllare che coincida con i parafanghi Correggere ogni disequilibrio allentando i bulloni del tubo anteriore e o i bulloni sui fermi laterali pareggiando e quindi serrando di nuovo i bulloni Su un contenitore dell erba correttamente regolato lo spazio tra la piastra posteriore della macchina e il tubo anteriore 3 3 3 2c no...

Страница 173: ...ne Inserire l imbuto nella bocchetta di rifornimento e versare il carburante da una tanica Dopo aver riempito il serbatoio asciugare sempre completamente il tappo e l area circostante È opportuno controllare le linee del livello di carburante Si consiglia inoltre di pulire regolarmente lo stesso serbatoio perché eventuali contaminanti nel carburante possono causare la rottura del motore 3 4 4 CONT...

Страница 174: ...lare attenzione ai punti di connessione di tubi e indotti Se viene rilevata una perdita informare il centro assistenza 4 CONTROLLO DELLA MACCHINA 4 1 DISPOSIZIONE DEI COMANDI 4 1a 1 Leva dell acceleratore 2 Indicatore del freno a pedale e del freno di stazionamento 3 Interruttore di controllo del taglio quando il contenitore dell erba è pieno 4 Interruttore per il meccanismo di taglio 5 Interrutto...

Страница 175: ... questa ragione questa posizione è prevista soltanto per l utilizzo a breve termine per completare la falciatura di aree restanti molto piccole Se la macchina è munita di un indicatore acustico dispositivo di segnalazione acustica questo si attiva automaticamente quando il cestino è pieno Nella posizione AUT il taglio si disattiva automaticamente nel momento in cui contenitore dell erba risulta pi...

Страница 176: ... il freno di stazionamento La pressione del freno a pedale disinnesta il freno di stazionamento rilasciando automaticamente la leva e spostandola nella posizione 1 8 LEVA DEL COPERCHIO DEL PACCIAME Questa leva ha due funzioni 1 Produzione di pacciame i frammenti d erba sono sparsi sotto la falciatrice 2 Raccolta dell erba i frammenti d erba sono raccolti nel contenitore dell erba Quando si trasfer...

Страница 177: ...te proporzionale alla pressione sul pedale Se si rilascia il pedale torna automaticamente in folle e la macchina si arresta Per maggiori dettagli 5 5 ATTENZIONE Un cambiamento di direzione in avanti indietro è possibile solo dopo l arresto della macchina 10 PEDALE RETROMARCIA Questo pedale controlla le ruote di trazione e regola il movimento indietro della macchina La velocità della macchina è dir...

Страница 178: ...to della macchina a motore spento È possibile che se si tenta tale movimento l asse anteriore si sovraccarichi e possa subire danni In caso di spostamento della macchina con il motore spento spingere sempre con l asse anteriore sollevato La leva di esclusione serve essenzialmente per spurgare l impianto idraulico Considerata la complessità della struttura è preferibile far eseguire tali riparazion...

Страница 179: ...a Se l orologio delle ore di movimento è fuori servizio contattare immediatamente l assistenza 4 CONTROLLO DELLA VELOCITÀ DI CROCIERA Il controllo della velocità di crociera serve solo per corse lunghe e diritte Il controllo della velocità di crociera deve essere disattivato prima di ogni cambio di direzione Il controllo della velocità di crociera è attivo solo quando è inserita l accensione Il co...

Страница 180: ...lle macchine a motore aprire il tappo del carburante solo su macchine con motori 15 5 hp BS15 d Impostare nel seguente modo la leva dell acceleratore Su macchine con motori bicilindrici sulla posizione STARTER ACCENSIONE Su macchine con motori monocilindrici sulla posizione MAX e Estrarre l avviamento solo su motori con almeno 16 hp f Ruotare la chiave sulla posizione Start engine Avvio motore per...

Страница 181: ...re dalla macchina con il motore in funzione il meccanismo di taglio è disinserito la leva di controllo del carburante è sulla posizione MIN la marcia è in folle e il freno di stazionamento è attivato la spia dell indicatore del freno è accesa 5 4 INSERIMENTO E DISINSERIMENTO DEL MECCANISMO DI TAGLIO 5 4 1 INSERIMENTO DEL MECCANISMO DI TAGLIO Spostare la leva dell acceleratore sulla posizione MAX U...

Страница 182: ...o 6 3 7 MECCANISMO DI TAGLIO ISPEZIONE A ALLINEAMENTO del presente manuale 5 5 MARCIA DELLA MACCHINA Avvertenze generali prima della marcia Verificare che il freno di stazionamento sia disinnestato La leva del freno di stazionamento non deve restare in posizione 2 4 2 Il freno di stazionamento viene rilasciato automaticamente quando si preme il freno di servizio a pedale La leva di esclusione deve...

Страница 183: ...scono i giri al minuto delle lame con conseguente riduzione della qualità del taglio e si potrebbe ostruire il tubo di rimozione In tali condizioni occorre impostare sempre il motore al valore massimo di giri al minuto Se l erba è molto alta deve essere tagliata più volte Eseguire il primo taglio all altezza massima o a un ampiezza di striscia minore Eseguire il secondo taglio all altezza desidera...

Страница 184: ...può regolare utilizzando le parti scorrevoli del coperchio allungando o accorciando il braccio 1 Parte scorrevole ritratta riempimento minimo del cestello 2 Parte scorrevole protratta riempimento massimo del cestello 5 6a Processo di svuotamento Condurre la macchina sul luogo dove si desidera svuotare il contenitore dell erba Arrestare la macchina e innestare il freno Se ci si trova su una pendenz...

Страница 185: ...ione e regolazione della cinghia di trasmissione 4 Controllare il comando del freno Ispezionare la pressione dei pneumatici Controllare i collegamenti dei cavi connettori allentati Pulire il meccanismo di taglio Controllare le connessioni delle viti Controllare la tensione della cinghia dentata che fa ruotare le lame 4 Controllare la tensione della cinghia trapezoidale del motore del meccanismo di...

Страница 186: ...di rifornimento Svitare l astina pulirla reinserirla e riavvitarla Quindi svitarla di nuovo e leggere il livello dell olio Il livello dell olio deve trovarsi tra i due segni presenti sull astina In caso contrario aggiungere olio motore fino a raggiungere il segno FULL PIENO Ulteriori informazioni sul controllo e il rabbocco dell olio sono riportate in un manuale a parte fornito dal produttore del ...

Страница 187: ...ERIA Una manutenzione corretta e regolare aumenta la durata della batteria Pertanto occorre controllarla secondo quanto indicato nel manuale di istruzioni della batteria fornito dal produttore Mantenere puliti i contatti della batteria Se si sporcano o si corrodono occorre pulirli secondo le istruzioni del produttore L interruzione del circuito a causa dell ossidazione dei contatti può causare mal...

Страница 188: ...i rifiuti domestici e non versarlo in fognature nell immondizia o sul terreno MANUTENZIONE DEL FILTRO DELL ARIA Non far mai funzionare il motore senza il filtro dell aria per evitare che si usuri più rapidamente Eseguire la manutenzione del filtro dell aria secondo le istruzioni indicate nel manuale fornito dal produttore del motore MANUTENZIONE DELLA CANDELA D ACCENSIONE Per ottenere un funzionam...

Страница 189: ...na fuori dalla presa 2 Per l installazione procedere in sequenza inversa 6 3 3b 6 3 4 SOSTITUZIONE DI FUSIBILI Se si brucia un fusibile il motore si spegne immediatamente il meccanismo di taglio si arresta e tutti gli indicatori del pannello degli strumenti si spengono In tale eventualità occorre individuare il fusibile bruciato e sostituirlo Non sostituire mai un fusibile guasto con uno di un val...

Страница 190: ...proteggono il meccanismo di taglio Se i perni di sicurezza risultano danneggiati occorre sostituirli immediatamente I perni di ricambio sono forniti in dotazione con la macchina 6 3 6b Dopo aver controllato l equilibratura e i perni di sicurezza avvitare di nuovo le lame Al momento dell installazione verificare che le lame non siano rivolte verso l alto all interno della copertura del meccanismo d...

Страница 191: ...aglio all altezza giusta dal terreno e ogni lato del meccanismo deve essere livellata Prima della regolazione Sistemare la macchina su una superficie perfettamente piana gonfiare tutti gli pneumatici al valore nominale indicato 80 140 kPa 10 kPa tra i singoli pneumatici e bloccare l intera macchina perché non si muova ad esempio con cunei adatti ecc Impostare la leva del meccanismo di taglio sulla...

Страница 192: ...la cinghia a A 45 1 mm utilizzando il tirante di allungamento con dado 4 Allungare la molla della cinghia di trasmissione del meccanismo di taglio 5 a B 135 1 mm in posizione 7 ancora una volta utilizzando il tirante di allungamento con dado 6 6 3 8 6 3 9 MECCANISMO DI TAGLIO REGOLAZIONE DELLA CINGHIA DI TRASMISSIONE DENTATA DELLE LAME Macchine AJ 102 AJ102 4x4 AG 122 Impostare il meccanismo di ta...

Страница 193: ...i mani o dita Togliere la cinghia trapezoidale dalla puleggia del connettore elettromagnetico 6 3 10e Far scorrere lentamente il meccanismo di taglio su un lato della macchina 6 3 10f 6 3 11 MANUTENZIONE DELLO STERZO Controllare periodicamente per vedere se non vi sia gioco eccessivo tra la cremagliera e il pignone In tal caso occorrerà ridurlo 6 3 11 Se non si provvede a questo intervento di manu...

Страница 194: ...ori sull assale è presente una molla 6 3 14 Quando si riposizione la ruota eseguire le fasi di montaggio in ordine inverso Prima di installare la ruota pulire tutte le parti e ingrassare leggermente l assale Tale ingrassaggio è indispensabile particolarmente per le ruote dell asse posteriore nel caso di una successiva rimozione della ruota Se l assale non è ingrassato un successivo montaggio potre...

Страница 195: ... Dadi M12 per le pulegge di trazione del meccanismo di taglio 45 55 Nm Bullone 10x25 KL 100 RIPP per lo spallamento della puleggia di tensionamento della cinghia di trasmissione del meccanismo di taglio 55 65 Nm Sterzo Dal bullone M8x30 alla sezione di sterzo 15 25 Nm Dal bullone M12 alla sezione di sterzo 35 45 Nm Motore Dal bullone al connettore elettromagnetico 60 70 Nm Vite di staffa per la pu...

Страница 196: ...ulta corretta adattarla Controllare la tensione delle cinture 6 3 8 e 6 3 9 Se occorre regolare la tensione Controllare che l asta della lama non sia danneggiata o estremamente usurata e in tali casi sostituirla Resta non tagliata una striscia tra i rotori delle lame Controllare eventuali danni ai cuscinetti Riparare o sostituire se occorre Quando si taglia erba spessa o con una superficie eccessi...

Страница 197: ...stano in ritardo Controllare la tensione della cinghia 6 3 8 Se occorre regolare la tensione Se non è possibile serrare ulteriormente la cinghia a causa di una notevole usura procedere alla sostituzione Controllare se il movimento della cinghia sia impedito da un oggetto estraneo In tal caso rimuovere l oggetto Controllare il funzionamento del connettore elettromagnetico per verificare se si disat...

Страница 198: ...e macchine nuove togliere le candele e verificare che non si sia accumulato olio sulla punta a causa di una manipolazione non corretta Verificare se tutti i connettori a filo siano a posto e che gli interruttori dell impianto elettrico funzionino Eseguire le prove sul motore esattamente come descritto nel manuale per l utente fornito dal produttore Incaricare un officina del settore di eseguire le...

Страница 199: ...rchio nella bocchetta di riempimento e caricarla completamente Le batterie scariche possono congelare ed esplodere Se occorre depositare la batteria in un ambiente asciutto e freddo Ricaricare la batteria ogni 30 giorni e controllare regolarmente la sua ricarica Coprire la falciatrice con un panno e depositarla in un locale pulito e asciutto La prassi migliore per mantenere la macchina nelle migli...

Страница 200: ...eqv 5 par 2 NV N 176 2008 Coll Direttiva del consiglio N 2004 108 CE Articolo 7 eqv 4 par 1 NV N 616 2006 Coll Direttiva del Consiglio N 2000 14 CE Appendice VIII eqv appendice 7 NV N 9 2002 Coll sotto la vigilanza di una persona notificata Registrazione LRQA N 0088 Hiramford Middlemarch Office Village Siskin Drive Coventry CV3 4FJ Regno Unito E Si conferma che la presente macchina secondo la defi...

Страница 201: ...a del consiglio N 2006 42 CE Articolo 5 eqv 5 par 2 NV N 176 2008 Coll Direttiva del consiglio N 2004 108 CE Articolo 7 eqv 4 par 1 NV N 616 2006 Coll Direttiva del Consiglio N 2000 14 CE Appendice VIII eqv appendice 7 NV N 9 2002 Coll sotto la vigilanza di una persona notificata Registrazione LRQA N 0088 Hiramford Middlemarch Office Village Siskin Drive Coventry CV3 4FJ Regno Unito La conformità ...

Страница 202: ... conformità secondo le procedure descritte in Direttiva del Consiglio N 2006 42 CE Articolo 12 comma 2 eqv 5 par 2 NV N 176 2008 Coll Direttiva del consiglio N 2004 108 CE Articolo 7 eqv 4 par 1 NV N 616 2006 Coll Direttiva del Consiglio N 2000 14 CE Appendice VIII eqv appendice 7 NV N 9 2002 Coll sotto la vigilanza di una persona notificata Registrazione LRQA N 0088 Hiramford Middlemarch Office V...

Страница 203: ...fice Village Siskin Drive Coventry CV3 4FJ Regno Unito E Verifica di conformità eseguita da un laboratorio accreditato Laboratorio di collaudi accreditato No 1054 Státní zkušebna zemědělských lesnických a potravinářských strojů a s Molákova 622 11 163 04 Praga 8 Repubblica Ceca F Si conferma che la presente macchina secondo la definizione che emerge dai dati forniti è conforme ai requisiti prescri...

Страница 204: ...m dan contact op met één van onze meer dan 100 geautoriseerde goeduitgeruste onderhoudsdiensten in heel Europa Hier werken onderhoudsprofessionals die door de fabriek zijn opgeleid en getest Symbolen die in deze handleiding worden gebruikt SYMBOOL BETEKENIS Deze symbolen betekenen VOORZICHTIG en WAARSCHUWING en duiden op factoren die de machine kunnen beschadigen en of ernstig letsel bij de gebrui...

Страница 205: ...n de omstandigheden die beschreven zijn door de fabrikant voor het gebruik onderhoud en reparatie van deze machine die alleen mag alleen worden gebruikt onderhouden en gerepareerd door personen die ermee bekend zijn en die geïnstrueerd over de veiligheidsaspecten ervan Alleen door de fabrikant goedgekeurde accessoires mogen op de machine worden gemonteerd Gebruik van niet goedgekeurde accessoires ...

Страница 206: ...nemotor die is bevestigd op het chassis Afhankelijk van het ontwerp van de machine bevindt de accu zich ofwel in een bak onder de stoel of onder de kap aan de voorzijde 1 3 TYPEPLAATJE EN ANDERE LABELS GEBRUIKT OP DE MACHINE 1 3 1 TYPEPLAATJE Elke zelfaangedreven maaier is voorzien van een specificatielabel van de fabrikant geplaatst onder de stoel U kunt er bijkomen door de stoel op te tillen 1 3...

Страница 207: ...is beschadigd of niet meer leesbaar is neem dan contact op met de dealer of de fabrikant en vraag deze het label te vervangen Labels aan de linkerzijde en de rechterzijde van de maaier 1 3 2c Voorzichtig Heet oppervlak Gevaar voor brandwonden Labels naast het onderste pedaal 1 3 2d R Achteruit N Neutraal F Voorwaarts Snel Langzaam 1 4 TECHNISCHE PARAMETERS BASISSPECIFICATIES EENHEID MAAIERMODEL AJ...

Страница 208: ...6 x 6 50 8 Achter 20 x 10 8 Capaciteit brandstoftank l 7 5 13 15 afhankelijk van het type van de machine 13 15 gebaseerd op type 13 15 afhankelijk van het type van de machine 7 5 13 15 afhankelijk van het type van de machine Gegarandeerd akoestisch uitgangsniveau LWA dB 100 105 100 Verklaard geluidemissieniveau voor de gebruiker LpAd volgens EN ISO 11201 dB 90 90 90 Accutype 12V 32 Ah BS Vanguard ...

Страница 209: ...volgens EN 1032 A1 trilling doorgegeven aan arm ahvd volgens EN 1033 A1 AJ102 4x4 Maaier Motor TPM 100 min 1 Verklaard geluidemissieniveau voor de gebruiker LpAd volgens EN ISO 11201 Gegarandeerd akoestisch uitgangsniveau LWA dB Totaalwaarde Trilling acceleratie m s 2 totale trilling avd overgedragen aan arm ahvd BS23 2800 86 4 100 0 9 0 5 2 5 BS24I 2800 84 1 8 100 1 0 0 4 2 7 1 4 AJ122 Maaier Mot...

Страница 210: ...achine op juiste wijze wordt gebruikt volgens de handleiding is de machine zeer veilig Als de gebruiker zich niet houdt aan werkveiligheid en geen aandacht besteedt aan de waarschuwingen in deze handleiding dan kan deze zelfaangedreven maaier een hand of voet afsnijden of zelfs objecten wegslingeren wat kan leiden tot ernstige verwondingen of dood schade of vernietiging van de machine of van sommi...

Страница 211: ...n van de motorafregeling of de snelheidsbegrenzer van de motor niet Voordat u met de machine gaat werken moet u alle stenen hout draden botten gevallen takken en andere objecten die door de machine tijdens het maaien zouden kunnen worden gelanceerd van het te maaien oppervlak verwijderen Verhelp alle storingen voordat u de maaier gaat gebruiken Controleer voordat u aan het werk gaat de spanning va...

Страница 212: ...or de machine voor is bedoeld 2 1 4 Na het werken met de machine Onderhoud de machine en de accessoires goed en houd alles altijd schoon De roterende messen zijn scherp en kunnen verwondingen veroorzaken Draag beschermende handschoenen wanneer u de messen hanteert Controleer regelmatig de moeren en bouten waarmee de messen vastzitten en controleer of zij met de juiste hoeveelheid aanzetmoment zijn...

Страница 213: ...en Zij zijn zeer brandbaar en ook de dampen ervan zijn explosief Rook niet terwijl u werkt Verwijder de tankdop niet en voeg geen brandstof toe als de motor draait of warm is of als de machine in een afgesloten ruimte staat Controleer voordat u aan het werk gaat de doorstroming van de brandstof vult de brandstoftank niet tot in de hals Warmte van de motoren zon en uitzetting van de brandstof kunne...

Страница 214: ...BLEREN VAN VERPAKTE ONDERDELEN Omdat het werk enige technische aanleg vraagt zal uw dealer de maaier klaarmaken voor gebruik volgens de hieronderstaande instructies Verwijder voor u begint met de installatie alle beschermende materialen plaats de maaier op een vlakke ondergrond en richt de voorwielen in een voorwaartse positie 3 3 1 STUURWIEL STOEL EN ACCU a Bevestig de stoel Plaats de stoel op de...

Страница 215: ...we schets van de assemblage Het complete proces wordt getoond op de DVD die is bijgesloten of op verzoek kan worden toegezonden BENODIGD GEREEDSCHAP Breng het volgende gereedschap in gereedheid voor het assembleren van de opvangbak Een mes voor het verwijderen van het verpakkingsmateriaal Een set moersleutels en dopsleutels Phillips schroevendraaiers of een elektrische schroevendraaier UITPAKKEN V...

Страница 216: ... en moeren Verwissel vooral niet de linker en de rechterbeugel De linkerbeugel is duidelijk gemarkeerd met een L 3 3 2f Schroef de zijsteunen op de grasopvangbak De steunen worden op de binnenzijde van de grasopvangbak bevestigd met M5x16 bouten en moeren 3 3 2g Dit geldt niet voor de opvangbak van het 360 liter model de zijbeugels zijn voorgemonteerd Schroef de onderste buis vast aan het frame U ...

Страница 217: ...rplaat van de machine Controleer dat de opvangbak goed aan de spatschermen past Corrigeer een eventuele onbalans door de bouten in de voorste buis en of de bouten in de zijbeugels los te draaien de stand te wijzigen en de bouten weer vast te draaien Bij een goed afgestelde grasopvang is de ruimte tussen de achterplaat van de machine en de voorste buis 3 3 3 2c niet meer dan 5 mm Als u de opvangbak...

Страница 218: ...der de dop van de brandstoftank Draai de dop langzaam los want de tank kan benzinedampen onder druk bevatten Plaats de trechter in de vulopening en giet de brandstof uit een jerrycan Veeg na het vullen van de tank altijd de dop en de omgeving van de vulopening altijd schoon U kunt het brandstofniveau aflezen aan de strepen Wij bevelen aan de tank zelf regelmatig te reinigen omdat verontreinigingen...

Страница 219: ...IGINGEN VAN HET HYDRAULISCH CIRCUIT CONTROLEREN Voer een visuele inspectie uit van het hydraulische systeem en let op lekkage Let vooral goed op plaatsen waar leidingen en onderdelen zijn verbonden Neem contact op met het servicecentrum wanneer u lekkage ontdekt 4 DE MACHINE AFREGELEN 4 1 LAYOUT VAN DE BEDIENINGSFUNCTIES 4 1a 1 Acceleratiehendel 2 Indicator voor het rempedaal en de parkeerrem 3 Be...

Страница 220: ...m is deze stand alleen bedoeld om kort het maaien van kleine stukjes gras te voltooien Als de machine is uitgerust met een akoestische indicator zoemer dan wordt deze automatisch geactiveerd wanneer de opvangbak vol is In de stand AUT wordt het maaien automatisch uitgeschakeld op het moment dat de grasopvangbak vol is Stand Grasopvangbak is vol Maaimechanisme en versnellingsbak AUT NEE INGESCHAKEL...

Страница 221: ...aal drukt wordt de parkeerrem ingeschakeld Door op het rempedaal te drukken deactiveert u de parkeerrem wordt de hendel automatisch vrijgegeven en in stand 1 geplaatst 8 HENDEL MULCHKLEP Deze hendel heeft twee functies 1 Mulch het gemaaide gras wordt onder de gazonmaaier verspreidt 2 Grasopvang het gemaaide gras wordt opgevangen in de grasopvangbak Wanneer u de hendel verzet van de stand grasopvan...

Страница 222: ...l indrukt des te sneller gaat de machine Wanneer u het pedaal loslaat zal het automatisch terug gaan naar de neutrale stand en zal de machine stoppen Voor meer details 5 5 ATTENTIE Een voorwaartse achterwaartse verandering van richting is pas mogelijk wanneer de machine stilstaat 10 PEDAAL ACHTERUITRIJDEN Dit pedaal bedient de aangedreven wielen en regelt de achterwaartse verplaatsing Hoe dieper u...

Страница 223: ...eden van de machine aanzienlijk wanneer de motor is uitgeschakeld De vooras kan overbelast raken wanneer wordt geprobeerd de machine te verplaatsen en de as kan beschadigd raken Als de machine moet worden verplaatst met de motor uitgeschakeld duw dan altijd met de vooras omhoog De koppelingshendel wordt meestal gebruikt om het hydraulisch systeem te ontluchten Omdat het hier gaat om een gecomplice...

Страница 224: ...n Manipulatie van de teller leidt ertoe dat de garantie komt te vervallen de klok die de bedrijfsuren telt is voorzien van een verzegeling Als de klok die de bedrijfsuren telt buiten werking is meld dat dan onmiddellijk aan het servicecentrum 4 CRUISE CONTROL De cruise control wordt alleen gebruikt op lange rechte ritten De cruise control moet worden uitgeschakeld voordat u van richting verandert ...

Страница 225: ...ing 3 4 4 5 2 DE MOTOR STARTEN a Trap het rempedaal in b Plaats de hendel van de hoogteafstelling van het maaimechanisme in positie 7 c Open op gemotoriseerde machines brandstofdop alleen op machines met 15 5 pk BS15 motoren d Stel de gashendel als volgt in Op machines met een 2 cilinder motor in de stand MAX Op machines met een 1 cilinder motor in de stand STARTER e Trek de starter uit alleen op ...

Страница 226: ...ek nooit de aansluiting van de accukabels terwijl de motor loopt Hierdoor zou het regelmechanisme van de motor beschadigd kunnen raken 5 3 1 DE MACHINE VERLATEN TERWIJL DE MOTOR DRAAIT Als u de machine even wilt of moet achterlaten om obstakels te verwijderen enz en u wilt daarna verder gaan met maaien kunt u van de machine afstappen en de motor laten draaien Dit spaart de accu Voorwaarden voor he...

Страница 227: ...j de messen beschermen tegen beschadiging Als u de kracht waarmee het maaimechanisme wordt wordt opgetild op een AG122 machine wilt verminderen kunt u de stand van de veer aan de linker kant wijzigen De fabrieksinstellingen zijn 5 4 4 HET MAAIMECHANISME UITBALANCEREN Voor de beste maairesultaten moet het maaimechanisme op de juiste hoogte worden afgesteld Het aanpassingsproces wordt uitgelegd in h...

Страница 228: ...meen geldt dat hoe natter hoger en dikker het gras is des te langzamer u moet rijden Bij een te hoge snelheid of bij zware belasting zal het toerental van de messen afnemen waardoor de maaikwaliteit afneemt en de afvoerbuis verstopt kan raken Stel onder dergelijke omstandigheden de motor in op het maximale toerental Als het gras heel hoog is moet het meerdere keren worden gemaaid Maai eerst op de ...

Страница 229: ...e mand Het vulniveau van de mand kan worden geregeld door middel van de bewegende delen van de klep langer of korter maken van de arm 1 Schuivend deel uitgetrokken minimaal vulniveau van de mand 2 Schuivend deel ingeduwd maximaal vulniveau van de mand 5 6a Leegmaken Rijd de machine naar de plaats waar u de grasopvangbak wilt legen Stop de machine en schakel de rem in Gebruik op een helling de park...

Страница 230: ...n of beschadigde onderdelen moeten tijdig te worden vervangen Gebruik alleen originele vervangende onderdelen Andere vervangende onderdelen kunnen de machine beschadigen en de gezondheid van de bestuurder andere personen in gevaar brengen en de garantie doen vervallen Neem voor het bestellen van vervangende onderdelen contact op met de fabrikant of een geautoriseerde servicevoorziening ...

Страница 231: ...ingen Controleer de spanning van de aandrijfriem van de messen 4 Controleer de spanning van de V snaar op de aandrijving van het maaimechanisme 4 Controleer de speling op de vooras en de sturing en stel af Controleer werking van de veiligheidsschakelaars en onderdelen Controleer het functioneren van de motor versnellingsbak en de elektromagnetische connectors en stel af Controleer onderhoud of ver...

Страница 232: ...p los Schroef de oliepeilstok los veeg deze schoon en plaats de peilstok weer en schroef vast Schroef de peilstok vervolgens weer los en lees het oliepeil af Het oliepeil moet tussen de twee markeringen op de peilstok staan Als dat niet het geval is vul dan bij tot de markering FULL is bereikt Verdere informatie over het controleren en verversen van olie staat vermeld in een aparte handleiding van...

Страница 233: ...e levensduur van de accu Het uitvoeren van het accuonderhoud moet worden uitgevoerd volgens de aanwijzigen in de instructiehandleiding van de fabrikant van de accu Houd de polen van de accu schoon Als deze vuil worden of corroderen maak ze dan schoon volgens de instructies van de fabrikant Een onderbreking van het circuit die wordt veroorzaakt door oxidatie van de contacten kan leiden tot een stor...

Страница 234: ...olie Gooi gebruikte olie nooit weg bij het normale afval en gooi niet in het riool bij vuilnis of in de grond ONDERHOUD VAN HET LUCHTFILTER Laat de motor nooit draaien zonder luchtfilter Dit zal snelle slijtage geven van de motor Onderhoud het luchtfilter volgens de instructies in de handleiding van de fabrikant van de motor ONDERHOUD VAN DE BOUGIE Voor een perfecte werking van de motor is het bel...

Страница 235: ...en van de lamp in omgekeerde volgorde te werk 6 3 3b 6 3 4 ZEKERINGEN VERVANGEN Als een zekering doorbrandt zal de motor onmiddellijk afslaan het maaimechanisme zal stoppen en de verlichting van alle meters op het instrumentenpaneel zal uitgaan In dat geval moet u uitzoeken welke zekering is doorgebrand en deze zekering vervangen door een nieuwe Vervang een doorgebrande zekering nooit door een zek...

Страница 236: ...chermen tegen beschadiging Vervang de splitpennen onmiddellijk als ze beschadigd zijn Er worden bij de machine reserve splitpennen geleverd 6 3 6b Zet de messen weer met de bouten vast nadat u de balans en de splitpennen hebt gecontroleerd Bij het plaatsen is het belangrijk dat de messen niet omhoog wijzen binnenin het maaimechanisme Verwissel het linker mes niet met het rechter Het rechter mes he...

Страница 237: ... de juiste hoogte vanaf de grond en elke zijde van het mechanisme moet op gelijke hoogte zijn Voorafgaand aan het afstellen Plaats de machine op een perfect vlakke ondergrond pomp alle banden tot de nominale spanning 80 140 kPa 10 kPa tussen de individuele banden en zet de machine vast zodat deze niet kan verrijden bijv met een geschikte wig enz Plaats de hendel van de hoogteafstelling van het maa...

Страница 238: ... stand 7 weer met de streksleutel met moer 6 6 3 8 6 3 9 MAAIMECHANISME DE GETANDE AANDRIJFRIEM VAN DE MESSEN AFSTELLEN Machines AJ 102 AJ102 4x4 AG 122 Zet het maaimechanisme in de laagste positie door de afstelhendel in stand 1 te zetten Draai de bout los van de kunststof kap aan de rechterkant in de rijrichting en til de kap op 6 3 9a Draai de moer van het spanmechanisme met de tandriem 3 onder...

Страница 239: ...minimum is teruggebracht Draai beide M12 moeren 1 aan op 35 45 Nm 6 3 12 DE AANDRIJFRIEM CONTROLEREN EN AFSTELLEN Controleer regelmatig de spanning van de aandrijfriem De riem heeft de juiste spanning met 4 kPa druk halverwege de poelies 1 en 3 de riem buigt ongeveer 1 5 cm door Pas de spanning aan als de riem verder doorbuigt 6 3 12a Meet de kracht met bijvoorbeeld een standaard dynamometer verkr...

Страница 240: ...sie is het absoluut noodzakelijk dat het oliepeil goed is U kunt de vulopeningen van de transmissie bereiken wanneer u de afvoerbuis 6 3 10 verwijdert U vindt de voorgeschreven waarden in de volgende grafiek Transmissietype Olietype Oliepeil TUFF TORQ K46 SAE 10W 30 API CD ten minste halve hoogte in het distributiereservoir TUFF TORQ K62 SAE 10W 30 API CD lijnen 5 7 op het distributiereservoir TUF...

Страница 241: ...terval in uren Breng vet aan op hoekverbindingen van de verbindingsstangen van de aandrijving verwijderen en smeren bout van de remstang smeer de stang bij de opening voor de bout bout voor de hefstang van het maaimechanisme smeer de stang bij de opening voor de bout hoekverbindingen van de verbindingsstangen van de stuurinrichting verwijderen en smeren hoekverbindingen van de wielpennen verwijder...

Страница 242: ...met de gashendel volledig open Wanneer u lang gras maait maai dan eerst op een aangepaste hoogte en daarna pas op de normale hoogte Houd u aan de informatie in hoofdstuk 5 5 3 Controleer de spanning van de riemen 6 3 8 en 6 3 9 Pas de spanning aan als dat nodig is Controleer vooral na het vervangen van de messen dat het mes goed is geïnstalleerd De aandrijfriem van het maaimechanisme stopt tijdens...

Страница 243: ...an als dat nodig is Controleer de riemgeleider Stel deze af als dat nodig is Controleer de poelies op beschadigingen Vervang ze als dat nodig is Controleer de ruimte tussen het koppelingsmechanisme van de aandrijving Als er afwijkingen zijn kan het zijn dat de koppelingspoelie verbogen is Vervang de poelie als dat nodig is De machine komt niet van z n plaats wanneer u op het gaspedaal drukt Contro...

Страница 244: ...d geen goed doen en het kan de oorzaak zijn van slecht functioneren van de motor Maak daarom de brandstoftank leeg Zet de grasmaaier nooit in de stalling met een volle tank in een gebouw of in een slecht geventileerde ruimte waar brandstofdampen open vuur vonken of waakvlammen een oven centrale verwarming of droge vodden enz zijn Wees voorzichtig met brandstoffen en smeermiddelen Deze zijn zeer br...

Страница 245: ...rwerk het product door de secundaire materialen te recyclen in overeenstemming met de wetgeving voor afvalverwerking Ontmantel de gehele machine Maak alle onderdelen die kunnen worden hergebruikt schoon verpak ze en sla ze op voor toekomstig gebruik Verdeel de overige onderdelen in onderdelen die ecologisch onschadelijk zijn en onderdelen die schadelijk voor het milieu zoals de rubberen onderdelen...

Страница 246: ...r 2004 108 EG Artikel 7 vgl 4 para 1 NV Nr 616 2006 Coll Richtlijn van de Raad Nr 2000 14 EG Bijlage VIII vgl bijlage 7 NV Nr 9 2002 Coll onder supervisie van een aangewezen persoon LRQA registratie nr 0088 Hiramford Middlemarch Office Village Siskin Drive Coventry CV3 4FJ Verenigd Koningrijk E Wij verklaren dat deze machine gedefinieerd is volgens de gegevens die hier staan beschreven en voldoet ...

Страница 247: ...htlijn van de Raad Nr 2006 42 EG Artikel 5 vgl 5 para 2 NV Nr 176 2008 Coll Richtlijn van de Raad Nr 2004 108 EG Artikel 7 vgl 4 para 1 NV Nr 616 2006 Coll Richtlijn van de Raad Nr 2000 14 EG Bijlage VIII vgl bijlage 7 NV Nr 9 2002 Coll onder supervisie van een aangewezen persoon LRQA registratie nr 0088 Hiramford Middlemarch Office Village Siskin Drive Coventry CV3 4FJ Verenigd Koningrijk Nalevin...

Страница 248: ...ad Nr 2006 42 EG Artikel 12 paragraaf 2 vgl 5 para 2 NV Nr 176 2008 Coll Richtlijn van de Raad Nr 2004 108 EG Artikel 7 vgl 4 para 1 NV Nr 616 2006 Coll Richtlijn van de Raad Nr 2000 14 EG Bijlage VIII vgl bijlage 7 NV Nr 9 2002 Coll onder supervisie van een aangewezen persoon LRQA registratie nr 0088 Hiramford Middlemarch Office Village Siskin Drive Coventry CV3 4FJ Verenigd Koningrijk E Wij verk...

Страница 249: ...ijk E Beoordeling van de naleving uitgevoerd door een geaccrediteerd laboratorium Geaccrediteerd testlaboratorium nr 1054 Státní zkušebna zemědělských lesnických a potravinářských strojů a s Molákova 622 11 163 04 Praag 8 Tsjechische Republiek F Wij verklaren dat deze machine gedefinieerd is volgens de gegevens die hier staan beschreven en voldoet aan de vereisten zoals deze worden beschreven in d...

Страница 250: ...da o pregunta al respecto no dude en ponerse en contacto con uno de nuestros 100 centros de servicio habilitados y equipados en toda Europa Mediante ellos podrá acceder a profesionales de servicio probados y formados en fábrica Símbolos utilizados en el presente manual SÍMBOLO SIGNIFICADO Estos símbolos significan CUIDADO y ADVERTENCIA e indican los factores que podrían dañar la máquina o provocar...

Страница 251: ...cibido la formación necesaria para operarla con toda seguridad Tan sólo los accesorios aprobados por el fabricante podrán unirse a la máquina El uso de accesorios no aprobados anulará de inmediato la garantía 1 2 PARTES PRINCIPALES DEL CORTACÉSPED Las máquinas cortacésped AJ102 AJ202 4X4 AJ110 y AG122 están formadas por los siguientes elementos básicos 1 2 1 Bastidor y parachoques El bastidor y el...

Страница 252: ...icante 9 El nivel de ruido garantizado está conforme con la normativa 2000 14 EC El vendedor deberá escribir el número de serie de su máquina en la cubierta trasera del presente manual 1 3 2 OTRAS ETIQUETAS Y SU SIGNIFICADO Las siguientes etiquetas y pegatinas se han colocado en su máquina Etiquetas en la parte izquierda del cortacésped 1 3 2a Peligro Mantenga limpio su calzado Herramientas girato...

Страница 253: ...s largo x ancho x alto mm 2400 x 1060 x 1100 2480 x 1060 x 1305 2450 x 1270 x 1200 2450 x 1140 x 1200 Peso kg 255 320 en función del tipo de máquina 319 290 302 332 en función del tipo de máquina Velocidad hacia delante hacia atrás km h 8 4 Altura de corte mm 30 90 30 80 40 100 Par de corte mm 102 122 110 Volumen del colector de césped l 300 360 en función del tipo de máquina 360 300 360 en funció...

Страница 254: ...edida min s 2 asiento rueda de dirección suelo BS15 2700 85 0 100 0 16 2 48 1 72 BS16 2800 83 1 100 0 30 1 52 0 73 BS17I 2700 86 0 100 0 94 3 34 BS18 2800 83 3 100 0 50 1 38 1 20 BS18I 2800 83 1 100 0 41 1 75 1 19 BS19I 2700 86 0 100 1 3 0 5 3 7 1 9 BS20I 2800 84 5 100 0 17 2 07 1 59 BS22I 2800 84 0 100 0 9 0 4 6 0 2 4 BS20 2800 86 0 100 0 19 2 75 1 34 BS23 2800 84 0 100 1 6 0 6 2 5 HO16 2800 85 0...

Страница 255: ...ratton 16 hp VANGUARD V TWIN BS17I Briggs Stratton 17 5 hp INTEK BS18 Briggs Stratton 18 hp VANGUARD V TWIN BS20 Briggs Stratton 20 hp VANGUARD V TWIN BS23 Briggs Stratton 23 hp VANGUARD V TWIN BS18I Briggs Stratton 18 hp INTEK BS19I Briggs Stratton 19 5 hp INTEK BS20I Briggs Stratton 20 21 hp INTEK BS22I Briggs Stratton 22 hp INTEK BS24I Briggs Stratton 24HP INTEK HO16 Honda 16 hp GCV530 TT46 TUF...

Страница 256: ...xtraño mientras comprueba los motivos de un exceso de vibraciones repare el motor u otras piezas móviles desconecte también el cable de arranque 2 1 2 Antes de utilizar la máquina No utilice la máquina si está dañada o si faltan equipos de seguridad Todas las cubiertas de protección y los elementos de seguridad deben mantenerse en su lugar en todo momento No saque ni desmonte ningún dispositivo de...

Страница 257: ...te No acerque ninguna parte de su cuerpo a las piezas giratorias o movibles de la máquina No arranque el motor sin el tubo de escape El ruido producido durante el corte no supera normalmente la presión acústica más alta y los valores de volúmenes indicados en el presente manual 1 4 No obstante en determinadas circunstancias debido a las características del terreno el nivel de ruido podrá superar b...

Страница 258: ...ocurrir un accidente trágico El movimiento de la máquina cortacésped atrae su atención No presuma nunca que los niños se quedarán en el lugar en donde los vio por última vez No deje nunca a los niños sin vigilancia en las zonas de corte Esté atento y listo para parar su máquina en caso de que se registre una emergencia Antes y durante la marcha atrás observe la parte trasera de la máquina y la tie...

Страница 259: ...piezas de la máquina Compruebe que no se registran daños de transporte Desempaquete también todas las piezas y compruébelas 3 1 1 Tapa de fábrica 2 Rampas 3 Colector de césped 4 Documentación 5 Asiento 6 Rueda de dirección El paquete básico incluye Máquina cortacésped Rueda de dirección 6 Asiento 5 Colector de césped 3 viene desmontado parcialmente en una caja de cartón con un asa conectores y dos...

Страница 260: ...a batería y fíjelo con el perno La conexión de los cables hacia atrás puede dañar la máquina Cuando desconecte la batería desconecte siempre el terminal negativo primero Cuando instale utilice y mantenga la batería siga las instrucciones descritas en el manual de la batería Del mismo modo observe todas las instrucciones de seguridad del manual 3 3 2 COLECTOR DE CÉSPED sólo con los tipos AJ102 AJ10...

Страница 261: ... TERMINOLOGÍA 1 Tapa 2 Palanca de elevación 3 Tubo inferior 4 Suspensor de esquina derecho e izquierdo 5 Suspensor inferior sólo en la versión de 300l 1x 6 Suspensores laterales 9 Asa 10 Tubo frontal 11 Bolsa malla 13 Soporte basculante de control de césped 3 3 2c INSTALAR EL COLECTOR DE CÉSPED Apriete las bisagras del colector de césped 1 y las bisagras 2 en el plato trasero 3 3 2d En algunas máq...

Страница 262: ...el asa y las arandelas laterales negras en los extremos roscados Del mismo modo introduzca la hoja metálica y otro conjunto más de arandelas en ellos Introduzca la pieza ensamblada de este modo mediante las aperturas en el soporte superior del bastidor introduzca más arandelas en los extremos roscados y fije el conjunto utilizando los pernos No las apriete por ahora 3 3 2k Fije la tapa al bastidor...

Страница 263: ...ro de la hendidura izquierda y tiene una capacidad de 7 5 litros tipos con contenedor bajo la campana o de 13 15 litros tipos con contenedor en el guardabarros de combustible Utilice sólo combustible con el índice de octanaje indicado en el manual del motor Los defectos provocados por un combustible incorrecto no están cubiertos por la garantía Llene el depósito sólo cuando el motor esté apagado y...

Страница 264: ... que la rodea utilizando un paño Limpie todo el depósito igualmente ya que la suciedad del aceite reduce la duración del filtro de aceite y puede provocar roturas 3 4 6 DESGASIFICAR EL CIRCUITO HIDRÁULICO sólo en la máquina AJ102 4x4 La desgasificación completa del circuito hidráulico se realiza durante las primeras horas de funcionamiento de la máquina Le aconsejamos que haga un rodaje de la máqu...

Страница 265: ...onamiento Indicador del pedal de freno 3 Interruptor de control de la función de corte cuando el colector de césped está lleno equipo opcional El interruptor automático o manual activa y desactiva la función de corte del mecanismo de corte cuando el colector de césped está lleno En la posición MANUAL el corte se realiza en todo momento y si el colector de césped está lleno el tubo de retirada podr...

Страница 266: ...anque 6 PEDAL DE FRENO Si pisa el pedal de freno detendrá la máquina cortacésped El pedal también se utiliza cuando se arranca la máquina que tan sólo podrá arrancar si pisa el pedal de freno 7 PALANCA DEL FRENO DE ESTACIONAMIENTO El freno de estacionamiento tiene dos posiciones En la posición 1 el freno está inactivo Cuando se coloca en la posición 2 mientras pisa el pedal de freno se activa el f...

Страница 267: ... que no le impide trabajar Para que la cubierta de corte pueda funcionar correctamente una vez que acabe el trabajo limpie todo el mecanismo de corte y descargue el tubo de desechos y sus agentes contaminantes 9 PEDAL DE DIRECCIÓN HACIA DELANTE Este pedal controla las ruedas de dirección y regula el movimiento de avance de la máquina Cuanto más cerca del suelo pulse el pedal mayor será la velocida...

Страница 268: ... de diseño no es posible desconectar la dirección del eje frontal en el cortacésped AJ 102 4x4 el sistema hidráulico no tiene una válvula de paso Esto reduce considerablemente el movimiento de la máquina cuando el motor está apagado El eje frontal podrá sobrecargarse durante dicho intento de movimiento y podrá ser dañado Si la máquina tuviese que moverse con el motor apagado empújela siempre con e...

Страница 269: ...anipulación del contador conlleva la pérdida de la garantía el reloj de horas de movimiento está unido con un sello de protección Si el reloj de horas de movimiento no está activo informe a su agencia de reparaciones de inmediato 4 CONTROL DE CRUCE El control de cruce sólo se utiliza en trayectos largos y rectos Deberá apagar el control de cruce antes de cambiar de dirección El control de cruce só...

Страница 270: ...or 3 4 1 El estado de la batería 3 4 2 El nivel de carburante 3 4 3 La presión del neumático 3 4 4 5 2 ARRANQUE DEL MOTOR a Pise el pedal de freno b Fije la palanca de altura del mecanismo de corte en la posición 7 c En las máquinas motorizadas abra la tapa del combustible sólo en las máquinas con motores 15 5 hp BS15 d Fije la palanca del acelerador tal y como sigue En las máquinas con motores de...

Страница 271: ...egulador del motor 5 3 1 DEJAR LA MÁQUINA CON EL MOTOR EN MARCHA Si desea o necesita dejar la máquina durante un tiempo para retirar obstáculos etc y ha previsto seguir trabajando tras ello podrá desmontar la máquina y dejar funcionando el motor Esto conservará la batería Condiciones para desmontar la máquina con el motor funcionando el mecanismo de corte está apagado la palanca de control del com...

Страница 272: ... de corte en una máquina AG122 cambie la anilla auxiliar a la parte izquierda Los parámetros predefinidos de fábrica son los siguientes 5 4 4 EQUILIBRIO DEL MECANISMO DE CORTE Para lograr mejores resultados de corte el mecanismo de corte deberá fijarse a la altura adecuada El proceso de ajuste se explica en el capítulo 6 3 7 MECANISMO DE CORTE INSPECCIÓN Y ALINEACIÓN del presente manual 5 5 CONDUC...

Страница 273: ...sped más baja deberá ser la velocidad de conducción aconsejada Con una velocidad de vehículo demasiado alta o una carga demasiado pesada las velocidades por minuto de las cuchillas disminuirán reduciendo la calidad del corte y pudiendo bloquear el tubo de retirada En dichas condiciones fije siempre el motor a las VPM máximas Si el césped es muy alto deberá cortarlo más de una vez Haga el primer co...

Страница 274: ... El relleno de la cesta puede regularse utilizando las piezas movibles de la tapa alargando o acortando el brazo 1 Parte movible sacada relleno mínimo de la cesta 2 Parte movible hacia dentro relleno máximo de la cesta 5 6a Proceso de vaciado Conduzca la máquina hacia el lugar en donde desea vaciar el colector de césped Detenga la máquina y ponga el freno Si se encuentra en una pendiente ponga el ...

Страница 275: ...problemas Las piezas desgastadas o dañadas deben ser sustituidas a tiempo Utilice siempre piezas de recambio originales Otras piezas de recambio podrán dañar la máquina y poner en peligro la salud del conductor y de las demás personas y cancelar la garantía Para realizar el pedido de piezas de recambio póngase siempre en contacto con el fabricante o un centro de servicio habilitado ...

Страница 276: ...de las conexiones de tuercas Comprobación de la tensión de la correa dentada que gira por las cuchillas 4 Comprobación de la tensión de la correa en V de la dirección del mecanismo de corte 4 Comprobación y ajuste del eje frontal y la dirección Comprobación del funcionamiento de los interruptores y dispositivos de seguridad Comprobación y ajuste del funcionamiento del motor transmisión y conectore...

Страница 277: ...introdúzcala y vuelva a apretarla de nuevo A continuación aflójela de nuevo y observe el nivel de aceite El nivel de aceite debe estar comprendido entre las dos marcas de la varilla De lo contrario añada aceite al motor hasta que alcance la marca COMPLETO Podrá encontrar más información sobre la comprobación y el añado del aceite en el manual independiente suministrado por el fabricante del motor ...

Страница 278: ...comprobarla de conformidad con el manual de instrucciones del fabricante de la batería Mantenga limpios los contactos de la batería Si ensucian u oxidan límpielos de conformidad con las instrucciones del fabricante La interrupción del circuito provocada por la oxidación de los contactos podrá dar lugar a problemas de funcionamiento del motor Compruebe frecuentemente los electrolitos El nivel debe ...

Страница 279: ...a del aceite utilizado con la basura habitual ni lo tire por el desagüe al campo o a la tierra MANTENIMIENTO DEL FILTRO DE AIRE No de je nunca que el motor funcione sin el filtro de aceite Esto desgastará rápidamente el motor Mantenga el filtro de aire de conformidad con las instrucciones suministradas en el manual del fabricante del motor MANTENIMIENTO DE LA BUJÍA DE ENCENDIDO Para un funcionamie...

Страница 280: ... primeramente la pestaña 1 y saque la bombilla del soporte 2 Para la instalación proceda en orden contrario 6 3 3b 6 3 4 SUSTITUCIÓN DE FUSIBLES Si falla un fusible el motor se parará de inmediato el mecanismo de corte se detendrá y todos los indicadores del panel del instrumento se oscurecerán En dicho caso deberá buscar el fusible quemado y sustituirlo por otro nuevo No cambie nunca un fusible d...

Страница 281: ...tes de reinstalar las cuchillas compruebe los pasadores de seguridad que protegen el mecanismo de corte ante los daños Si las clavijas de cizallamiento han sufrido daños cámbielas de inmediato Las clavijas de sustitución vienen con la máquina 6 3 6b Tras comprobar el equilibrio y las clavijas de cizallamiento apriete de nuevo las cuchillas Cuando las instale compruebe que las cuchillas no estén ha...

Страница 282: ...ir de la tierra y cada lado del mecanismo deberá estar nivelado Antes del ajuste Coloque la máquina en una superficie perfectamente nivelada infle todos los neumáticos con la presión indicada 80 140 kPa 10 kPa entre los neumáticos individuales y asegure todo el conjunto frente al movimiento por ej con una cuña adecuada etc Fije la palanca de altura del mecanismo de corte en la posición 2 AJUSTE DE...

Страница 283: ...zando la varilla de expansión con perno 6 6 3 8 6 3 9 MECANISMO DE CORTE AJUSTE DE LA CORREA DE DIRECCIÓN DENTADA DE LAS CUCHILLAS Máquinas AJ 102 AJ102 4x4 AG 122 Fije el mecanismo de corte en la posición más baja colocando la palanca de ajuste en la posición 1 Afloje el perno de la tapadera de plástico de la parte derecha en el sentido de la dirección y levante la cubierta aflojada 6 3 9a Bajo e...

Страница 284: ...a Afloje las dos tuercas M12 1 en el perno excéntrico En el excéntrico hexagonal 2 coloque una llave adecuada y gírela hasta reducir la fuerza al mínimo Apriete ambas tuercas M12 1 hasta 35 45 Nm 6 3 12 COMPROBACIÓN Y AJUSTE DE LA CORREA DE DIRECCIÓN Compruebe frecuentemente la tensión de la correa de dirección La correa está tensada adecuadamente cuando al ejercer 4 kPa de presión a la mitad de l...

Страница 285: ...cuda a un servicio profesional para la reparación de neumáticos para que los reparen o a un centro de servicio autorizado de máquinas cortacésped de Seco 6 3 16 MANTENER LA TRANSMISIÓN HIDROSTÁTICA Máquinas AJ102 AJ110 y AG122 Para garantizar un funcionamiento fiable de la transmisión deberá mantener el nivel de aceite adecuado Los puertos de relleno de la transmisión son accesibles tras retirar e...

Страница 286: ...nsión las poleas de dirección y el mecanismo de corte se lubrican solos Antes de guardar la máquina durante mucho tiempo lubrique todas las zonas indicadas en la gráfica Pero concretamente las mitades de ejes del eje frontal y trasero es necesario para desmontar las ruedas traseras 6 4 Símbolo Explicación grasa Aceite SAE 30 intervalo en horas Aplique la grasa a las juntas angulares de las varilla...

Страница 287: ...smo de corte empuja el césped Compruebe la tensión de las correas 6 3 8 y 6 3 9 Si es necesario ajuste la tensión Compruebe si hay rodamientos dañados Repare o sustituya si es necesario Compruebe la altura de corte y ajústela si es necesario A menudo se empuja el césped en los terrenos no uniformes Compruebe si las cuchillas están estropeadas Cambie las cuchillas si es necesario El mecanismo de co...

Страница 288: ...de servicio autorizado para repararlo o sustituirlo Compruebe la superficie interior de la polea del motor Si está gastada o rota la polea deberá cambiarse Compruebe que no se haya acumulado grasa bajo el mecanismo de corte En caso afirmativo retírela Compruebe que no haya ningún defecto en el montaje del motor Si es necesario apriete o cambie las tuercas Compruebe la tensión de la correa 6 3 8 Si...

Страница 289: ...s de recambio originales que garantizan la seguridad y la intercambiabilidad Pida siempre piezas de sustitución a través de un vendedor autorizado o una organización de reparaciones que esté informada acerca de los cambios técnicos actuales aplicados a los productos durante la producción Para facilitar una identificación más rápida y precisa de la pieza que necesita sustituir incluya siempre el nú...

Страница 290: ...tiva de la máquina el propietario será responsable de su eliminación Esto podrá hacerse de dos modos distintos a Lleve la máquina a una empresa especializada en este tipo de actividad desarmadero desguace centro de recogida de desechos secundarios etc Recibirá un recibo adecuado cuando se deshaga correctamente de su máquina b Deshágase de la máquina por sí mismo En dicho caso le aconsejamos que si...

Страница 291: ...08 Coll La Directiva del Consejo Europeo Nº 2004 108 EC Artículo 7 equiv 4 pár 1 NV Nº 616 2006 Coll Directiva del Consejo nº 2000 14 EC Anexo VIII equiv anexo 7 NV Nº 9 2002 Coll bajo la supervisión de una persona notificada Nº de registro LRQA No 0088 Hiramford Middlemarch Office Village Siskin Drive Coventry CV3 4FJ Reino Unido E Declaramos y confirmamos que esta máquina tal y como se define en...

Страница 292: ...scritos en La Directiva del Consejo Europeo Nº 2006 42 EC Artículo 5 equiv 5 pár 2 NV Nº 176 2008 Coll La Directiva del Consejo Europeo Nº 2004 108 EC Artículo 7 equiv 4 pár 1 NV Nº 616 2006 Coll Directiva del Consejo nº 2000 14 EC Anexo VIII equiv anexo 7 NV Nº 9 2002 Coll bajo la supervisión de una persona notificada Nº de registro LRQA No 0088 Hiramford Middlemarch Office Village Siskin Drive C...

Страница 293: ...edimientos descritos en La Directiva del Consejo Nº 2006 42 EC Artículo 12 párrafo 2 eq 5 pár 2 NV Nº 176 2008 Coll La Directiva del Consejo Europeo Nº 2004 108 EC Artículo 7 equiv 4 pár 1 NV Nº 616 2006 Coll Directiva del Consejo nº 2000 14 EC Anexo VIII equiv anexo 7 NV Nº 9 2002 Coll bajo la supervisión de una persona notificada Nº de registro LRQA No 0088 Hiramford Middlemarch Office Village S...

Страница 294: ...Village Siskin Drive Coventry CV3 4FJ Reino Unido E Evaluación de conformidad realizada por un laboratorio habilitado Laboratorio de pruebas habilitado nº 1054 Státní zkušebna zemědělských lesnických a potravinářských strojů a s Molákova 622 11 163 04 Praga 8 República Checa F Declaramos y confirmamos que esta máquina tal y como se define en los datos suministrados cumple con los requisitos exigid...

Страница 295: ...i musi zostać do niej dołączona w przypadku sprzedaży maszyny W przypadku pytań lub niejasności skontaktuj się z jednym ze 100 autoryzowanych doskonale wyposażonych centrów serwisowych w Europie Zapewniają one dostęp do profesjonalistów przeszkolonych w fabryce Symbole użyte w instrukcji SYMBOL ZNACZENIE Symbole te to UWAGA oraz OSTRZEŻENIE i wskazują na czynniki które mogą spowodować uszkodzenie ...

Страница 296: ...maszyny która musi być użytkowana konserwowana oraz naprawiana tylko przez osoby znające maszynę które zostały przeszkolone w zakresie bezpieczeństwa Do maszyny mogą być dołączanie tylko akcesoria zatwierdzone przez producenta Użycie innych akcesoriów powoduje natychmiastowe unieważnienie gwarancji 1 2 GŁÓWNE CZĘŚCI KOSIARKI Kosiarki AJ102 AJ202 4X4 AJ110 oraz AG122 składają się z następujących po...

Страница 297: ... produkcji 4 Ciężar 5 Nazwa i adres producenta 6 Zgodność produktu z dyrektywami WE 7 Symbol zgodności produktu 8 Logo producenta 9 Gwarantowany poziom hałasu zgodnie z Dyrektywą 2000 14 WE Sprzedawca wpisze numer seryjny maszyny na tylnej okładce niniejszej instrukcji 1 3 2 POZOSTAŁE ETYKIETY I ICH ZNACZENIE Następujące etykiety oraz naklejki zostały umieszczone na maszynie Etykiety po lewej stro...

Страница 298: ...g jałowy F Bieg w przód Szybko Wolno 1 4 PARAMETRY TECHNICZNE SPECYFIKACJA PODSTAWOWA JEDNOSTKA MODEL KOSIARKI AJ102 A102 4x4 AG122 AJ 110 Wymiary dł x szer x wys mm 2400 x 1060 x 1100 2480 x 1060 x 1305 2450 x 1270 x 1200 2450 x 1140 x 1200 Ciężar kg 255 320 w zależności od typu maszyny 319 290 302 332 w zależności od typu maszyny Prędkość do przodu do tyłu km h 8 4 Wysokość koszenia mm 30 90 30 ...

Страница 299: ...pnej stronie Kosiarka AJ102 Silnik Obr min 100 min 1 Deklarowany poziom emisji hałasu przy operatorze LpAd dla EN ISO 11201 Gwarantowany poziom ciśnienia akustycznego LWA dB Wartość drgań przy przyśpieszeniu RMS min s 2 Siedzenie Kierownica Podłoga BS15 2700 85 0 100 0 16 2 48 1 72 BS16 2800 83 1 100 0 30 1 52 0 73 BS17I 2700 86 0 100 0 94 3 34 BS18 2800 83 3 100 0 50 1 38 1 20 BS18I 2800 83 1 100...

Страница 300: ...ę w poniższych tabelach zgodnie z modelem kosiarki podanym na wewnętrznej stronie okładki niniejszej publikacji Kosiarka AJ110 Silnik Obr min 100 min 1 Deklarowany poziom emisji hałasu przy operatorze LpAd dla EN ISO 11201 Gwarantowany poziom ciśnienia akustycznego LWA dB Łączna wartość drgań przy przyspieszaniu m s 2 całkowita ilość drgań avd drgania przeniesione na ramię ahvd BS22I 2900 100 BS24...

Страница 301: ... stosować się do wszystkich zasad bezpieczeństwa 2 4 Nie wolno usuwać ostrzegawczych naklejek i etykiet z maszyny Nie wolno zbliżać się ani wchodzić pod maszynę która została podniesiona ale nie jest wystarczająco zabezpieczona przed upadkiem Wystawienie elementów kosza na trawę na przeciążenia może spowodować ich uszkodzenie obniżyć funkcjonalność lub spowodować że przedmioty będą wypadać z kosza...

Страница 302: ... mogą spowodować przewrócenie się maszyny Nie należy próbować zachować stabilności maszyny stawiając stopę na ziemi Maszynę należy używać tylko podczas dnia lub w warunkach dostatecznego oświetlenia sztucznego Nie należy jeździć maszyną po drogach publicznych Podczas obsługi maszyny nie należy nosić luźnych ubrań lub krótkich spodenek należy nosić wytrzymałe zamknięte obuwie Nie wolno obsługiwać m...

Страница 303: ...omiernie Nie należy nagle zmieniać prędkości lub kierunku jazdy Należy unikać ruszania oraz zatrzymywania się na zboczu Jeśli koła utracą przyczepność należy odłączyć mechanizm tnący i powoli zjechać ze zbocza Na zboczach należy przyśpieszać powoli i ostrożnie aby maszyna się nie chwiała Przed zboczem należy zawsze obniżyć prędkość obrotów silnika W szczególności podczas jazdy w dół należy obniżyć...

Страница 304: ... sprawdzić czy nie jest uszkodzona W przypadku uszkodzenia należy poinformować o tym firmę transportową Jeśli reklamacja nie zostanie złożona na czas nie będzie uznana Należy sprawdzić czy maszyna jest zamówionym modelem Jeśli przesłano błędny model nie należy odpakowywać maszyny i natychmiast poinformować o tym fakcie dostawcę Po zdjęciu osłony należy ostrożnie zdjąć maszynę z palety Wymaga to pr...

Страница 305: ...ie pod siedzeniem lub pod maską Należy poluzować śruby na zaciskach akumulatora Należy podłączyć czerwony przewód do dodatniego bieguna akumulatora i dokręcić śrubę Należy podłączyć brązowy przewód do ujemnego bieguna akumulatora i dokręcić śrubę Podłączenie przewodów na odwrót może spowodować uszkodzenie maszyny Podczas odłączania akumulatora należy zawsze najpierw odłączyć przewód ujemnego biegu...

Страница 306: ...ma Cztery zapasowe kołki zabezpieczające dla ostrzy tnących zostały dołączone do kosza na trawę Należy je zachować do użytku w przyszłości KOSZ NA TRAWĘ CZĘŚCI GŁÓWNE TERMINOLOGIA 1 Pokrywa 2 Dźwignia podnoszenia 3 Dolna rura 4 Lewy i prawy usztywniacz rogowy 5 Usztywniacz dolny 1 szt tylko dla wersji 300 l 6 Pręty ściskane boczne 9 Uchwyt 10 Przednia rura 11 Worek siatkowy 13 Wspornik sterowania ...

Страница 307: ...ależy wsunąć uchwyt i nałożyć podkładki czarne na jego nagwintowane końce Należy nasunąć również metalową blaszkę i kolejny zestaw podkładek Tak przygotowany element należy włożyć do otworów we wsporniku górnym na ramie nałożyć kolejne podkładki na gwinty i przykręcić wszystko za pomocą nakrętek W tej chwili nie należy jeszcze mocno dokręcać nakrętek 3 3 2k Należy przykręcić pokrywę do ramy i dokr...

Страница 308: ... wewnątrz lewego błotnika i mieści odpowiednio 7 5 litra modele ze zbiornikami pod maską lub 13 15 litrów model ze zbiornika wewnątrz błotnika paliwa Należy stosować tylko i wyłącznie paliwo o ilości oktanów określonej w instrukcji obsługi silnika Uszkodzenia spowodowane nieodpowiednim paliwem nie są objęte gwarancją Paliwo należy uzupełniać tylko gdy silnik jest wyłączony i zimny Zbiornik paliwa ...

Страница 309: ...o zakończeniu należy przetrzeć pokrywę i wlew czystą ściereczką Należy również oczyścić cały zbiornik ponieważ zanieczyszczenia oleju skracają żywotność filtra i mogą powodować awarie 3 4 6 ODPOWIETRZANIE UKŁADU HYDRAULICZNEGO tylko model AJ102 4x4 Całkowite odpowietrzenie układu hydraulicznego następuje w przeciągu kilku pierwszych godzin pracy maszyny Zalecane jest delikatne użytkowania maszyny ...

Страница 310: ...hamulec postojowy Sygnał zaciągnięcia hamulca postojowego Sygnał naciśnięcia pedału hamulca 3 Przełącznik funkcji koszenia gdy kosz na trawę jest pełny wyposażenie opcjonalne Przełącznik AUT MAN włącza i wyłącza funkcję koszenia mechanizmu tnącego kiedy kosz na trawę jest pełny W pozycji MAN funkcja koszenia jest włączona przez cały czas i jeśli kosz na trawę się zapełni przewód usuwania trawy moż...

Страница 311: ...AŁ HAMULCA Naciśnięcie pedału hamulca powoduje zatrzymanie kosiarki Pedał jest również używany podczas uruchamiania maszyny która może zostać uruchomiona tylko gdy pedał jest naciśnięty 7 DŹWIGNIA HAMULCA POSTOJOWEGO Dźwignia hamulca postojowego posiada dwie pozycje W pozycji 1 hamulec nie jest aktywny Kiedy zostanie przestawiona na pozycję 2 gdy naciśnięty jest pedał hamulca hamulec postojowy zos...

Страница 312: ...a przesunie się w dół samoistnie do pozycji nie utrudniającej pracy Aby pokrywa ściółkowania funkcjonowała prawidłowo po skończeniu pracy należy dokładnie wyczyścić mechanizm tnący oraz oczyścić przewód z trawy i innych zanieczyszczeń 9 PEDAŁ JAZDY DO PRZODU Pedał ten służy do sterowania kołami napędowymi i reguluje ruch maszyny do przodu Im mocniej pedał zostanie naciśnięty tym szybciej jedzie ma...

Страница 313: ...czenia napędu przedniej osi w modelu AJ 102 4x4 układ hydrauliczny nie posiada zaworu obejściowego Powoduje to znaczne ograniczenie ruchomości maszyny gdy silnik jest wyłączony Podczas prób poruszania może dojść do przeciążenia przedniej osi i jej uszkodzenia W przypadku gdy maszyna musi zostać przestawiona z wyłączonym silnikiem należy zawsze odciążyć przednią oś Dźwignia omijania jest zazwyczaj ...

Страница 314: ...ik godzin jest zabezpieczony uszczelnieniem ochronnym Jeśli wskaźnik godzin nie funkcjonuje należy natychmiast poinformować o tym fakcie serwis 4 TEMPOMAT Tempomat wykorzystywany jest tylko na długich prostych odcinkach Tempomat musi zostać wyłączony przed zmianą kierunku jazdy Tempomat funkcjonuje tylko gdy zapłon jest włączony Tempomat można wyłączyć naciskając pedał lub przestawiając pozycję kl...

Страница 315: ... BS15 15 5 KM d Dźwignię przyśpieszenia należy ustawić następująco W maszynach z silnikiem 2 cylindrowym na pozycję MAKS W maszynach z silnikiem 1 cylindrowym na pozycję STARTER SSANIE e Należy pociągnąć dźwignię ssania tylko w silnikach o mocy 16 KM lub więcej f Należy przekręcić kluczyk na pozycję Uruchamiania silnika aby uruchomić zapłon Po uruchomieniu silnika należy puścić kluczyć Kluczyk aut...

Страница 316: ...ć uszkodzenie regulatora silnika 5 3 1 POZOSTAWIENIE MASZYNY Z URUCHOMIONYM SILNIKIEM Jeśli chcesz lub musisz na chwilę zejść z maszyny aby usunąć przeszkodę itp ale zamierzasz dalej pracować można zejść z maszyn i pozostawić uruchomiony silnik Pozwala to na oszczędzanie akumulatora Warunki zejścia z maszyny przy uruchomionym silniku mechanizm tnący jest wyłączony dźwignia sterowania paliwem jest ...

Страница 317: ...hanizm tnący wyposażony jest w cztery koła które podnoszą ramę na nierównym terenie i dzięki temu chronią ostrza przed uszkodzeniem Jeśli siła sterowania podnoszenia mechanizmu tnącego ma zostać zmniejszona w maszynie AG122 należy zmienić element dodatkowej sprężyny po lewej stronie Ustawienia fabryczne są następujące 5 4 4 WYWARZENIE MECHANIZMU TNĄCEGO Aby uzyskać najlepsze wyniki koszenia mechan...

Страница 318: ...zenia przestawi się automatycznie na pozycję jałową Odległość hamowania wynosi mniej niż 2 m 5 5 3 PRĘDKOŚĆ JAZDY ORAZ KOSZENIA Im bardziej wilgotna wysoka i gęsta trawa tym wolniejszą prędkością należy jechać Przy zbyt wysokiej prędkości pojazdu lub pod dużym obciążeniem spadają obroty ostrzy obniżając jakość koszenia a przewód usuwania trawy może się zatkać W takich warunkach należy zawsze ustaw...

Страница 319: ...rywy kosza Napełnienie kosza można regulować za pomocą ruchomych części pokrywy wydłużając lub skracając ramię 1 Ruchoma część wysunięta minimalne napełnienie kosza 2 Ruchoma część wsunięta maksymalne napełnienie kosza 5 6a Procedura opróżniania kosza Należy przejechać maszyną w miejsce gdzie kosz ma zostać opróżniony Należy zatrzymać maszynę i przytrzymać hamulec Jeśli miejsce to jest na zboczu n...

Страница 320: ...nie Zużyte lub uszkodzone części należy wymieniać w odpowiednim czasie Należy zawsze stosować oryginalne części zamienne Nieoryginalne części zamienne mogą uszkodzić maszynę oraz spowodować zagrożenie zdrowia kierowcy oraz innych osób oraz spowodować utratę gwarancji Aby zamówić części zamienne należy skontaktować się z producentem lub autoryzowanym centrum serwisowym ...

Страница 321: ...h Kontrola pasa zębatego który obraca ostrza 4 Kontrola napięcia pasa zębatego napędu mechanizmu tnącego 4 Kontrola i usunięcie luzów przedniej osi i układu kierowniczego Kontrola funkcjonowania wyłączników oraz urządzeń zabezpieczających Kontrola i wyregulowanie pracy silnika i przekładni oraz złączy elektromagnetycznych Kontrola i konserwacja filtra powietrza i świec zapłonowych oraz ich wymiana...

Страница 322: ...ęcić wskaźnik prętowy wytrzeć do czysta ponownie umieścić i wkręcić Następnie odkręcić i odczytać poziom oleju Poziom oleju musi znajdować się pomiędzy dwoma oznaczeniami na wskaźniku prętowym Jeśli poziom jest zbyt niski należy dolewać oleju do czasu gdy osiągnie poziom PEŁNY Dalsze informacje na temat kontroli oraz uzupełniania oleju zostały podane w osobnej instrukcji obsługi dostarczonej przez...

Страница 323: ...mulator należy kontrolować zgodnie z instrukcją dostarczoną przez jego producenta Styki akumulatora muszą być utrzymywane w czystości Jeśli się zabrudzą lub skorodują należy je wyczyścić zgodnie z instrukcjami producenta Przerwanie obwodu elektrycznego spowodowane utlenianiem się styków może prowadzić do uszkodzenia funkcji ładowania silnika Należy regularnie kontrolować elektrolit Poziom elektrol...

Страница 324: ...podarstwa domowego ani wylewać do ścieków ziemi ani do śmieci KONSERWACJA FILTRA POWIETRZA Silnik nie może pracować bez filtra powietrza Spowoduje to szybkie zużycie silnika Konserwację filtra powietrza należy przeprowadzić zgodnie z instrukcjami podanymi przez producenta silnika KONSERWACJA ŚWIECY ZAPŁONOWEJ Aby silnik pracował prawidłowo świeca zapłonowa musi zostać prawidłowo zainstalowana oraz...

Страница 325: ...ntażu wykonać czynności w odwrotnej kolejności 6 3 3b 6 3 4 WYMIANA BEZPIECZNIKÓW Jeśli przepali się bezpiecznik silnik natychmiast się wyłączy mechanizm tnący się zatrzyma a wszystkie wskaźniki na panelu instrumentów zgasną W takim wypadku należy znaleźć spalony bezpiecznik i wymienić go na nowy Nie wolno wymieniać przepalonego bezpiecznika na bezpiecznik o wyższych wartościach znamionowych prądu...

Страница 326: ...e chroniące mechanizm tnący przed uszkodzeniem Jeśli kołki zabezpieczające są uszkodzone należy je natychmiast wymienić Zapasowe kołki zostały dostarczone wraz z maszyną 6 3 6b Po skontrolowaniu wyważenia ostrzy oraz kołków zabezpieczających należy zamontować ostrza na miejscu Podczas montażu należy upewnić się że ostrza nie są zamontowane w górę w obudowie mechanizmu tnącego Należy uważać aby nie...

Страница 327: ...wysokość od ziemi a każda strona mechanizmu musi być w poziomie Przed regulacją Należy umieścić maszynę na idealnie poziomej powierzchni napompować opony do odpowiedniego ciśnienia 80 140 kPa 10 kPa różnicy pomiędzy poszczególnymi oponami oraz zabezpieczyć całą maszynę przed ruchem np za pomocą odpowiedniego klina itp Należy ustawić mechanizm tnący na pozycję 2 REGULACJA WYSOKOŚCI MECHANIZMU TNĄCE...

Страница 328: ...1 mm w pozycji 7 ponownie wykorzystując cięgno do rozciągania z nakrętką 6 6 3 8 6 3 9 MECHANIZM TNĄCY REGULACJA ZĘBATEGO PASA NAPĘDOWEGO OSTRZY modele AJ 102 AJ102 4x4 AG 122 Należy ustawić mechanizm tnący na najniższą pozycję ustawiając dźwignię ustawiania na pozycję 1 Należy poluzować śrubę na plastikowej obudowie po prawej stronie w kierunku jazdy i podnieść osłonę 6 3 9a Pod metalową płytką n...

Страница 329: ... luz Należy poluzować dwie nakrętki M12 1 na śrubie mimośrodowej Na sześciokątnej nakrętce 2 należy umieścić klucz i obracać nim do czasu zmniejszenia luzu do minimum Należy dokręcić dwie nakrętki M12 1 z momentem 35 45 Nm 6 3 12 KONTROLA I NAPINANIE PASA NAPĘDOWEGO Należy regularnie kontrolować napięcie pasa napędowego Pas jest prawidłowo napięty jeśli podczas wywierania nacisku o mocy 4 kPa w po...

Страница 330: ...zona należy zlecić jej naprawę profesjonalnemu zakładowi wulkanizacyjnemu lub autoryzowanemu centrum serwisowemu Seco 6 3 16 KONSERWACJA PRZEKŁADNI HYDROSTATYCZNEJ Modele AJ102 AJ110 i AG122 Aby zapewnić prawidłowe funkcjonowanie przekładni należy sprawdzać czy olej znajduje się na odpowiednim poziomie Złącza uzupełniania oleju w przekładni są dostępne po zdjęciu przewodu usuwającego trawę 6 3 10 ...

Страница 331: ...mem Łożyska kół napinających prowadzących oraz mechanizmu tnącego są łożyskami samosmarującymi Przed przechowywaniem maszyny przez długi okres czasu należy dokładnie nasmarować wszystkie punkty przedstawione w harmonogramie W szczególności należy pamiętać o półosiach tylnej i przedniej osi należy zdemontować tylne koła 6 4 Symbol Opis Smar Olej SAE 30 Odstęp czasu w roboczogodzinach Nanieść smar n...

Страница 332: ...często odrywana na nierównym terenie Sprawdzić czy ostrza nie są wypaczone W razie potrzeby wymienić ostrza Mechanizm tnący nie wyrzuca skoszonej trawy Usunąć resztki trawy spod obudowy mechanizmu tnącego W mokrych warunkach pracy przewód usuwający trawę oraz spód obudowy mechanizmu tnącego może zostać zaklejony przez trawę Nie kosić mokrej trawy Prędkość jazdy powinna odpowiadać wybranemu biegowi...

Страница 333: ...prawdzić czy mechanizm sprzęgła napędu nie jest blokowany obcym przedmiotem Jeśli tak usunąć przedmiot Skontrolować czy koło pasowe silnika lub przekładni nie jest uszkodzone Wymienić w razie potrzeby Pas napędowy piszczy Sprawdzić napięcie pasa napędowego 6 3 12 i funkcjonowanie hamulców W razie potrzeby wyregulować napięcie pasa Jeśli hamulec nie funkcjonuje poprawnie zlecić jego wyregulowanie a...

Страница 334: ...Podczas jazdy słyszalne jest gwizdanie Skontrolować paski prowadnicę oraz koła napinające Jeśli problem nie zostanie usunięty skontaktować się z autoryzowanym centrum serwisowym 7 1ZAMAWIANIECZĘŚCIZAMIENNYCH Zalecamy stosowanie oryginalnych części zamiennych gwarantujących bezpieczeństwo i niezmienność Części zamienne należy zawsze zamawiać poprzez dealera lub autoryzowane centrum serwisowe które ...

Страница 335: ...ia 6 4 Poluzować pas klinowy oraz mechanizm tnący 6 3 8 Wyjąć i wyczyścić akumulator napełnić wodą destylowaną do dolnej części okręgu złącza uzupełniania i całkowicie naładować Pusty akumulator może zamarznąć i wybuchnąć Według potrzeby akumulator postawić w chłodnym i suchym miejscu Ładowanie akumulatora należy wykonywać co 30 dni oraz regularnie kontrolować stan napięcia Kosiarkę należy przykry...

Страница 336: ...wi należy oddzielić i likwidować zgodnie z obowiązującymi katalogami będącymi zgodnymi z odpowiednimi rozporządzeniami Z częściami przyjaznymi dla środowiska naturalnego należy postępować jak z surowcami wtórnymi przeznaczonymi do następnego użytku ...

Страница 337: ... 1 NV Nr 616 2006 Coll Dyrektywa Rady Nr 2000 14 WE Załącznik VIII równorzędne załącznikiem 7 NV Nr 9 2002 Coll pod nadzorem osób powiadomionych LRQA nr rejestracyjny 0088 Hiramford Middlemarch Office Village Siskin Drive Coventry CV3 4FJ Wielka Brytania E Potwierdzamy że niniejsza maszyna jak zdefiniowano według dostarczonych danych spełnia wymogi podanych powyżej zarządzeń technicznych i jest be...

Страница 338: ...dne z 5 parag 2 NV Nr 176 2008 Coll Dyrektywa Rady Nr 2004 108 WE Artykuł 7 równorzędne z 4 parag 1 NV Nr 616 2006 Coll Dyrektywa Rady Nr 2000 14 WE Załącznik VIII równorzędne załącznikiem 7 NV Nr 9 2002 Coll pod nadzorem osób powiadomionych LRQA nr rejestracyjny 0088 Hiramford Middlemarch Office Village Siskin Drive Coventry CV3 4FJ Wielka Brytania Zgodność została oceniona przez akredytowane lab...

Страница 339: ... paragraf 2 równorzędne z 5 parag 2 NV Nr 176 2008 Coll Dyrektywa Rady Nr 2004 108 WE Artykuł 7 równorzędne z 4 parag 1 NV Nr 616 2006 Coll Dyrektywa Rady Nr 2000 14 WE Załącznik VIII równorzędne załącznikiem 7 NV Nr 9 2002 Coll pod nadzorem osób powiadomionych LRQA nr rejestracyjny 0088 Hiramford Middlemarch Office Village Siskin Drive Coventry CV3 4FJ Wielka Brytania E Potwierdzamy że niniejsza ...

Страница 340: ...ka Brytania E Zgodność oceniona przez akredytowane laboratorium Akredytowane laboratorium testowe nr 1054 Státní zkušebna zemědělských lesnických a potravinářských strojů a s Molákova 622 11 163 04 Praga 8 Republika Czeska F Potwierdzamy że niniejsza maszyna jak zdefiniowano według dostarczonych danych spełnia wymogi podanych powyżej zarządzeń technicznych i jest bezpieczna w warunkach normalnego ...

Страница 341: ...341 ...

Страница 342: ...342 ...

Страница 343: ...343 ...

Страница 344: ...1 Bagnolo in Piano Reggio Emilia Italy Member of the YAMA group Producer WARNING This owner s manual must stay with the machine for all its life ACHTUNG Dieses Anweisungsheft muß das Gerät während seiner gesamten Lebensdauer begleiten ATTENTION Le manuel doit accompagner la michine pour toute sa vie ATTENZIONE Questo manuale deve accompagnare la machina durante tutta la sua vita WAARSCHUWING Deze ...

Отзывы: