background image

7      ENGLISH 

5. Hardware Installation 

Follow these simple steps to setup your LCD monitor 

1.  

Turn power off to both Computer and Display before making any connection. 

2.  

Disconnect any existing monitor you may have from your Computer.  Please refer to 
your existing monitor’s User’s Guide. 

3.  

Install the Display on a solid horizontal surface such as a table or a desk. 

4.  Connect the power cable and the AC/DC adapter and then connect the AC Adapter to 

the DC jack that is located at the end of the signal cable. 


IBM PC’s & Compatibles 

5a.  Connect one end of the signal cable to the matching 15-pin connector on the rear of 

the computer. 


Apple / Macintosh Computers 

5b.  Connect a MAC adapter (not supplied) to the video connector on the rear of the 

Apple / Macintosh computer.   Then plug the other end of the signal cable into the 
MAC adapter. (Contact your local Apple dealer for information on purchasing the 
correct conversion connector.) 

 
6.  Tighten the screws of the Display cable until the connectors are fastened securely. 
7.  Switch on power to the computer, then to the Display. 


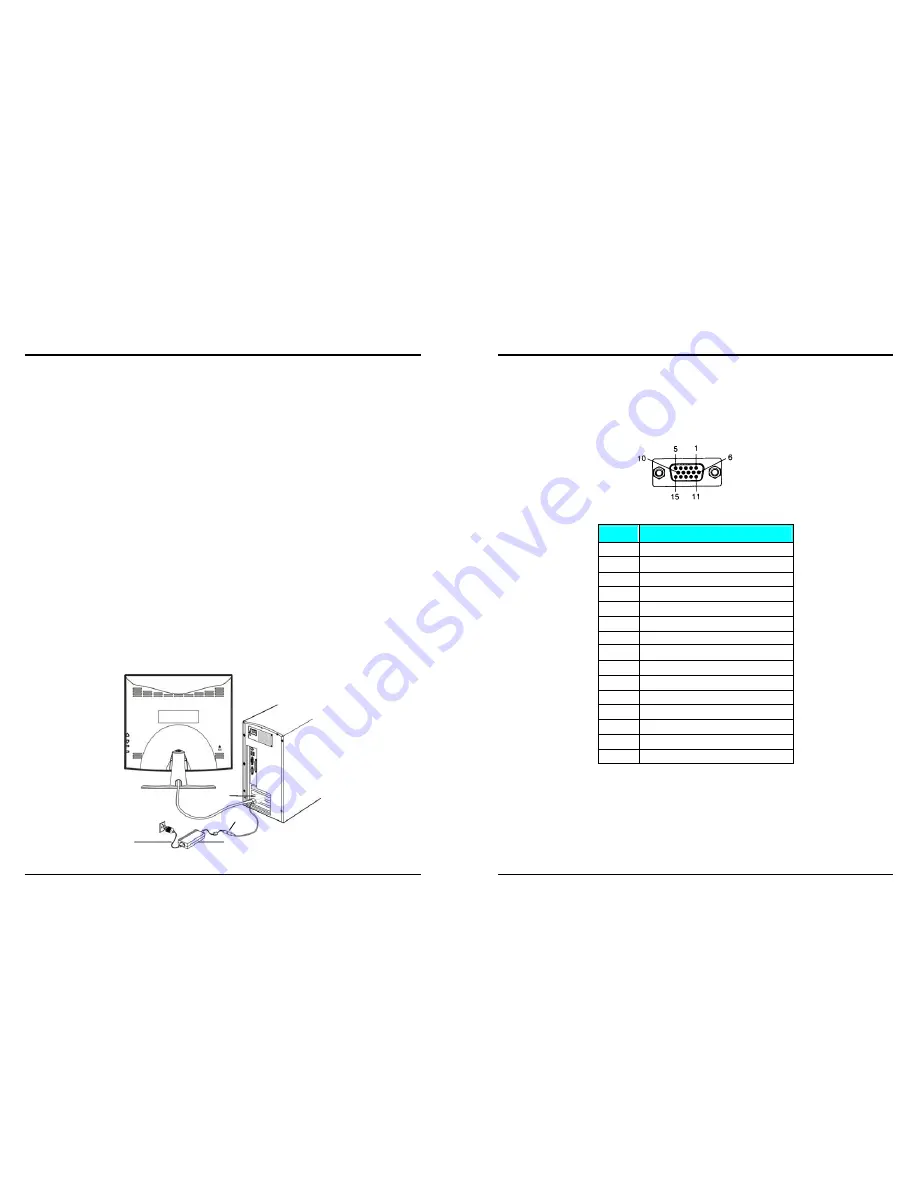
Figure 5.1 LCD Monitor Hardware Setup 

Power Cord

AC/DC Adapter 

15 pin D-SUB

DC Jack

8      ENGLISH 

5. Hardware Installation 

5-3. Video Input Pin Assignment 

This section describes the pin assignment of the LCD’s video connector.   It is called a 
15-Pin Mini D-sub Connector. 


Pin No. Signal Connector


Red Video Signal 

Green Video Signal 

Blue Video Signal 

4 N.C. 
5 Ground 

Ground for red video signal 

Ground for green video signal 

Ground for blue video signal 

9 +5V 

10 Ground 
11 N.C. 
12 DDC 

data 

13 Horizontal 

sync 

signal 

14 Vertical 

sync 

signal 

15 DDC 

clock 


Содержание E15T

Страница 1: ...Controls 14 8 3 How to use AUTO TUNE Adjustment 17 9 Troubleshooting Tips 18 10 Specification 19 11 Appendix 20 2 ENGLISH 1 Caution and Warning CAUTION RISK OF ELECTRIC SHOCK DO NOT OPEN CAUTION To reduce the risk of electric shock do not remove cover or back No user serviceable parts inside Refer servicing to qualified personnel WARNING TO PREVENT FIRE OR SHOCK HAZARD DO NOT EXPOSE THIS MONITOR T...

Страница 2: ...quipment Regulations This Class B digital apparatus meets all requirements of the Canadian Interference Causing Equipment Regulations Cet appareil numérique de la Classe B respecte toutes les exigences du Reglemènt sur le matériel brouilleur du Canada 4 ENGLISH 3 Product Safety Precautions Follow all warnings and instructions marked on the product Do not use this product near water This display sh...

Страница 3: ...tion This chapter will guide you thru the correct installation procedures of your LCD monitor 5 1 Unpacking After you unpack your LCD Monitor please make sure that the following items are included in the carton and in good condition If you find that any of these items are damaged or missing please contact your dealer immediately One LCD Monitor mounted on its stand with video cable AC DC adapter w...

Страница 4: ...connector on the rear of the Apple Macintosh computer Then plug the other end of the signal cable into the MAC adapter Contact your local Apple dealer for information on purchasing the correct conversion connector 6 Tighten the screws of the Display cable until the connectors are fastened securely 7 Switch on power to the computer then to the Display Figure 5 1 LCD Monitor Hardware Setup PowerCord...

Страница 5: ...75Hz 37 500 75 000 800 600 56Hz 35 156 56 250 800 600 60Hz 37 879 60 017 800 600 72Hz 48 077 72 188 SVGA 800 600 75Hz 46 875 75 000 1024 768 60Hz 48 363 60 004 1024 768 70Hz 56 476 70 069 XGA 1024 768 75Hz 60 023 75 029 Table 6 1 Applicable Video Timing 10 ENGLISH 6 Display Timing IBM MODES Mode Resolution Horizontal Nominal Frequency 1 kHz Vertical Nominal Frequency 1 Hz EGA 640 350 70Hz 31 469 7...

Страница 6: ...e This LCD monitor features an On Screen Display OSD menu The icons are designed to make your monitor display settings easier to perform When highlighted the icons illustrate the control function to assist you in identifying which control needs adjustment Before activating the OSD menu the select button can be used to automatically adjust the display to the proper size and horizontal and vertical ...

Страница 7: ...cal size horizontal and vertical position and phase CONTRAST This control allows you to make adjustments to the contrast of the display screen BRIGHTNESS Selecting this control allows you to make adjustments to the luminosity level of the display screen H POSITION HORIZONTAL POSITION Select this control and then use the and buttons to center the image horizontally on the screen V POSITION VERTICAL...

Страница 8: ...ol and then use the select button to select the duration time for the OSD menu Use the and buttons to select the time 5 15 30 60 SEC POWER SAVE DELAY This feature directs the monitor to stay in the on mode even after the computer goes into sleep mode The user is able to select time of 5 seconds 1 minute 60 minutes or OFF for the display to appear on the monitor screen 16 ENGLISH 8 Screen Adjustmen...

Страница 9: ...tion from the Video Card to the Display We recommend that you also consult your Video Card User s manual during the Troubleshooting Procedure Do not exceed the maximum refresh rate recommended for the display Problem Troubleshooting Tip No image on displayscreen 1 Check that power cord of the Computer has been connected securely into wall outlet or grounded extension cable or strip 2 Check that po...

Страница 10: ...accessible CAUTION Use a power cable that is properly grounded Always use the appropriate AC cord that is certified for the individual country Some examples are listed below USA UL Switzerland SEV Canada CSA Britain BASE BS Germany VDE Japan Electric Appliance Control Act IMPORTANT NOTICE CONCERNING POWER CORD SELECTION The power cord set for this unit has been enclosed and been selected according...

Страница 11: ...ealer from whom you have purchased the product 22 ENGLISH 11 Appendix Compliance Information for U S A The equipment has been tested and found to comply with the limits for a Class B digital device pursuant to part 15 of the FCC Rules These limits are designed to provide reasonable protection against harmful interference in a residential installation This equipment generates uses and can radiate r...

Отзывы: