7
S E T T I N G S
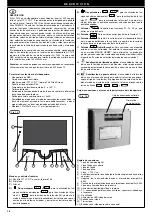
simultaneously press and hold down push-buttons
and
until the red LED
underneath starts flashing. At this point, while the
LED is flashing, press the TALK/LISTEN push-button
. to confirm
the change. The function is confirmed if the red LED switches off.
Automatic answer function
This function, which is only available in HANDS FREE mode, activates
the monitor audio connection automatically when a call is received from
the speech unit, without the need to push the TALK/LISTEN button
. The "audio active" condition is indicated by the illumination of the
red LED
at the bottom left corner of the monitor, which is normally
used to indicate RINGTONE MUTE. The audio is activated automatical-
ly 5 seconds after the call is received. To enable this function, with the
monitor switched OFF press push-button
for 2 seconds to enter
SETTING mode; simultaneously press and hold down push-buttons
and
until the red LED underneath starts flashing. At this
point, while the LED is flashing, press the TALK/LISTEN push-button
to confirm the change. The function is confirmed if the red LED
switches off. To disable this function, follow the same procedure. If
HANDS FREE mode was not active during the enabling process, it will
be activated automatically when the AUTOMATIC ANSWER function is
enabled. If the automatic answer function is subsequently disabled, the
HANDS FREE function will remain active.
Adjusting the conversation volume
The term “conversation volume" refers to the perceived volume of the
caller's voice when he/she is standing in front of the speech unit (entran-
ce panel), or speaking through an intercommunicating interphone or
monitor. To adjust the conversation volume, the user must be in commu-
nication with a speech unit or intercom device. Press push-button
for 2 seconds to enter SETTING mode; once the green LED
starts flashing, press and hold the TALK/LISTEN push-button
and adjust the volume with push-buttons
and
.
This procedure applies both in HANDS FREE mode and in PUSH-TO-
TALK mode.
Push-buttons
, , and
These four push-buttons can execute up to 4 functions when the moni-
tor is not in setting mode.
By default the
button (stair light) is associated with command
F1, the
button is associated with commands F3, F4 and F5
and buttons
–
–
–
with commands F2 –
F6 – F7 – F8 respectively.
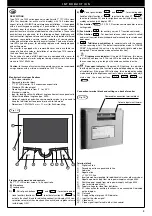
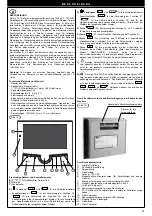
Colour adjustment
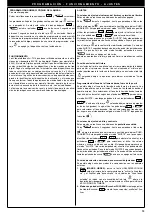
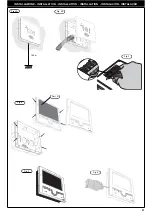
The colour adjustment is carried out by a trimmer on the rear of monitor
(Fig. 1B).
Outdoor call
Through a dedicated terminal cabling it is possible to discriminate the call
tone coming from an outdoor push-button (for example passage, secon-
dary entry etc.) from that coming from an outdoor station. Terminal 9 is
preset for the input of the call wire for an apartment entrance panel (the
speech unit Art. 930D) or for a simple push-button N.A. (connected bet-
ween 9 and 5) which make the monitor ring through a programmed
chime.
On receiving an apartment outdoor call it is possible to turn the monitor
on and send a digital command able to switch the video signal in the
entrance with that of a possible camera on the apartment door.
To program the monitor self-start and door panel command functions,
proceed as follows:
1) To enable
activation of the monitor from door call
, make sure the
monitor is switched OFF, then press button
for 2 seconds to
enter SETTING mode, simultaneously press and hold buttons
and
until the red LED
starts to flash and then press
.
2) To
activate an auxiliary command after activation of the monitor
from door call
, make sure the monitor is switched OFF, then press
button
for 2 seconds to enter SETTING mode, simultane-
ously press and hold buttons
and
until the red LED
starts to flash and then press the button corresponding to the
function
command , , , , to
be
sent.
“USER ABSENT” function
This type of function enables the user to indicate his/her absence to cal-
lers, via the external entrance panel; it can also be used if the user is at
home but does not wish to be disturbed.
When the function is enabled, the monitor receiving the call does not
switch on and does not emit any audible signal, but the “USER
ABSENT” command is sent to a switchboard (if present) and the red
LED
flashes once for each unanswered call (max 4).
To enable this function, make sure the monitor is switched OFF, then
press button
for 2 seconds to enter SETTING mode, with the
monitor off simultaneously press and hold buttons
and
until the red LED
starts to flash and then press
; the LED
will illuminate and remain on to indicate that the function is active.
To disable this function, with the monitor off simultaneously press and
hold buttons
and
until the red LED
starts to flash
and then press
; the LED
will go out.
Содержание DIGIBUS 7200 Series
Страница 28: ...28 NOTE ...
Страница 29: ...29 ...


