background image

22

3 Basic Function Instruction

3.1 Startup and Shutdown

Please make sure all the connections are done properly before you power on the unit. Proper startup and shutdown are crucial to expanding the life of your 

NVR.

3.1.1 Startup

- Connect with the power.

- The device will boot and the power LED would turn blue.

- A WIZARD window will pop up and show some information about time zone, time setup, network configuration, record configuration and disk management. 

You can set here and refer to the concrete setup steps from the corresponding chapters. If you don’t want to set up Wizard, please click “Exit” button to exit.

Note:

 The default output is HDMI output. Hold and press ESC key to switch the resolution of the VGA & HDMI output.

3.1.2 Shutdown

You can shut down the device by using IR remote controller or mouse.

- Go to 

 Main Menu and select “Shut Down” icon. This will take you to a shutdown window.

- Click OK. Then the unit will power off after a while.

- Disconnect the power.

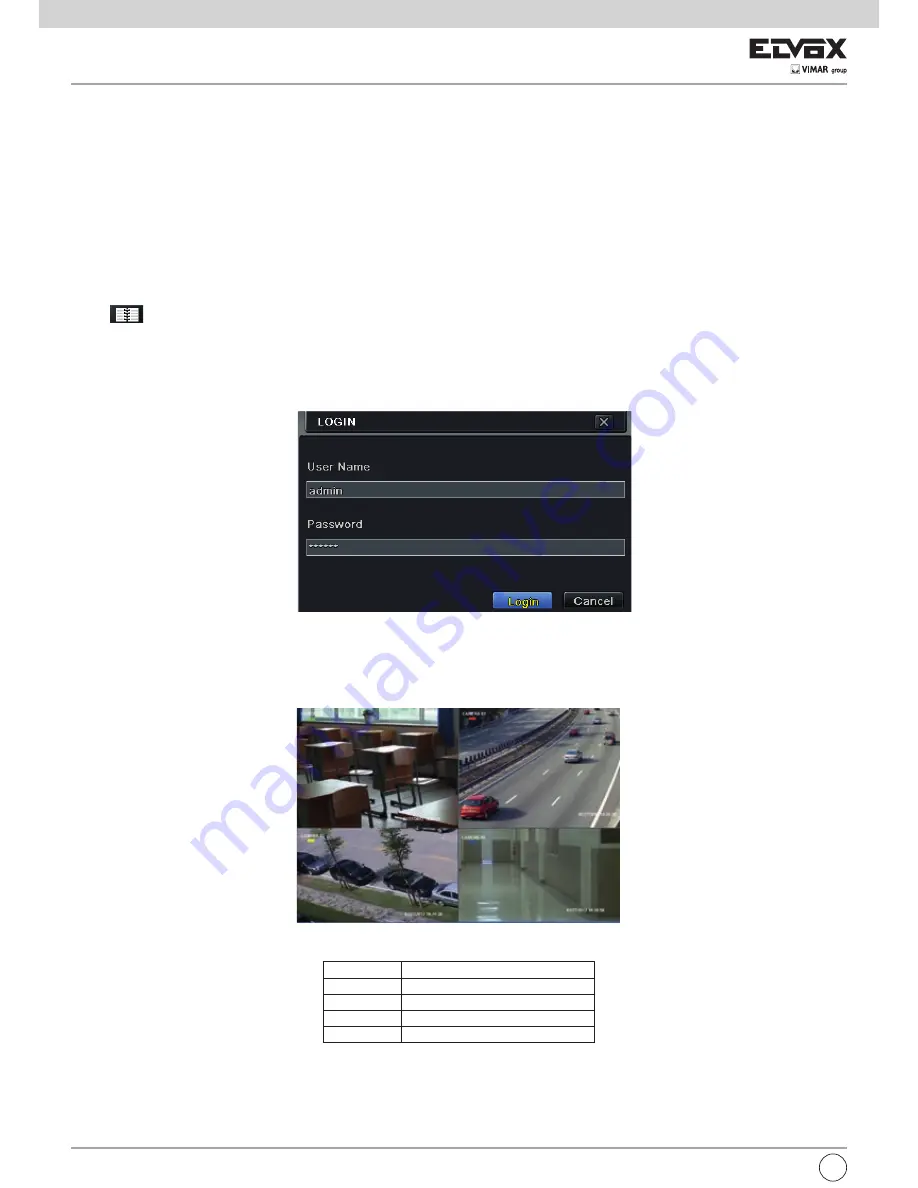
3.2 Login

You can login or log off the NVR system. Once logged off you cannot do any other operation except changing the multi-screen display.

Fig 3-1 Login

Notice: 

The default user name is admin and the default password is 123456.

For complete operational steps for changing password, adding or deleting user please refer to section 5.7 User management Configuration.

3.3 Live preview

Fig 3-2 Live Preview Interface

Symbol

Meaning

Green

Manual record

Yellow

Motion detection record

Red

Sensor Alarm record

Blue

Schedule record

EN

Содержание 46540.H04

Страница 1: ...Guida rapida Quick guide 46540 H04 46540 H08 Guida rapida per l uso del DVR AHD AHD DVR quick guide ...

Страница 2: ...isoluzione frame rate e qualità dell immagine regolabili Registrazione e riproduzione su 4 8 CH 2 canali audio disponibili Tre modi di ricerca delle registrazioni ricerca cronologica per evento e per immagine Riproduzione simultanea di 4 8 schermi Eliminazione e blocco individuale dei file registrati Riproduzione in remoto tramite Network Client via LAN o Internet ALLARME Programmazione per il ril...

Страница 3: ...e viti sui lati inferiore e laterale del dispositivo per togliere il coperchio 2 Estrarre l HDD 3 Inserire l HDD sul fondo del dispositivo 4 Capovolgere il dispositivo e stringere le viti dell HDD 5 Collegare i cavi di alimentazione e dati 6 Rimontare il coperchio e fissarlo con le viti 2 2 Descrizione del pannello anteriore Avvertenza La descrizione del pannello anteriore ha solo valore indicativ...

Страница 4: ...nte di accedere al modo backup Pulsante STOP ESC 1 Esce dal modo riproduzione 2 Esce dalla schermata o dallo stato corrente Pulsante di direzione multischermo Cambia direzione per selezionare gli elementi Cambia il modo di visualizzazione schermo a 1 4 9 16 canali Pulsante Enter Conferma la selezione USB Connettersi al mouse USB o un dispositivo di memorizzazione USB Fig 1 4 ch Collegamento teleca...

Страница 5: ...isoluzione dell uscita tra VGA e HDMI 3 1 2 Spegnimento È possibile spegnere il dispositivo dal telecomando IR o con il mouse Andare a Menu principale e selezionare l icona Shut Down Spegni Verrà visualizzata la finestra di spegnimento Fare clic su OK Dopo qualche istante l unità si spegne Scollegare l alimentazione 3 2 Login È possibile effettuare l accesso con credenziali login o disconnettersi ...

Страница 6: ... in grado di visualizzare tutte le telecamere disponibili Colore attivare questo pulsante per regolare il colore delle immagini live E Zoom ingrandimento elettronico dell immagine su canale singolo Audio attiva l audio PTZ fare clic su questo pulsante per controllare la posizione di rotazione la velocità e la scansione automatica della funzione PTZ collegata alla telecamera IP Registrazione fare c...

Страница 7: ... il sistema viene avviato viene visualizzata la procedura di impostazione guidata in cui è possibile eseguire la configurazione di base Video Output Uscita video risoluzione dell interfaccia di visualizzazione live Language Lingua consente di selezionare la lingua di visualizzazione dei menu Nota dopo aver modificato la lingua e l uscita video è necessario eseguire nuovamente il login Logout After...

Страница 8: ...tazioni di una telecamera canale specifici per visualizzare la finestra illustrata di seguito 2 In questa interfaccia è possibile regolare la luminosità il colore la saturazione e il contrasto per la visualizzazione live Fare clic sul pulsante OK per salvare le impostazioni 4 2 2 Monitor principale Le impostazioni del monitor principale consentono di impostare la sequenza della telecamera in modo ...

Страница 9: ... uscire dall interfaccia di impostazione della maschera 5 Fare clic sul pulsante Apply Applica per salvare le impostazioni Per eliminare l area della maschera 1 Fare clic sul pulsante Setting Impostazioni nell interfaccia della maschera 2 Selezionare un area oscurata e fare doppio clic sull area per eliminarla 3 Fare quindi clic sul pulsante Apply Applica per salvare le impostazioni Fig 4 9 Impost...

Страница 10: ...consentiti 256 12288kbps Se il parametro viene impostato a un valore che supera le risorse massime del sistema il sistema lo corregge automaticamente 4 3 3 Tempo 1 Andare a Main Menu Setup Record interfaccia Time per impostare il tempo di registrazione Fare riferimento alla Fig 4 12 2 Impostare il tempo di registrazione pre allarme e post allarme Selezionare All Tutti per impostare gli stessi valo...

Страница 11: ...trazioni e ricicla lo spazio liberato La procedura di impostazione è la seguente 1 Andare a Main Menu Setup Record interfaccia Recycle Record 2 Selezionare la casella Recycle Record Ricicla registrazione per attivare il riutilizzo automatico Se questa opzione è disattivata o non è selezionata quando l HDD è pieno l NVR interrompe la registrazione 3 Fare clic sul pulsante Apply Applica per salvare ...

Страница 12: ...clic sul pulsante per aggiungere la programmazione per un giorno specifico Fare clic sul pulsante per eliminare la programmazione selezionata Se si desidera applicare l impostazione della programmazione di un canale ad altri o tutti i canali selezionare il canale e fare clic sul pulsante Copy Copia È possibile impostare la programmazione settimanale facendo doppio clic nell area della griglia Verr...

Страница 13: ...dettagli Questo passaggio è molto importante per l allarme sensore Anche se l allarme sensore è attivato per tutti i canali ed è stata impostata l attivazione il risultato dell allarme sensore non sarà visibile se non viene aggiunta alcuna programmazione Se la programmazione della registrazione attivata dal sensore è stata impostata nella stessa linea temporale le registrazioni verranno attivate 4...

Страница 14: ...i 7 Fare clic sul pulsante Apply Applica per salvare le impostazioni 8 Andare alla scheda Schedule Programmazione La procedura di impostazione dell allarme attivato dal movimento è analoga a quella di configurazione della programmazione normale per maggiori informazioni vedere il paragrafo 4 4 1 4 5 3 Altri allarmi In questa scheda è possibile configurare l allarme per Disk Full Disco pieno IP Con...

Страница 15: ...nternet Esistono tre modi per collegarsi a Internet Fig 4 23 Configurazione di rete Rete Se è attivato un server DHCP e si desidera che l NVR ottenga automaticamente l indirizzo IP e altre impostazioni di rete da quel server selezionare la casella accanto a Obtain an IP address automatically Ottieni indirizzo IP automaticamente Il dispositivo compilerà l indirizzo IP la subnet mask l IP gateway e ...

Страница 16: ...terfaccia del server di trasferimento per controllare 3 Abilitare l auto segnalazione nel server CVM Elvox quando viene aggiunto un nuovo dispositivo Inserire un ID dispositivo e immettere le restanti infor mazioni relative al dispositivo nel server CVM Elvox 4 Inserire l IP server suddetto la porta server e l ID dispositivo nell interfaccia del server Fare clic sul pulsante Apply Applica per salv...

Страница 17: ...l pulsante Play per riprodurre la registrazione Utilizzare la barra degli strumenti di riproduzione per controllare la riproduzione 5 2 Ricerca evento 1 Andare a Main Menu Search pulsante Event Search Fare riferimento alla Fig 5 2 2 Selezionare i dati e i canali sul lato destro Se la data ha il bordo evidenziato significa che sono presenti dei dati 3 Selezionare Motion Movimento Sensor Sensore o A...

Страница 18: ...h scheda Image 2 Selezionare i dati e i canali sul lato destro 3 Premere il pulsante Search Cerca per cercare un immagine registrata 4 Dopo aver identificato l immagine registrata fare doppio clic su di essa per riprodurre la registrazione Fig 5 4 Configurazione della ricerca Immagine 5 5 Backup Questa unità supporta il backup tramite USB Flash con il masterizzatore DVD SATA incorporato È inoltre ...

Страница 19: ...il pulsante Export Esporta 6 1 3 Informazioni sul log In questa scheda è possibile cercare i log pertinenti per data e per evento che include Operation Funzionamento Setup Configurazione Playback Ri produzione Backup Search Ricerca Check Information Controlla informazioni ed Error Errore Il rapporto può essere salvato su una memoria USB in formato html utilizzando il pulsante Export Esporta 6 1 4 ...

Страница 20: ...zione Premere il tasto CODICE QR freccia rossa sulla foto sotto per entrare nella modalità scansione L utente può accedere rapidamente al client mobile leggendo il codice QRCODE Andare a Main Menu Information scheda QRCODE Fare riferimento alla Fig 6 1 A Appena la scansione viene eseguita l indirizzo MAC del DVR NVR compare sul campo Server su Superlive PRO Inserire nome utente e password del DVR ...

Страница 21: ...es Manual Schedule and Motion detection recording Supports recycle after HDD full Resolution frame rate and picture quality are adjustable 4 8CH 720P recording 1 audio channels available Three record search modes time search event search and image search 4 8 channels playback simultaneously Supports deleting and locking the recorded files one by one Supports remote playback in Network Client throu...

Страница 22: ...x B Calculate Recording Capacity 1 Loosen the screws on the back and side 2 Take out the HDD 3 Put the HDD on the bottom of the device 4 Turn over the device and fix the HDD with the screws 5 Connect the power and data cables 6 Install the cover back and fix it with the screws 2 2 Front Panel Descriptions The front panel descriptions are only for reference please make the object as the standard Fr...

Страница 23: ... the sound box VGA VGA Port Connect to monitor HDMI HDMI Port Connect to high definition display device LAN Network Port USB To connect external USB devices like USB mouse or USB storage device DC12V DC12V Power Input RS485 Connect to keyboard or speed dome A is TX B is TX Fig 1 4 ch AHD and Analog CVBS camera connections to AHD DVR You can connect at the same time AHD cameras and analog CVBS came...

Страница 24: ...output Hold and press ESC key to switch the resolution of the VGA HDMI output 3 1 2 Shutdown You can shut down the device by using IR remote controller or mouse Go to Main Menu and select Shut Down icon This will take you to a shutdown window Click OK Then the unit will power off after a while Disconnect the power 3 2 Login You can login or log off the NVR system Once logged off you cannot do any ...

Страница 25: ...r in a grid fashion from different cameras Dwell mode is enabled only when the chosen display mode is not able to display all the available cameras Color If this button is enabled you can adjust the color of live images E Zoom Single channel large screen electronic amplification Audio Enable sound PTZ Click the PTZ button to control rotation position speed and auto scan of the PTZ connected to the...

Страница 26: ... number of concurrent user logins in the NVR Show wizard If selected the GUI would launch the startup wizard on every boot allowing user to do basic setup Video Output Resolution of live display interface Language To set up the menu language Note After changing the language and video output the device needs to login again Logout After Minutes You can set up the screen interval time 30s 60s 180s 30...

Страница 27: ...o set up color 1 Click Setting button for a particular camera channel to see a window as below 2 In this interface you can adjust brightness hue saturation and contrast in live Click OK button to save the setting 4 2 2 Main Monitor The main monitor settings allow you to set camera sequence in live display mode Operate the following steps to set main monitor 1 Go to Main Menu Setup Live Main Monito...

Страница 28: ...n to set mask area as shown below 4 Right click to exit the mask setting interface 5 Click Apply button to save the setting To delete mask area 1 Click Setting button in the mask interface 2 Select a certain masked area and double click to delete that masked area 3 Then click Apply button to save the setting Fig 4 9 Setting Mask Area 4 3 Record Configuration Record configuration includes six sub m...

Страница 29: ...l 3 Select All to set up the same settings for all channels 4 3 2 Record Bitrate 1 Go to Main Menu Setup Record Record Bitrate Refer to Fig 4 11 2 Setup rate resolution and max bit stream 3 Select All to set the same settings for all channels 4 Click Apply button to save the setting Parameter Meaning Rate Range from 1 30 NTSC 1 25 PAL Resolution Supports1080P 720P VGA Quality The default quality i...

Страница 30: ...will automatically delete the old records and recycle the space if it is com pletely utilized The setting steps are as follows 1 Go to Main Menu Setup Record Recycle Record interface 2 Checkmark recycle record to activate auto recycling If the option is disabled or not selected the NVR would stop recording once HDD is full 3 Click Apply button to save the setting 4 3 6 Snap In this interface user ...

Страница 31: ...details 2 Select channel and click button to add a certain day schedule Click button to delete the selected schedule If you want to apply the schedule setting of a certain channel to other or all channels you need to select channel and click Copy button You can also set week schedule by double clicking in the gridding area This will take you to see a dialog box as Fig 4 15 1 Select a day and click...

Страница 32: ...important for sensor alarm Even if you have enabled the sensor alarm for all channels and set the trigger you will not see the result of sensor alarm if no schedule is added If you have set schedule for sensor based recording in the same timeline recordings can also be triggered 4 5 2 Motion Alarm Motion includes two sub menus motion and schedule The steps to set motion alarm are as follows 1 Go t...

Страница 33: ...ttings for all channels 7 Click Apply button to save the setting 8 Go to Schedule tab The setting steps for schedule for motion based alarm are similar to normal schedule setup see Chapter 4 4 1 for more details 4 5 3 Other Alarm This tab gives a choice to configure alarm for Disk Full IP Conflict the Disconnect event etc 1 Go to Main Menu Setup Alarm Other Alarm Refer to Fig 4 21 Fig 4 21 Other A...

Страница 34: ...etwork Configuration Network If you have a DHCP server running and would like your NVR to automatically obtain an IP address and other network settings check the checkbox beside Obtain an IP address automatically Then the device will distribute IP address subnet mask and gateway IP and DNS server If you want to configure your own settings disable Obtain an IP address automatically item and input t...

Страница 35: ... the transfer media interface to check 3 Enable the auto report in the ECMS NVMS when adding a new device Then self define device ID and input the remaining information of the device in the ECMS NVMS 4 Input the above mentioned server IP server port and device ID in the server interface Then click Apply button to save the setting Now the ECMS NVMS system will automatically connect this device Fig ...

Страница 36: ...e field 3 Select the channel display mode and click Play button to play record Use the playback toolbar to control the playback 5 2 Event Search 1 Go to Main Menu Search Event Search button Refer to Fig 5 2 2 Select date and channels on the right hand side A data with highlighted borderline indicates presence of data 3 Checkmark Motion Sensor or All accordingly 4 Click Search button to display the...

Страница 37: ...s The date with highlighted borderline indicates presence of data 3 Click Search button to display the searched files in the file list box 4 Use All button to lock unlock or delete all files in the file management column 5 Double click an unlocked item to play Lock Select a file and click Lock button to lock this file after that that file will not be deleted or covered Unlock Select a locked file ...

Страница 38: ...you can check relevant parameters of network 6 1 5 Online Information In this tab you can check the details of the connected online users Refresh refresh the current interface Disconnect Disconnect the online users to access NVR If this function is used by the admin the particular PC will not be able to access the device for five minutes 6 1 6 Record Information In this interface you can check the...

Страница 39: ... Fig 6 1 9B Information Configuration As soon as the scan is done the MAC Address of the DVR NVR appear on the Server field on Superlive PRO Input on SUPERLIVE PRO the user and password of the DVR NVR Default User admin Password 123456 Press the login button on SUPERLIVE PRO and the mobile phone is connected to the DVR NVR EN ...

Страница 40: ...Vimar SpA Viale Vicenza 14 36063 Marostica VI Italy Tel 39 0424 488 600 Fax Italia 0424 488 188 Fax Export 0424 488 709 www vimar com 49400832A0 00 15 05 VIMAR Marostica Italy ...

Отзывы: