


20
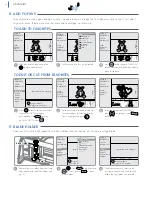
Designs on some cartridges contain easy scoring lines for simple folding. These lines are indicated with a dotted line in
the Display Window.
Scoring adjustment should be varied relative to the material being used. (The age of the blade also affects the scoring quality.)
If the default setting is not scoring deeply enough for a clean fold, the depth should be increased to a higher number.
If the material has been cut along the scoring lines, then the scoring depth should be set to a lower number.
advanced
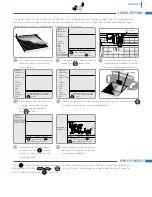
This option controls how hard the blade presses through the material to be cut. Pressure settings should be varied relative
to the material being used. For example, copy paper and vinyl generally work well at settings of 1 or 2. Cardstock and
vellum work best at 2 to 4, depending on material. Shrink film and light chipboard work best between 5 and 6.
SPEED: 7
PRESSURE: 2
12"x12"
CUSTOM
H: 3.75"
W: 3.25"
QTY: 1
to select pressure options
for more options Esc
PRESSURE:
4
H: 3.75"
W: 3.25"
QTY: 1
to change pressure 1-6
to select Esc
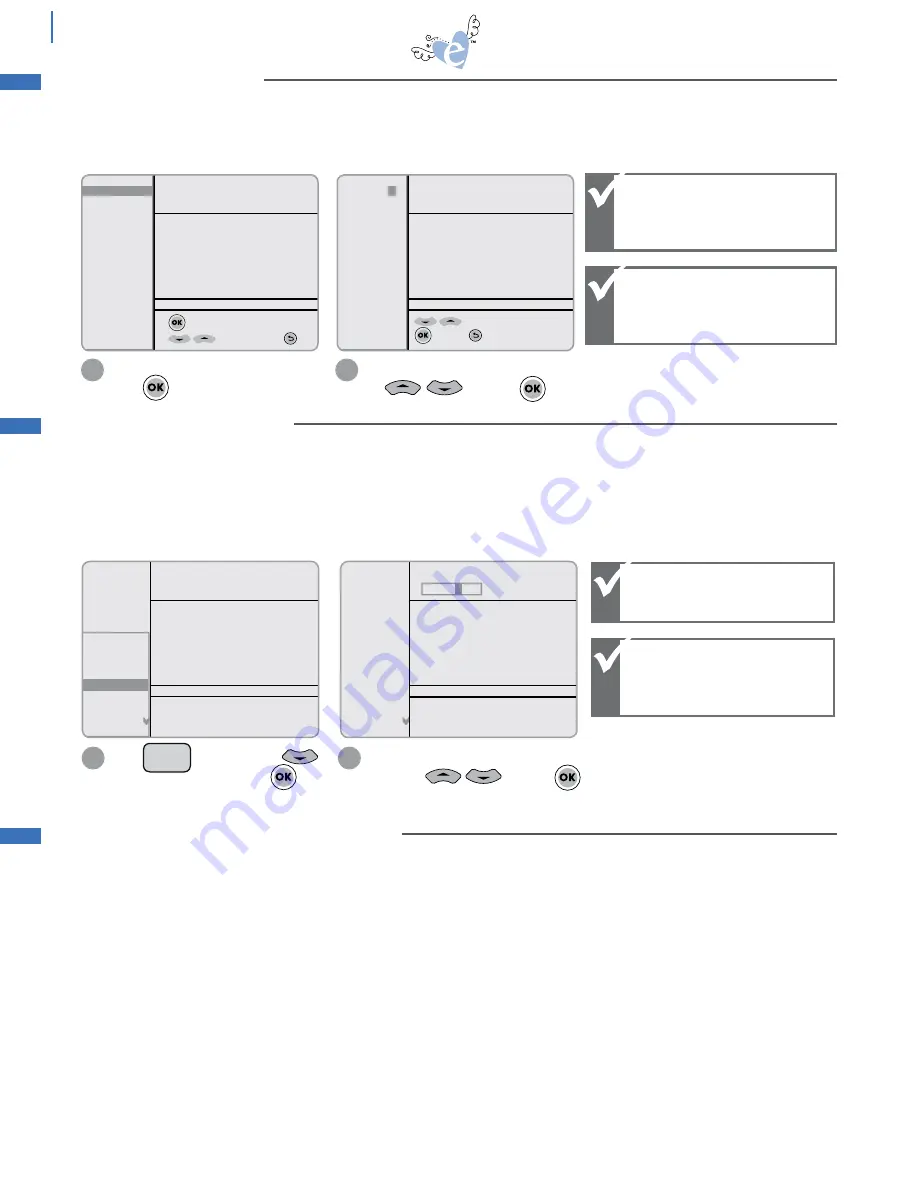
Scroll down to highlight Pressure.
Press
.
Enter a number between 1 and 6 using Keypad
or and press to apply.
Material now appears as Custom.
1
2
Setup
Space
P
R
Setup
Space
P
R
Setup
Space
P
R
Setup
Space
P
R
PRESSURE SETTINGS
Higher number =
Greater pressure.
Lower number =
Lesser pressure.
Press on Keypad. Press
to highlight Scoring Adj. Press .
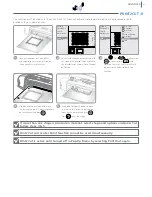
To make cutting easy, the Machine has preset adjustments for various materials that may be selected. Choose a material,
and the Pressure and Speed (and Scoring on selected designs) are automatically adjusted for you.
However, since there are so many options of material thicknesses, the Machine gives you the ability to manually adjust
settings for the perfect cut (see pg. 19 for details). We suggest that you begin with the preset options and do a test cut
on a similar weighted material.
Some other general cutting guidelines to keep in mind:
• If material wrinkles as it cuts, then Speed should be manually set at a slower, lower number. Material will also wrinkle
if Cutting Mat has lost its adhesion. In this case, replace the Cutting Mat.
• If material is not cutting all the way through, try increasing Pressure or Blade Depth number.
• If material appears scraped or bruised near Blade, try decreasing Pressure.
• If shape being cut is simple, try increasing Speed.
• If shape is highly detailed, try decreasing Speed.
• Adjust the Blade Depth for a deeper or shallower cut (see pg. 6 for details).
• For optimal results, try a test cut first and make necessary adjustments to settings before making final cut.
Setup
Space
P
R
Setup
Setup
Space
P
R
Setup
Space
P
R
Setup
Space
P
R
Setup
Space
P
R
Higher number =
deeper scoring.
Lower number =
lighter scoring.
Check that your correct
material type is selected
in the Options Menu.
Enter a number between 1 and 9 using
Keypad or and press
to apply.
1
2
SPEED: 7
PRESSURE: 2
12"x12"
CUSTOM
+ Greetings
+ Languages
+ Dimension
Version
Scoring Adj.
+ Sound
+ Cart. Name
+ Paper Saver
H: 3.75"
W: 3.25"
QTY: 1
Adjust scoring pressure value ID
specify:
5
SPEED: 7
PRESSURE: 2
12"x12"
CUSTOM
+ Greetings
+ Languages
+ Dimension
Version
Scoring Adj.
+ Sound
+ Cart. Name
+ Paper Saver
H: 3.75"
W: 3.25"
QTY: 1
Also check your blade
depth to ensure it is
adjusted to the
appropriate material.
SCORING ADJUSTMENT
ADJUSTING FOR THE PERFECT CUT


