Rev.04/28/17 DR
4
www.eliteproav.com
Bead Chain Tensioner1.
EliteProAV
Manual Tab-Tension
Series uses a Bead Chain Clutch Operated mechanism to allow the screen
material to roll down and up. For the safety of young children, it includes a
Bead chain tensioner (I)
device
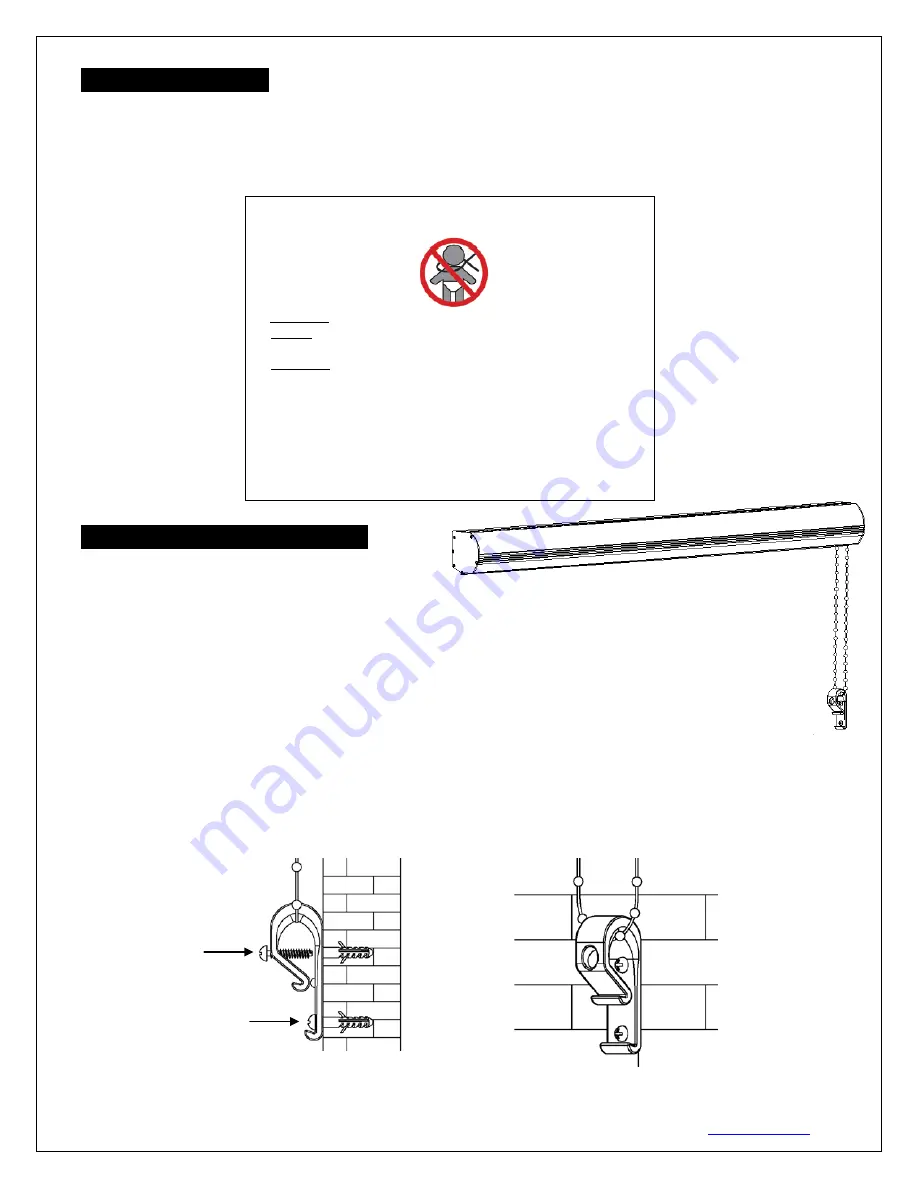
pre-attached to the bead chain (along with the safety label below). To use this tension clip, thread bead chain
through the clip, then attach to wall or window sill so that the bead chain is held taut enough that children
cannot pull it away from the wall or fit their head into the loop.
Bead Chain Tensioner Installation
1. After the screen has been properly installed, allow the bead chain to hang down freely. Then find the best
place on your wall to attach the
Bead chain tensioner (I)
.
2. After locating the position of the
Bead chain tensioner (I)
, mark where to drill the holes for the anchors
with a pencil.
3. Drill the holes and insert the
M8 Dry-wall anchor (J).
4. Tighten the
M4x32 Screw (J)
to the
M8 Dry-wall anchor (J)
when the upper hole of the
Bead chain
tensioner (I)
aligns with the hole of
M8 Dry-wall anchor (J).
5. Tighten the bottom screw hole as shown below to complete the tensioner installation.
Warning for the Safety of Young Children
Young children can STRANGLE in cord and bead chain loops.
1.
ALWAYS
keep cords and bead chains out of children’s reach.
2.
MOVE
cribs, playpens, beds, and any other furniture away from the
bead chain. Children can climb on furniture and get to the cord loop.
3.
INSTALL
the bead chain tensioner as it serves as a safety device to
keep the bead chain from being able to be pulled away from the wall.
Fasteners provided with the tension device may not be appropriate for
all mounting surfaces. Use appropriate anchors to safely secure the
tension device to the mounting surface.


