


6.4 Cursors
Allows to know the signal value in the desired moment.
Cursors are positioned on CH1 by default.
To position cursors on another channel click on the desired channel and tick
the entry
Cursors
.
To start this function you have to stop the measurement.
Proceed as follows:
1. Click on
.
2. Drag labels “a” and “b” (the cursors) along the signal until reaching the desired
points.
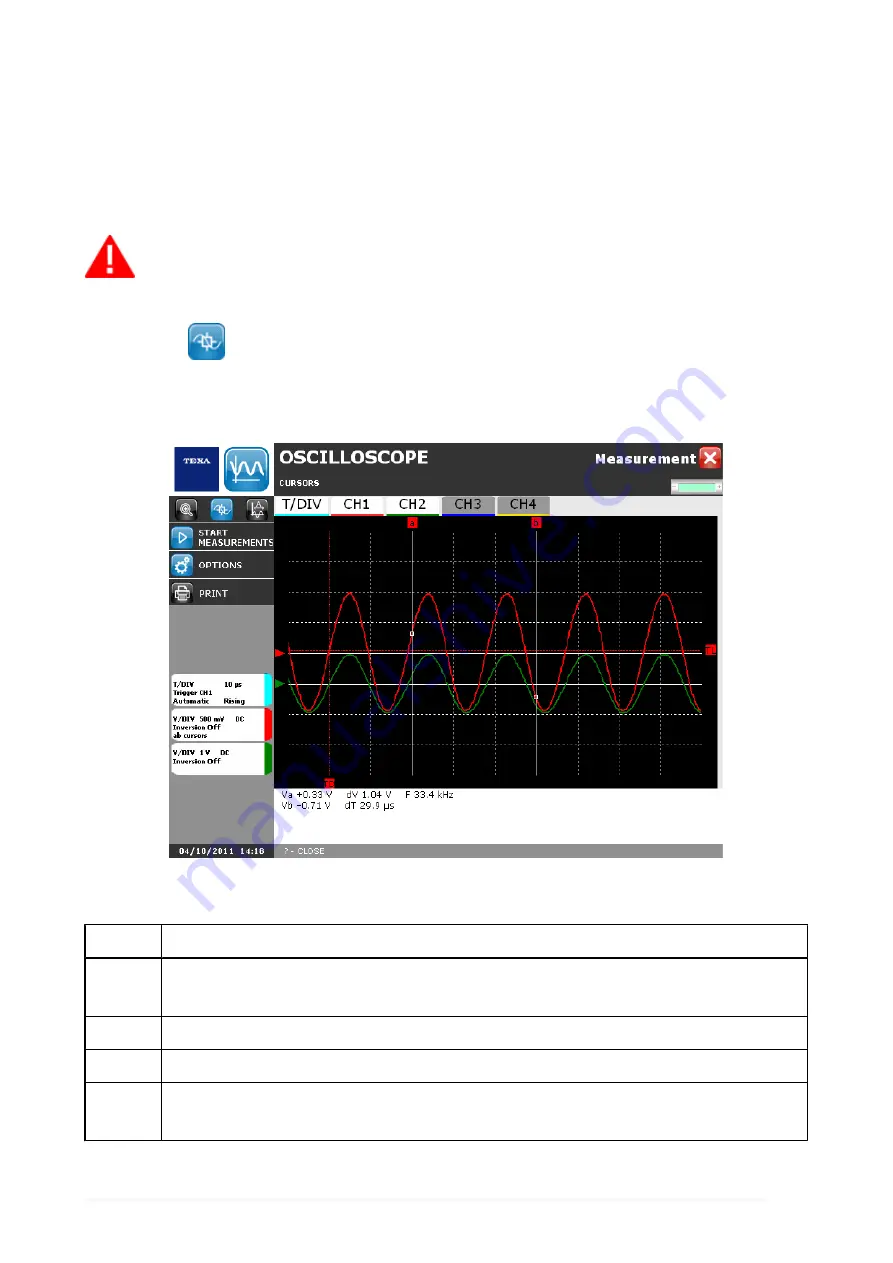
The lower bar provides the following information:
Name
Description
Va / Aa
Indicates the voltage/current value detected in the point signalled by
cursor “a”.
dV / dA Indicate the difference between Va / Aa e Vb / Ab.
F
Indicates the signal frequency.
Vb / Ab
Indicates the voltage/current value detected in the point signalled by
cursor “b”.
110
Содержание UniProbe
Страница 1: ...UniProbe User Manual www elektropartner com...
Страница 2: ...ENGLISH 7 en...
Страница 3: ...2...
Страница 7: ...6...
Страница 18: ...You may now access the self diagnosis functions 17 en...
Страница 26: ...MSS Manual Allows you to view the software manual 25 en...
Страница 33: ...To launch the function from the Tools menu proceed as follows 1 Click 32...
Страница 46: ...2 Click 3 Click 4 Select the ammeter scale 5 Click 6 Follow the instructions that appear on the screen 45 en...
Страница 62: ...2 Click 3 Click 4 Select the ammeter scale 5 Click 6 Follow the instructions that appear on the screen 61 en...
Страница 65: ...2 Click 3 Click 4 Select the ammeter scale 5 Click 6 Follow the instructions that appear on the screen 64...
Страница 71: ...5 Follow the instructions that appear on your screen 6 Click on 70...
Страница 74: ...5 Follow the instructions that appear on your screen 6 Click on 73 en...
Страница 77: ...Reset Allows you to clear the graph 76...
Страница 79: ...The measurement starts To disconnect the tool click on the icon 78...
Страница 100: ...2 Click on The device starts measuring a direct current again 99 en...
Страница 101: ...5 8 Reset This function allows you to clear the graph Proceed as follows 1 Click on The graph is set to zero 100...
Страница 106: ...The Time Division is set 105 en...
Страница 110: ...Zoom in carried out 109 en...
Страница 123: ...7 3 Reset This function allows you to reset the parameters 1 Click The parameters are reset 122...
Страница 128: ...3 Click on The procedure is launched only for the functions selected 127 en...
Страница 131: ...3 Click on 4 Click on The configurations are deleted 130...
Страница 134: ...6 Select the desired device 7 Click on 8 Select the type of communication desired 9 Click on 133 en...
Страница 135: ...10 Click on icon No 11 Click on icon Yes 12 Follow the instructions on the screen 13 Click on icon Ok 134...
Страница 137: ...15 Click on 16 Select the desired device 17 Click on 136...
Страница 139: ...21 Open the drop down menu 22 Select the desired COM port 23 Click on 24 Click on 138...
Страница 142: ...Info Allows you to view information regarding the Bluetooth stack 141 en...
Страница 143: ...9 1 Find This function allows you to search for Bluetooth devices Proceed as follows 1 Click on 2 Click on 142...
Страница 145: ...5 Click on The result of the search is displayed 144...
Страница 147: ...The device is activated 146...
Страница 149: ...The device is deactivated The COM assigned to the device is removed 148...
Страница 151: ...2 Click on 3 Select the desired function 4 Click on 150...
Страница 152: ...5 Click on Repeat the operations described above for each of the functions that use the selected device 151 en...
Страница 153: ...9 5 Info Allows you to view information regarding the Bluetooth stack Proceed as follows 1 Click on 2 Click on 152...
Страница 156: ...Wait for FPGA firmware installation 4 Follow the instructions that appear on your screen 5 Click on 155 en...
Страница 157: ...Wait for ARM firmware installation 6 Follow the instructions that appear on your screen 7 Click on 156...
Страница 158: ...Firmware is updated 157 en...


