7
Defrosting
When the frost has reached a thickness of up to
4mm it can be removed using the ice scraper
provided with the appliance. During this operation it
is not necessary to disconnect the appliance from
the mains and remove the food. Never use metal
tools for this operation.
For complete defrosting (once or twice a year)
proceed as follows:
- turn the thermostat (B) dial to the «OFF» position
(
■
) or disconnect the appliance from the mains.
- Remove any food from inside the freezer and
fridge, wrap it in several sheets of newspaper and
store in a cool,dry place.
- Leave the door open and insert the ice scraper
under the channel in the centre of the lower part
of the appliance; place a low-sided container
beneath the scraper to collect the water (see fig.).
- Clean and dry thoroughly.
- Replace the scraper in one of the drawers .
- Reconnect the appliance to the mains or reset
the thermostat to a functioning position.
- After letting the appliance run for at least two
hours in fast freeze mode, replace the previously
removed food into the compartment.
When the appliance is not in use
When the appliance is not in use for long periods,
disconnect from the electricity supply, empty all
foods and clean the appliance, leaving the doors ajar
to prevent unpleasant smells.
External cleaning
Many proprietary kitchen surface cleaners
contain chemicals that can attack/damage the
plastics used in this appliance. For this reason it
is recommended that the outer casing of this
appliance is only cleaned with warm water with a
little washing-up liquid added.
An accumulation of dust will affect the performance
of the appliance and cause excessive electricity
consumption.
You MUST ensure that the appliance is switched
OFF.
Once or twice a year dust the condenser (black grill)
and the compressor at the back of the appliance,
with a brush or vacuum cleaner, see diagram.
PR259
D068
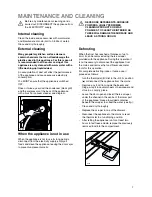
MAINTENANCE AND CLEANING
Before any maintenance or cleaning work is
carried out, DISCONNECT the appliance from
the ELECTRICITY supply.
Internal cleaning
Clean the inside and accessories with warm water
and bicarbonate of soda (5ml to 0.5 litre of water).
Rinse and dry thoroughly.
NEVER USE DETERGENTS, ABRASIVE
POWDERS, HIGHLY PERFUMED
CLEANING PRODUCTS OR WAX
POLISHES, TO CLEAN THE INTERIOR AS
THESE WILL DAMAGE THE SURFACE AND
LEAVE A STRONG ODOUR.
10
CUSTOMER CARE DEPARTMENT
In the event of your appliance requiring service, or if you wish to purchase spare parts, please contact your local
Electrolux Service Force Centre by telephoning:-
0 8 7 0 5 9 2 9 9 2 9
Your telephone call will be automatically routed to the Service Force Centre covering your post code area.
For the address of your local Service Force Centre and further information about Service Force, please visit the
website at www.serviceforce.co.uk
For Customer Service in Ireland please
contact us at the address below:
Electrolux Group (Irl) Ltd
Long Mile Road
Dublin 12
Republic of Ireland
Telephone : +353 (0)1 4090753
Email: [email protected]
Before calling out an engineer, please ensure you have read the details under the heading ‘Something Not
Working.’
When you contact the Service Force Centre you will need to give the following details:
1.
Your name, address and post code
2.
Your telephone number
3.
Clear and concise details of the fault
4.
The model and serial number of the appliance (found on the rating plate)
5.
The purchase date
Please note that a valid purchase receipt or guarantee documentation is required for in-guarantee
service calls.
For general enquiries concerning your Electrolux appliance or for further information on Electrolux products,
please contact our Customer Care Department by letter or telephone at the address below or visit our website
at www.electrolux.co.uk
Customer Care Department
Electrolux
55-77 High Street
Slough
Berkshire
SL1 1DZ
Tel: 08705 950 950 *
*
calls to this number may be recorded for training purposes.
SERVICE AND SPARE PARTS
Содержание EU 7120/1 C
Страница 1: ...f r e e z e r INSTRUCTION BOOK 2222 060 16 EU 7120 1 C ...
Страница 16: ... Electrolux plc 2003 ...


