background image


12

INSTALLATION

If this appliance featuring magnetic door seals is to re-
place an older appliance having a spring lock (latch),
be sure to make that spring lock unusable before you
discard the old appliance. This will prevent it from be-
coming a death-trap for a child.

Location

The appliance should be installed well away from
sources of heat such as radiators, boilers, direct sun-
light etc.
Best performance is obtained with ambient tempera-
ture b18

°

C and +43

°

C (class T); +18

°

C and

+38

°

C (class ST); +16

°

C and +32

°

C (class N); +10

°

C

and +32

°

C (class SN).

The class of your appliance is shown on its rating
plate.
For building-in instructions, see the relevant section.

Electrical connection

Before you plug the appliance into a mains supply,
make sure that the voltage and frequency shown on
the rating plate correspond to your home supply.
A 6% fluctuation above or below the rated voltage is
admissible.
To adapt the appliance to other voltages, use a suita-
ble autotransformer.

It is essential that the appliance be connected to
an efficient earth tap.

For this purpose the supply cable plug incorporates a
special earth contact.
If the sockets of your domestic wiring system are not
grounded, have the appliance connected to a sepa-
rate ground wire by a qualified electrician in accord-
ance with the existing safety regulations.

The Manufacturer declines all responsibility if the
above safety precautions are not observed.

This appliance complies with EEC directive
number 87/308 of 2/6/87 relative to radio inter-
ference suppression.

This appliance complies with the following
E.E.C. Directives:

73/23 EEC of 19.2.73 (Low Voltage Directive) and

subsequent modifications;

89/336 EEC of 3.5.89 (Electromagnetic Compatibil-

ity Directive) and subsequent modifications.

Cleaning the interior

Before using the appliance for the first time, wash the
interior and all internal accessories with lukewarm wa-
ter and some neutral soap so as to remove the typical
smell of a brand-new product, then dry thoroughly. Do
not use detergents which will leave an odour or abra-
sive powders on the interior, as these will damage the
finish.


Building-in instructions


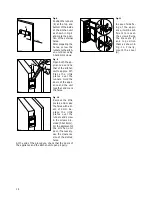
Fig. 1

D112

P

P1

A

P

P1


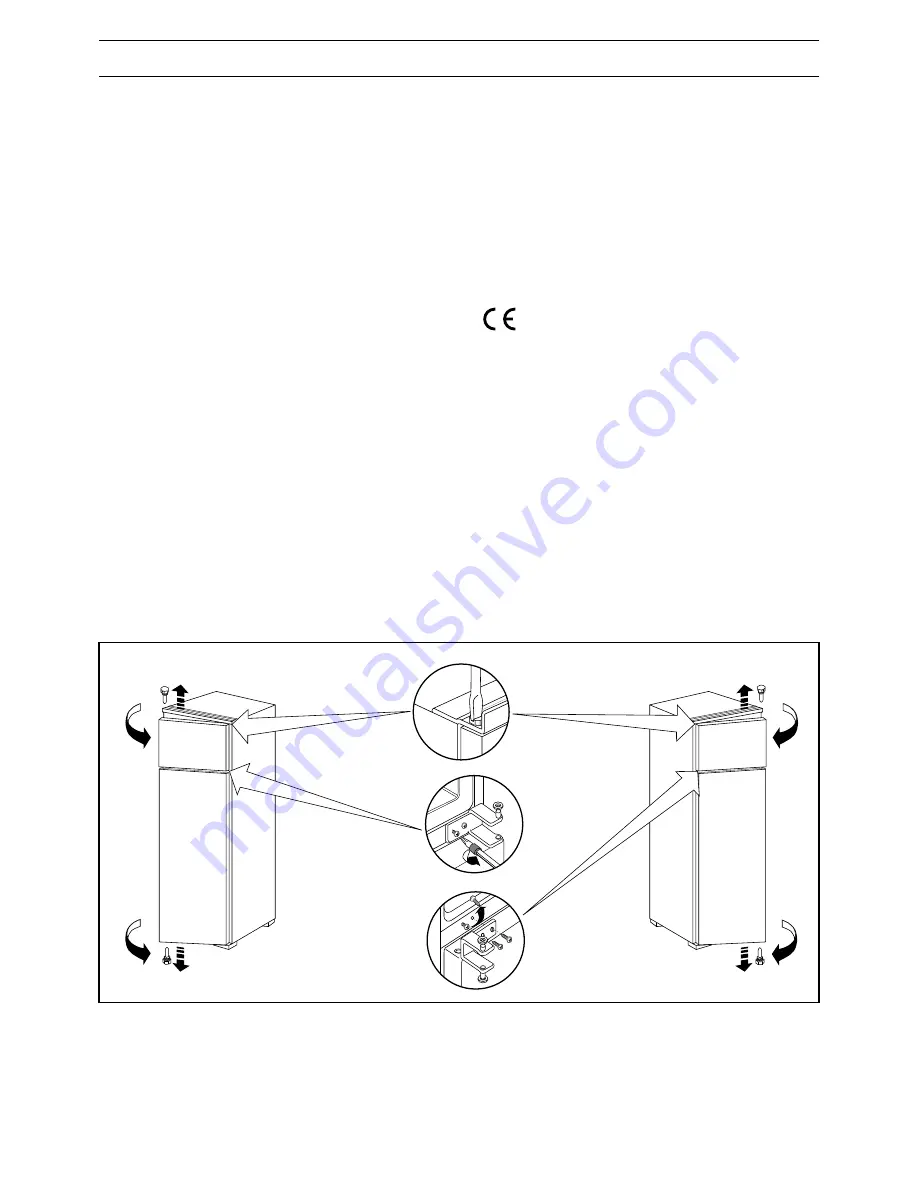
Door reversibility 


(Fig. 1)


Right opening


Remove the pins (P) and (P1).


Left opening


Remove (P) from both sides and the door. Remove (A)
and refit it on the opposite side. Refit the door and (P)
on the left side. Remove (P1) from the right side.

Содержание ER 2824 I

Страница 1: ...I N S T A L L A T I O N A N D I N S T R U C T I O N M A N U A L I N S T A L L A T I O N S U N D G E B R A U C H S A N W E I S U N G FRIGORIFERO CONGELATORE ER2824I FRIDGE FREEZER ER2824I KÜHL GEFRIERSCHRANK ER2824I 2222 014 43 This document was created with FrameMaker 4 0 4 ...

Страница 2: ...age 15 Refrigeration of foods and drinks page 15 Movable shelves page 15 Positioning the door shelves page 15 Freezing fresh food and storage of frozen food page 16 Freezing fresh food page 16 Storage of frozen food page 16 Thawing page 16 Ice cube production page 16 Use of the Wine Cellar compartment page 17 Defrosting page 18 Maintenance page 19 Periodical cleaning page 19 Idle periods page 19 L...

Страница 3: ...nstallation instruc tions ª Parts which heat up should not be exposed Wher ever possible the back of the appliance should be against a wall ª Before any cleaning or maintenance work is carried out be sure to switch off and unplug the appliance ª If the appliance is transported horizontally it is possible that the oil contained in the compressor flows in the refrigerant circuit It is advisable to w...

Страница 4: ...tes a special earth contact If the sockets of your domestic wiring system are not grounded have the appliance connected to a sepa rate ground wire by a qualified electrician in accord ance with the existing safety regulations The Manufacturer declines all responsibility if the above safety precautions are not observed This appliance complies with EEC directive number 87 308 of 2 6 87 relative to r...

Страница 5: ...it fit the trimming provided together with the appliance on the stop strip A D033 50 min cm 200 2 min cm 200 2 A D015 D265 A Fig 5 Open the door and push the appliance against the side of the kitchen unit opposite to that of appliance hinges Fasten the appli ance with 4 screws provided in the kit included with the appliance Snap vent grille C and hinge cover D into position Fig 6 Press in the join...

Страница 6: ...t together and mark the holes Fig 10 Remove the little plates and make the holes with a di am of 2 mm Re place the little plates over the runners and screw in the screws pro vided 3 5x16 mm For the alignment of the kitchen unit door if necessary use the clearance size of the slotted holes At the end of the procedure check that the doors of the appliance and the kitchen unit open properly D285 20mm...

Страница 7: ...ator au tomatically defrosts with a considerable energy saving Refrigeration of foods and drinks To achieve the best results with the refrigerator com partment you should follow one or two very simple rules Do not put warm foods or evaporating liquids in the refrigerator Cover or wrap foods particularly if they have a strong smell or contain aromatic herbs Place the foods so that air can circulate...

Страница 8: ...he food in question may be conserved in months Do not put carbonated liquids fizzy drinks etc in the freezing compartment as they may burst Water ices if consumed immediately after removal from the freezing compartment can possibly cause the skin to be freeze burnt Remember that once thawed frozen food deterio rates rapidly Storage of frozen food To obtain the best performance from this appliance ...

Страница 9: ...mal refrigerator Slide this lever to 0 position to obtain a wine cellar temperature On positions 1 through 4 intermedi ate temperatures are obtained Freezer a This is for storing frozen food and for freezing fresh food Refrigerator b This is for soft cheese blue cheese and cooked foods c This is for storing meat fresh fish milk yoghurt this is the coolest part of the refrigerator Wine Cellar d Thi...

Страница 10: ...omplete defrosting of the freezer com partment proceed as follows Unplug the appliance from the power supply or set the thermostat on the O position Wrap the foods in several sheets of newspaper and then keep them in a cool place D037 Keep the freezer door open and place a basin on the first shelf in the refrigerator directly below the drainage hole and lift up the small lid Fig 16 Fig 16 When def...

Страница 11: ...e light cover Fig 17 D025 CUSTOMER SERVICE If the appliance is not working properly before calling the service center please check the following The light does not turn on when the door is opened Make sure there is electricity supply if there is re place the bulb The compressor does not work Make sure there is electricity supply and that the ther mostat knob is on a working position The compressor...

Отзывы: