background image

102

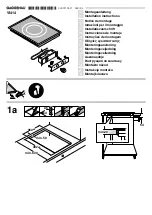
Montage / Assembly / Montaggio 

Ïäçãßåò åãêáôÜóôáóçò 

/


Monta¿

Содержание EHE642

Страница 1: ...tura ÊåñáìéêÞ åóôßá P yta kuchenna Montage und Gebrauchsanweisung Installation and Operating Instructions Instructions de montage et mode d emploi Istruzioni di montaggio e per l uso Ïäçãßåò ñÞóçò Ïäçãßåò åãêáôÜóôáóçò Instrukcja obs ugi Instrukcja monta u ...

Страница 2: ... concerning your personal safety Important Information on how to avoid damaging the appliance 3 Information and practical tips 2 Environmental information 1 These numbers indicate step by step how to use the appliance 2 3 In the event of any technical problems please contact your nearest CUSTOMER SERVICE CENTRE at any time Addresses and tele phone numbers may be found in the appendix under Custome...

Страница 3: ...Cleaning 26 Using the Rings 27 Uses Tables and Tips 28 Pans 28 Charts 29 Reference values for setting the hotplates 29 Cleaning and Care 30 What do I do if 31 Installation Instructions 32 Technical Data 32 Safety Instructions for the Installer 33 Regulations Standards Directives 34 Electrical Connection 35 Rating Plate 35 Service 37 Assembly 102 ...

Страница 4: ...s may only be operated after being in stalled in suitable installation cabinets and workplaces which con form to the relevant standards This ensures sufficient protection against contact for electrical units as required by the VDE Associa tion of German Electrical Engineers If a fault occurs in the appliance switch off all the hotplates switch off or remove the fuse for the hob Child safety The ho...

Страница 5: ... surface to come into contact with the hob e g plastics aluminium foil or cooking foil 2 Disposal Disposing of the packaging material All parts of the packaging can be fully recycled foil and expanded polyurethane parts are appropriately identified Please dispose of packaging material and if appropriate your old appliance properly Please follow the national and regional regulations and material id...

Страница 6: ...of the hob Hob Features Before Using for the First Time Initial Cleaning Wipe the hob with a damp cloth and a little washing up liquid 1 Important Do not use any caustic abrasive cleaners The surface could be damaged ...

Страница 7: ...lates heat more rapidly than normal hotplates They are identified by a red spot which will however disappear after a short while as a result of heating and cleaning To prevent condensation and rust formation please do not allow hot pans to cool on the hotplate or put wet pan lids on it 1 Do not allow items and materials that can melt onto the surface to come into contact with the hotplates e g pla...

Страница 8: ...rds concave They should never be bowed outwards convex 2 Energy saving tips You will save valuable energy if you observe the following tips Always place pots and pans on the hot plate before switching it on Soiled hotplates and pan bases cause in creased power consumption If possible always fit pans with a lid Switch off the hotplates before the end of cooking to make use of the residual heat e g ...

Страница 9: ...pasta Intense browning Deep frying pommes frites chips Browning meat e g goulash Frying e g potato fritters Frying pieces of loin steaks 2 Light frying Frying meat schnitzel cordon bleu chops pancakes rissoles roux light frying fried sausages liver eggs deep frying doughnuts Boiling Steaming Cooking larger quantities of food stews and soups Steaming potatoes Cooking meat stock or bouillon Steaming...

Страница 10: ... oil and then polish with absorbent paper 1 Important Do not clean the stainless steel hob surround with scour ing sand or a scouring pad as this causes scratching Use only suitable stainless steel cleaners and polishes for cleaning stainless steel hobs Please follow the manufacturer s instructions General information Heat the hotplates briefly after cleaning to dry them Do not put any damp or wet...

Страница 11: ...e carried out by ap proved service engineers Improperly effected repairs may result in considerable risk to the user If your appliance needs repairing please contact your specialist dealer or customer service What to do if the hotplates do not work Check whether the corresponding hotplate is switched on the switch is set to the correct heat setting the circuit breaker at the household fuse box has...

Страница 12: ...erwise the warranty will not cover any damage that may occur Technical Data Appliance dimensions Width 580 mm Depth 510 mm Height 43 mm Cut out dimensions Width 560 mm Depth 490 mm Corner radius R5 Power consumption Rear left hotplate 1000 W Front left front right and rear right hotplates 1500 W Heating element voltage 230 V Total connected load max 5 5 kW ...

Страница 13: ...ot be fitted underneath the hob Unless the appliance is built in above an oven there must be at least 100 mm clearance beneath the hob The installation must guarantee shock protection The kitchen unit in which the appliance is fitted must satisfy the sta bility requirements of DIN 68930 All cut surfaces must be sealed with a suitable sealant to protect against moisture On tiled work surfaces the j...

Страница 14: ...perating features of electric cookers for household use EN 55014 2 VDE 0875 part 14 2 EN 55014 VDE 0875 part 14 12 93 EN 61000 3 2 VDE 0838 part 2 EN 61000 3 3 VDE 0838 part 3 relating to basic requirements for electro magnetic compatibility protection EMC This appliance complies with the following EU Directives 73 23 EWG dated 19 02 1973 Low Voltage Directive 89 336 EWG dated 03 05 1989 EMC Direc...

Страница 15: ...terpart in the built in oven or switch box Push the connecting cable to the side on the top of the oven 1 Following connection to the mains supply all hotplates must be switched on at the maximum setting one after the other for approx 30 seconds to check that they function correctly Rating Plate ...

Страница 16: ...fault take Under what circumstances does the fault occur Prior to the telephone call it is impor tant that you make a note of the fol lowing appliance code numbers that are given on the rating plate PNC code 9 digits S No code 9 digits We recommend that you record the code numbers here so that you al ways have them to hand When do you incur costs even during the warranty period if you could have r...

Страница 17: ...102 Montage Assembly Montaggio Ïäçãßåò åãêáôÜóôáóçò Monta ...

Страница 18: ...103 Ausbau Removal Démontage Smontaggio áöáéñÝóôå ...

Отзывы: