background image

Care and Cleaning

Cleaning Condenser

Clean Condenser  

When the “CLEAN CONDENSER” indicator 

comes on, follow these steps to remove and 

clean the condenser assembly:
1.  Open the dryer door and locate the top of 

the condenser access door. 

2.  Pull the condenser access door toward 

you to open.

3.  Rotate the two latches as shown to lower 

the retention panel.

4.  Grab the condenser handle and pull 

straight out.

5.  Rinse condenser in sink. Clean with mild 

soap and water if necessary.

6.  Push condenser back in place, close 

retention panel, and rotate the two latches 

back down into the 6 o’clock position. 

Close the condenser access door.

1

1

Top of condenser access door

16

Содержание EFLS210TIS

Страница 1: ...EN FRONT LOAD DRYER FR SÉCHEUSE Á CHARGEMENT FRONTAL ES SECADORA DE CARGA FRONTAL USE CARE GUIDE GUIDE D UTILISATION ET D ENTRETIEN GUÍA DE USO Y CUIDADO 136964910 April 2020 ...

Страница 2: ...Dryer This dryer operates on a different drying principle than traditional exhaust ducted dryers Your new dryer is a condensation ventless dryer and DOES NOT require exhaust venting that exhausts the drying process air to the outside A condensation dryer works through a closed loop circuit The drying process air is heated by an internal heating element which then passes over and through your cloth...

Страница 3: ...r cycle occurs without heat cool down period Avoid stopping a tumble dryer before the end of the drying cycle unless all items are quickly removed and spread out so that the heat is dissipated DO NOT dry articles containing rubber plastic or similar materials such as bras galoshes bath mats rugs bibs baby pants plastic bags and pillows that may melt or burn Some rubber materials when heated can un...

Страница 4: ...ures If the dryer is moved to a new location have it checked and reinstalled by a qualified service person ALWAYS disconnect the dryer from the electrical supply before attempting any service or cleaning Failure to do so can result in electrical shock or injury WARNING FIRE ELECTRICAL SHOCK HAZARD Avoid fire hazard or electrical shock DO NOT use an adaptor plug or extension cord or remove groundin...

Страница 5: ...0TIS ELFW4222AW 1 2 3 4 5 6 7 8 9 10 WARNING NOT A GENERAL USE RECEPTACLE Only for use with compatible Electrolux washer models listed in this Use Care Guide NOTE Keep the outlet closed if a compatible Electrolux washer plug is not connected to the dryer 1 Control Lock 6 Moisture Sensor Located behind Lint Filter 2 LED Display 7 Condenser Access Door 3 Water Container 8 Adjustable Leveling Legs 4 ...

Страница 6: ...r operates and the flat spots smooth out B AIR FLOW SYSTEM Your dryer is equipped with a high volume air handling system In some installations there may be some sounds associated with air movement throughout the dryer This is normal and can vary with load size and type A B CAUTION Do not continue to use the dryer if you hear squeaking grinding rubbing or other unusual noises This could be a sign o...

Страница 7: ...the way out to ensure all water has been emptied from the container 3 Load the dryer and close the door Load items loosely The average wet load will fill the drum 1 3 to 1 2 full Items need room to tumble freely for even drying and less wrinkling When drying large items dry only two or three items at a time Fill out the load with smaller items For delicate or very small loads add two or three simi...

Страница 8: ... o clock posi tion OR press the power button to turn off the unit and cancel the cycle Press the power button again to turn on the unit Select the new cycle and or settings and press start pause to begin Changing a cycle se lection without canceling the current cycle WILL NOT change the cycle NOTE There is an exception if the start button has been pressed to begin a cycle and the delay start funct...

Страница 9: ... shown above for reference only Your model may differ Cycle Options Cycle Status Display Cycle Selection Selecting the Right Cycle to Save Energy This dryer has been specifically designed with options to help you save energy and at the same time utilize the optimal drying setting for your clothing The normal cycle was used to rate the dryer for energy efficiency The normal cycle defaults to Auto D...

Страница 10: ...rol lock and mute sound buttons simultaneously for 5 seconds to Controls and Settings NOTE To change the settings once the cycle has begun after the start button has been pressed either rotate the knob to the reset position 12 o clock position OR press the power button to turn off the unit and cancel the cycle Press the power button again to turn on the unit and select the new cycle and or setting...

Страница 11: ... this will increase the time of each cycle by approx 10 2 Max dry level this will increase the time of each cycle by approx 20 Please note that this dryness level change will apply to every dry cycle and cycle settings combination except for the time dry cycle The time dry cycle dryness level and available cycle times cannot be changed by adjusting the remaining moisture level setting 5 Press and ...

Страница 12: ... the power button to turn off the unit and cancel the cycle Press the power button again to turn on the unit and select the new cycle and or settings and or options and press start to begin Cycle options CANNOT be changed without canceling the current cycle eco mode Select eco mode to run a more eco friendly cycle with reduced temperature Cycle times with eco mode selected will be longer extended ...

Страница 13: ...a dry time convenient to your schedule or during off peak energy hours The delay time selected will be displayed and begin counting down when you select start A cycle can be delayed up to a maximum of 6 hours Status Display Timer The estimated total cycle time will be displayed when the cycle is selected The estimated remaining cycle time is displayed throughout the cycle Reversible Door Your drye...

Страница 14: ...an the drum with a damp cloth and a mild liquid household cleanser Remove cleanser residue before drying the next load See next page for more information regarding cleaning of the condenser assembly Outside Clean the cabinet with mild soap and water Never use harsh gritty or abrasive cleansers Remove debris and lint from the front of the condenser door with a vacuum cleaner Remove glue residue fro...

Страница 15: ...er without lint filter in place CAUTION DO NOT drink or prepare food with the con densed water from your dryer water It can cause health problems to people and pets Clean Lint When the CLEAN LINT indicator comes on follow these steps to clean the filter 1 Remove the filter by pulling straight up 2 Release the latch on the filter grille to open the filter 3 Remove trapped lint and larger particles ...

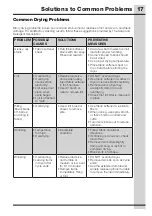
Страница 16: ...door 2 Pull the condenser access door toward you to open 3 Rotate the two latches as shown to lower the retention panel 4 Grab the condenser handle and pull straight out 5 Rinse condenser in sink Clean with mild soap and water if necessary 6 Push condenser back in place close retention panel and rotate the two latches back down into the 6 o clock position Close the condenser access door 1 1 Top of...

Страница 17: ...er to remove lint DO NOT overload dryer Use fabric softener in washer or dryer to reduce static electricity Remove items when they are slightly damp to avoid overdrying Check that lint filter is clean and in place Pilling fibers break off ball up and cling to fabric Overdrying Use a lint brush or shaver to remove pills Use fabric softener to lubricate fibers When ironing use spray starch or fabric...

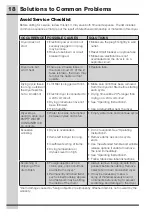
Страница 18: ...g each cycle Drying time will be 20 longer than drying on a 240 volt circuit See Operating Instructions Use a dehumidifier near the dryer Dryer stops during a cycle and EMPTY WATER CONTAINER is lit on console Water tank was not emptied between cycles and is full Empty water tank and continue cycle Excessive wrinkling Dryer is overloaded Items left in dryer too long Insufficient sorting of items Dr...

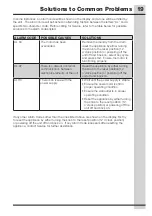
Страница 19: ...rd is still in proper operating condition Ensure the wall outlet is in proper operating condition Reset the appliance by either turning the knob to the reset position 12 o clock position or powering off the unit off and back on In some instances an alarm code will be shown on the display and a tone will be emitted by the unit The alarm code will be flashed in alternating fashion between the letter...

Страница 20: ...ing but not limited to floors cabinets walls etc 13 Damages caused by services performed by unauthorized service companies use of parts other than genuine Electrolux parts or parts obtained from persons other than authorized service companies or external causes such as abuse misuse inadequate power supply accidents fires or acts of God DISCLAIMER OF IMPLIED WARRANTIES LIMITATION OF REMEDIES CUSTOM...

Страница 21: ...21 ...

Страница 22: ...electrolux com shop ...

Отзывы: