background image

3

TABLE OF CONTENTS

IMPORTANT SAFETY INFORMATION ...................................................2
PRODUCT INFORMATION .......................................................................4
OPERATING INSTRUCTIONS ..................................................................6

Connecting Power .........................................................................................................6
Battery Backup ................................................................................................................6
Installing the Battery .....................................................................................................6

Daylight Saving Time (DST) / Summer Time

 ..........................................................7

Cancelling / Reactivating Automatic DST / Summer Time .................................7
Setting the Date & Time ...............................................................................................8
Setting Alarm 1 & Alarm 2...........................................................................................8
Snooze Function  ......................................................................................................... 10
Sleep Timer ................................................................................................................... 10
Nap Timer ..................................................................................................................... 10
Dimmer .......................................................................................................................... 10
Temperature Settings ..................................................................................................11
Listening to the Radio .................................................................................................11
To Set the Radio Presets ............................................................................................11
To Recall the Radio Presets.......................................................................................12
Projection Unit .............................................................................................................12
AUX In ............................................................................................................................12

ELECTROHOME

®

 WARRANTY ..............................................................13

TROUBLESHOOTING ..............................................................................15
SPECIFICATIONS ......................................................................................15
CARE AND MAINTENANCE ...................................................................16
WARNINGS .................................................................................................17

Содержание EAAC601

Страница 1: ... read this instruction manual carefully before using product to ensure proper use Keep this manual in a safe place for future reference Merci d avoir fait l achat de cet appareil Electrohome Veuillez lire le présent guide attentivement avant de faire fonctionner l appareil pour vous assurer de l utiliser correctement Conservez le présent guide dans un endroit sûr afin de pouvoir vous y référer au ...

Страница 2: ...d has been spilled on or into the product B If the product has been exposed to rain water or other liquids C If the product does not operate normally by following the operating instructions Adjust only those controls that are covered by the operating instructions Improper adjustment of other controls may result in damage and will often require extensive work by a qualified technician to restore th...

Страница 3: ... 7 Cancelling Reactivating Automatic DST Summer Time 7 Setting the Date Time 8 Setting Alarm 1 Alarm 2 8 Snooze Function 10 Sleep Timer 10 Nap Timer 10 Dimmer 10 Temperature Settings 11 Listening to the Radio 11 To Set the Radio Presets 11 To Recall the Radio Presets 12 Projection Unit 12 AUX In 12 ELECTROHOME WARRANTY 13 TROUBLESHOOTING 15 SPECIFICATIONS 15 CARE AND MAINTENANCE 16 WARNINGS 17 ...

Страница 4: ...4 NAP SIESTE C F DST HA 14 15 16 17 13 TIME ZONE FUS HOR DIMMER GRADATEUR AM FM MEM M SET RÉGL SNOOZE SLEEP MIN SOM SOMNO 18 19 20 21 12 11 5 9 10 3 4 1 2 7 8 6 PRODUCT INFORMATION ...

Страница 5: ...Indicator 11 Time Main Function Indicator 12 Indoor Temperature Display 13 LCD Screen 14 Daylight Savings Time 15 ºC ºF 16 Volume Down Nap 17 Volume Up Calendar 18 Projection Unit 19 Set Memory 20 Time Zone Snooze Sleep Dimmer 21 Radio ON OFF AM FM Band 22 Alarm 1 23 Alarm 2 24 AUX Input 25 Speaker 26 FM Antenna 27 Indoor Temperature Sensor 28 Battery Door 29 Projection Focus 30 Projection 180º Fl...

Страница 6: ...ears on the display press ONCE to confirm your selection There are 8 programmed times zones 0 Newfoundland time 1 Atlantic time 2 Eastern time default 3 Central time 4 Mountain time 5 Pacific time 6 Alaska time 7 Hawaiian time Battery Backup This alarm clock is equipped with a battery backup feature This feature will restore your alarm clock settings in the event of a power outage The 3V CR2032 Fl...

Страница 7: ...e the power cord and may cause an electric shock when disconnecting the power cord from the wall outlet Pull firmly at the base of the plug Daylight Saving Time DST Summer Time Daylight Saving Time Summer Time is automatically preset An icon will appear on screen to indicate DST is on Daylight saving time begins at 2 00 AM on the second Sunday of March Standard time begins at 2 00 AM on the first ...

Страница 8: ...ection press the button once again Setting Alarm 1 Alarm 2 Press the ALARM 1 or ALARM 2 button once to view the current alarm setting and then press and hold to enter the alarm set mode The alarm time will flash and the settings will appear in the following order HOUR MIN ALARM MODES WAKE OPTIONS RADIO VOLUME if applicable 3 Press the or buttons to decrease increase the HOUR press the or button to...

Страница 9: ... the Wake options AM FM or bu buzzer press the or button to confirm your selection if AM or FM is selected the Alarm Volume selection will begin to flash 7 Press the or buttons to decrease increase the Alarm Volume press the or button to confirm your selection Press and hold the or buttons to quickly decrease increase through settings To cancel an alarm while it is going off press the button If an...

Страница 10: ...r press the button Nap Timer The nap timer allows you to set a buzzer alarm to go off after a preset amount of time ranging from 90 minutes to 10 minutes 1 With radio off press the button to turn on the nap timer 2 Press the button to toggle through the preset times 90min 80min 70min 60min 50min 40min 30min 20min 10min OFF 3 When enabled pressing the button will show current nap timer and pressing...

Страница 11: ...ontrol the radio volume with the or buttons 6 Press the button to turn the radio OFF 7 Please ensure that the FM antenna is completely unrolled and extended for best FM reception The AM band uses an internal directional aerial For best reception please rotate the radio To Set the Radio Presets 1 Press the button on the front panel to turn the radio ON 2 Press and hold the button while the radio is...

Страница 12: ...t until the projected time temperature is clearly shown on the ceiling or wall To display the temperature press and hold the button on the back of the projection unit To flip the projected image temperature or time 180 press the button once AUX In This clock radio is equipped with a convenient auxiliary input that allows you to use your clock radio as a speaker for another audio device 1 Connect a...

Страница 13: ...oltage or liquid spillage 7 Any product received without appropriate model serial number and CSA cUL cULus cETL cETLus markings 8 Any products used for rental or commercial purposes 9 Any installation setup and or programming charges Should this Electrohome product fail to operate during the warranty period warranty service may be obtained upon delivery of the Electrohome product together with pro...

Страница 14: ...er support representative first regarding any additional information on product features specifications or assistance with setup Please contact us via one of the methods below For more product information visit electrohome com Support electrohome com support Online Web Chat electrohome com ...

Страница 15: ...osition the radio for better AM reception FM Antenna wire not extended Extend antenna wire CLOCK Incorrect time Batteries inserted incorrectly not connected or dead Check batteries Clock not set Set the clock Alarm does not turn on Alarm is not set to turn on Press and hold ALARM 1 or ALARM 2 to turn on the alarm Clock is not set Set the clock Alarm time is not set Set alarm time SPECIFICATIONS Fr...

Страница 16: ...ence in a residential installation This equipment generates uses and can radiate radio frequency energy and if not installed and used in accordance with the instructions may cause harmful interference to radio communications However there is no guarantee that interference will not occur in a particular installation If this equipment does cause harmful interference to radio or television reception ...

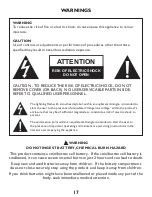
Страница 17: ...ture CAUTION Use of controls or adjustments or performance of procedures other than those specified may result in hazardous radiation exposure CAUTION TO REDUCE THE RISK OF ELECTRIC SHOCK DO NOT REMOVE COVER OR BACK NO USER SERVICABLE PARTS INSIDE REFER TO QUALIFIED USER PERSONNEL The lightning flash with arrowhead symbol within an equilateral triangle is intended to alert the user to the presence...

Страница 18: ... solution and clean soft cloth 9 Never attempt to insert wires pins or other such objects into the vents or opening of the unit 10 Batteries shall not be exposed to excessive heat such as sunshine fire or the like 11 Attention should be drawn to the environmental aspects of battery disposal Do not dispose this product into usual household garbage at the end of its lifecycle hand it over to a colle...

Страница 19: ...19 NOTES ...

Страница 20: ...s suivantes A Si du liquide a été renversé sur ou dans l appareil B Si l appareil a été exposé à la pluie l eau ou d autres liquides C Si l appareil ne fonctionne pas normalement en suivant le mode d emploi Effectuer que les commandes qui sont couvertes par le mode d emploi Un mauvais réglage des autres commandes peut entraîner des dommages et nécessitera souvent un travail approfondi par un techn...

Страница 21: ... l heure d été 26 Réglage de la date et de l heure 26 Réglage de l alarme 1 et de l alarme 2 26 Fonction de rappel de sonnerie 28 Minuterie sommeil 28 Minuterie sieste 28 Intensité d éclairage 29 Réglages de la température 29 Écouter la radio 29 Pour régler les stations programmées 30 Pour rappeler les stations programmées 30 Unité de projection 31 Entrée AUX 31 GARANTIE ELECTROHOME 32 DÉPANNAGE 3...

Страница 22: ...22 NAP SIESTE C F DST HA 14 15 16 17 13 TIME ZONE FUS HOR DIMMER GRADATEUR AM FM MEM M SET RÉGL SNOOZE SLEEP MIN SOM SOMNO 18 19 20 21 12 11 5 9 10 3 4 1 2 7 8 6 RENSEIGNEMENTS SUR LE PRODUIT ...

Страница 23: ...n Heure Actuelle 12 Affichage de la température intérieure 13 Écran ACL 14 Heure d été 15 ºC et ºF 16 Réduction du volume Sieste 17 Augmentation du volume Calendrier 18 Unité de projection 19 Réglage Mémoire 20 Fuseau horaire Rappel de sonnerie Arrêt différé Intensité d éclairage 21 Radio ON OFF allumée éteinte et fréquence AM FM 22 Alarme 1 23 Alarme 2 24 Entrée AUX 25 Haut parleur 26 Antenne FM ...

Страница 24: ...Pour changer votre fuseau horaire après la configuration Avec la radio éteinte appuyez et maintenez enfoncé le bouton jusqu à ce que les numéros des fuseaux horaires clignotent Appuyez sur ou jusqu à ce que votre propre fuseau horaire apparaît à l écran appuyez sur UNE fois pour confirmer votre sélection Il y a huit 8 fuseaux horaires programmes 0 Heure de Terre Neuve 1 Heure de l Atlantique 2 Heu...

Страница 25: ...utilise pendant une période prolongée veuillez retirer la pile afin d éviter les dommages éventuels causés par une pile qui a fui ATTENTION Lors du remplacement de la pile ne pas débrancher la fiche CA de la prise de courant L heure et l alarme seront initialisées Ne pas brancher ou débrancher le câble d alimentation si vous avez les mains mouillées Si vous ne prévoyez pas d utiliser l appareil pe...

Страница 26: ...région et la juridiction de chaque pays région Dans un tel cas annulez le réglage automatique de l HA l heure été Si vous vivez dans un pays ou une région qui n a pas introduit l heure avancée l heure d été vous devez annuler le réglage automatique de l HA l heure d été avant d utiliser l appareil Réglage de la date et de l heure Pour changer la date et l heure appuyez et maintenez le bouton enfon...

Страница 27: ...UE lors de la sélection 1 1 vous devez choisir un jour spécifique comme suit 1 lundi 2 mardi 3 mercredi 4 jeudi 5 vendredi 6 samedi 7 dimanche 3 Appuyez sur les boutons ou pour basculer entre les paramètres du MODE D ALARME puis appuyez sur le bouton ou pour confirmer votre sélection si 1 1 est sélectionné appuyez sur les boutons ou pour basculer entre les jours de la semaine et appuyez sur le bou...

Страница 28: ...pel de sonnerie appuyez sur le bouton sur le dessus de l appareil la fonction de Rappel de sonnerie s arrête automatiquement après 30 minutes Minuterie sommeil Le minuteur de sommeil vous permet d écouter de la musique pendant une durée prédéfinie allant de 90 minutes à 15 minutes Il est couramment utilisé par les personnes qui préfèrent s endormir en musique 1 Appuyez sur le bouton pour allumer l...

Страница 29: ...ntense ou même l éteindre Il y a trois options de gradation High Low OFF Élevé Bas Fermé 2 Avec la radio fermée appuyez sur le bouton afin de basculer entre les paramètres d intensité the dimmer settings Réglages de la température La température peut être affichée en C ou F 1 Avec la radio fermée appuyez et maintenez enfoncé le bouton afin de basculer entre les modes C ou F Écouter la radio 1 Appu...

Страница 30: ...ir la station de radio souhaitée 4 Pour programmer une station de radio existante appuyez et maintenez en foncé le bouton Un numéro préréglé clignotera à l écran par exemple P02 5 Utilisez les boutons ou pour passer au numéro préréglé souhaité 6 Appuyez à nouveau sur le bouton pour définir le préréglage 7 Répétez les étapes 2 à 6 pour régler plusieurs paramètres prédéfinis Pour rappeler les statio...

Страница 31: ...il de projection Pour faire basculer l image projetée la température ou l heure de 180 appuyez une fois sur le bouton Entrée AUX Ce radio réveil dispose d une entrée auxiliaire pratique qui vous permet d utiliser votre radio réveil comme un haut parleur pour un autre périphérique audio 1 Branchez un câble de 3 5 mm non fourni dans la prise à l arrière du radio réveil et branchez l autre extrémité ...

Страница 32: ...u le renversement de liquide 7 Tout appareil ne portant pas les identifications appropriées quant aux numéros de modèle et de série ni les étiquettes et attestations de l ACNOR de l ULC de l ULI de l ETL au Canada et aux États Unis 8 Tout appareil utilisé à des fins commerciales ou de location 9 Tous les frais d installation d ajustement et ou de programmation Si cet appareil de marque Electrohome...

Страница 33: ...OHOME pour toute information supplémentaire sur les caractéristiques du produit les spécifications ou pour de l aide avec l installation Veuillez nous contacter par l une des méthodes ci dessous Pour plus d information sur nos produits visitez electrohome com Soutien electrohome com support Clavardage en ligne electrohome com 33 ...

Страница 34: ...uit ou le son est déformé sur la radio AM ou FM AM interférence Placez la radio pour une meilleure réception AM FM le fi de l antenne n est pas bien étiré Étirez le fil de l antenne HORLOGE Incorrect time La pile est mal insérée l appareil n est pas branché ou la pile est à plat Réglez l horloge L horloge n est pas réglée Appuyez et maintenez enfoncé le bouton de l ALARME 1 ou l ALARME 2 afin d ac...

Страница 35: ...e de classe B conformément à la Partie 15 des règlements de la FCC Ces limites sont conçues pour fournir une protection raisonnable contre les interférences nuisibles dans une installation résidentielle Cet équipement génère utilise et peut émettre une énergie de radiofréquence et s il n est pas installé et utilisé conformément aux instructions il peut causer des interférences nuisibles aux commun...

Страница 36: ...SSEMENT L utilisation de commandes de réglages ou l exécution de procédures autres que ceux spécifiés peut entraîner une exposition à des rayonnements dangereux ATTENTION AFIN DE RÉDUIRE LE RISQUE DE DÉCHARGE ÉLECTRIQUE NE PAS RETIRER LE COUVERCLE OU LE DOS IL N Y A AUCUNE PIÈCE POUVANT ÊTRE ENTRETENUE OU RÉPARÉE PAR L UTILISATEUR À L INTÉRIEUR VEUILLEZ CONSULTER UN PERSONNEL UTILISATEUR QUALIFIÉ ...

Страница 37: ...doux et propre 9 Ne tentez jamais d insérer des fils des épingles ou autres objets dans les bouches d aération ou l ouverture de l appareil 10 Les piles ne doivent pas être exposées à une chaleur excessive comme le soleil un feu ou autre élément semblable 11 Il convient de souligner les aspects environnementaux de l élimination de la pile Ne pas jeter la pile dans les ordures ménagères à la fin de...

Страница 38: ...38 NOTES ...

Страница 39: ...39 NOTES ...

Страница 40: ...electrohome com ...

Отзывы: