7
CARE AND MAINTENANCE
To ensure that the humidifier continues to function correctly, and performs to its capacity, it
is highly recommended that you clean the humidifier weekly. Failure to keep the unit well
maintained will affect the quality of atomization, and could have a negative on the air quality.
Turn off the humidifier and unplug from the mains before attempting cleaning or
maintenance. Do not use harsh detergents, solvents or abrasive detergents to clean the
humidifier.
The unit is provided with a small brush to clean the atomiser. Do not use sharp objects, as
they are likely to scratch the surface of the atomiser.
The water tank and outer casing can be cleaned using a soft damp cloth. Once cleaned,
wipe down with a dry cloth. For a deeper clean of the water tank, a white vinegar solution
can be used.
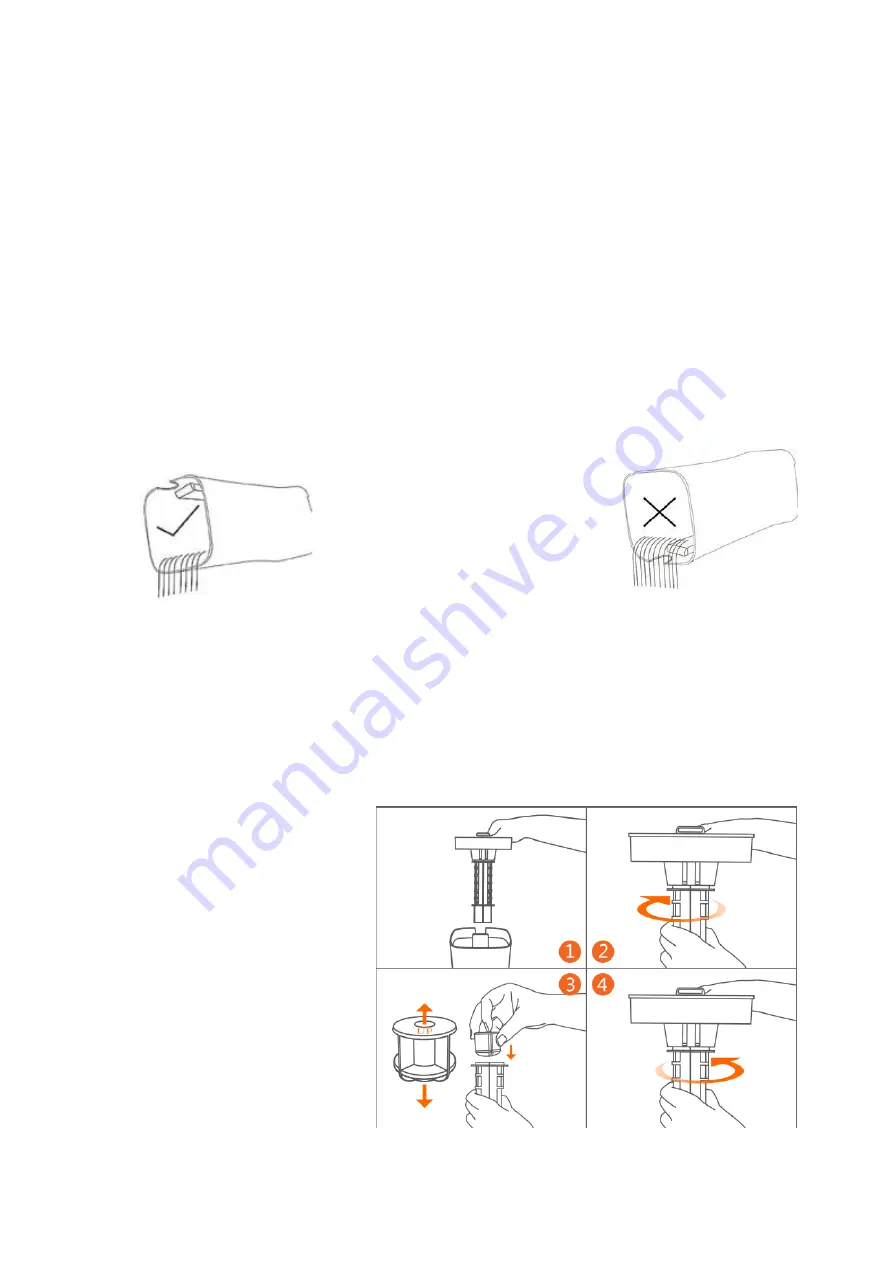
EMPTYING THE WATER TANK
When emptying the water tank,
ensure that the cut out for the
lid is on the top side of the unit.
Pouring water out with the cut
out on the underside may lead
to damage to electronic
components within the unit.
REPLACING THE FLOAT VALVE
If the amount of mist released by the unit decreases, or the unit starts to emit an abnormal
noise, it may be an indication of a defective float valve. Please inspect the float valve, and
replace if necessary following the steps below:
Before replacing the float valve, ensure the unit is turned off and unplugged.
1. Remove the lid from the
humidifier.
2. Remove the float tube from
the lid by twisting it
anticlockwise.
3. Slide the float valve out of the
tube. Slide the replacement
valve into the tube, ensuring
that the UP label is pointing
towards the lid.
4. Reattach the float tube to the
lid by locating the tabs within
the slots on the lid, and
twisting clockwise.


