34
Crowduino UNO-SD/Arduino UNO x1
Crowtail – Base Shield x1
Crowtail – IR Receiver x1
Crowtail – Infrared Remote Control x1
Crowtail – LED(Green) x1
Crowtail – LED(Red) x1
Crowtail – Cable x3
USB Cable x1
Required Parts
STEP2:
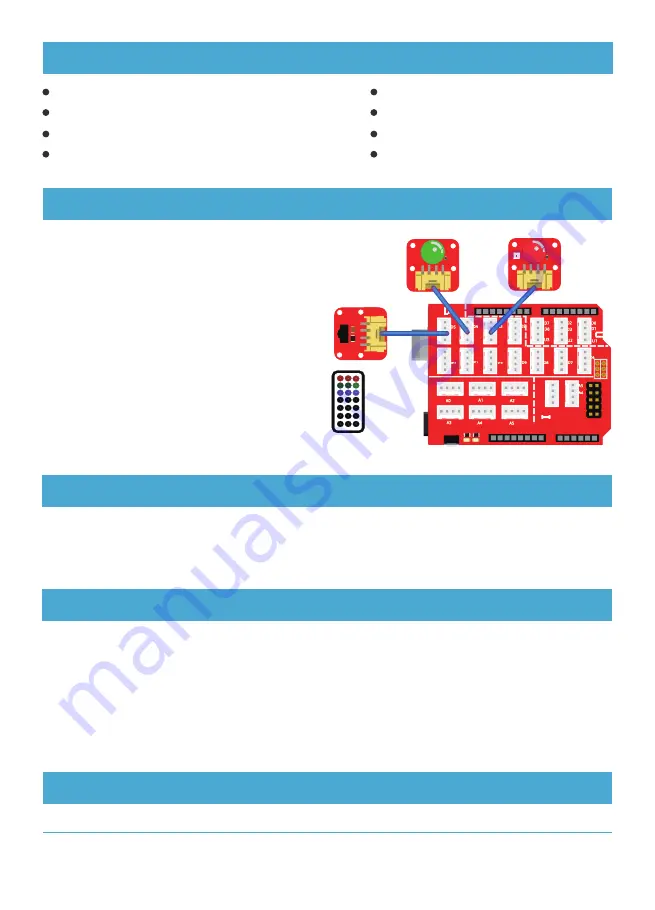
Connect Crowtail-LED(Red),
Crotail-LED(Green) and Crowtail-IR Receiver to
Crowtail-Base shield's D3, D4 and D5 ports.The
complete connection is as follows:
STEP1:
Plug the Crowtail-Base Shield onto
the Arduino or Crowduino Board.
Hardware Connection
After the program upload is completed, when you press the "1" button on the remote control, the red
LED lights on. When you press the "2" button on the remote control, the green LED light on. When
the "3" button on the remote control is pressed, these two LEDs will be turned off at the same time.
What will you see
1. Import the IR remote library and declare some variable of the remote control button.
2. Declare the pin of two color LEDs and IR Receiver and create an instance of IR Receiver.
3. Initialize serial monitor and IR receiver and then declare modules are output or input.
4. Determine which button is pressed .if the pressed button is the last button pressed or the newly
pressed button.
5. Use switch() statement to do the different things when different buttons are pressed.
6. Receive the next value.
Code overview
Open the downloaded folder “Crowtail-
Advanced kit for Arduino demo code”, navigate
to the folder lib-> IRremote, and add IRremote to
the Arduino library. Open the
P16_IR_Control_
System
with Arduino IDE and upload it.
'const' is the abbreviation of constants. If you use this to define variables, the variables are marked as
“read-only”, that is, they cannot be changed during the program. Constants are great for declaring pin
Constant: const uint16_t BUTTON_0 = 0x6897;
Code usage
Содержание Crowtail
Страница 48: ......


