background image


w w w . e l a t i o n l i g h t i n g . c o m  


                                                17

                ARENA Q7 ZOOM™ User Manual ver 1 

F I X T U R E   M E N U  

ON-BOARD SYSTEM MENU 

The 

ARENA Q7 ZOOM™

  comes with an easy to navigate system menu.  The next 

section will detail the functions of each command in the system menu. 


LCD MENU CONTROL PANEL 

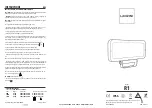
The control panel (see image below) located on back of the fixture allows you to 
access the main menu and make all necessary adjustments to the

  ARENA Q7 

ZOOM™.

  During normal operation, pressing 

MENU

  button once will access the 

fixture’s main menu. Once in the main menu you can navigate through the different 
functions and access the sub-menus with the 

UP 

and 

DOWN 

buttons. Once you 

reach a field that requires adjusting, press  the 

ENTER

  button to activate that field 

and use the 

UP

  and 

DOWN

  buttons  to adjust the field. Pressing  the 

ENTER 

button 

once more will confirm your setting. You may exit the main menu at any time 
without making any adjustments by pressing  and holding the 

MENU

  button  for  3 

seconds. 


The MENU display will lock when NO buttons are pressed for 30 seconds. When the 
display locks, none of the control panel buttons will respond. To unlock the display, 
press and hold the MENU button 3 seconds to access the menu options once again. 


Содержание ARENA PAR ZOOM

Страница 1: ...ARENA Q7 ZOOM user manual E L A TI ON ARENA Q7 ZOOM user manual...

Страница 2: ...eir respective companies ELATION PROFESSIONAL and all affiliated companies hereby disclaim any and all liabilities for property equipment building and electrical damages injuries to any persons and di...

Страница 3: ...T E N T S General Information 4 Warranty 6 Safety Instructions 7 General Guidelines 8 Fixture Overview 9 Fixture Installation 10 Understanding DMX 13 Fixture Menu 17 DMX Channel Functions And Values 1...

Страница 4: ...UNPACKING Thank you for purchasing the ARENA Q7 ZOOM by Elation Professional Every ARENA Q7 ZOOM has been thoroughly tested and has been shipped in perfect operating condition Carefully check the ship...

Страница 5: ...under warranty or not must be freight pre paid and accompany a return authorization R A number The R A number must be clearly written on the outside of the return package A brief description of the pr...

Страница 6: ...aser by Elation Professional if the product is damaged because not properly maintained as set forth in the product instructions guidelines and or user manual D This is not a service contract and this...

Страница 7: ...lines described in this manual Only qualified and certified personnel should perform installation of this fixture and only the original rigging parts brackets included with this fixture should be used...

Страница 8: ...ocation with adequate ventilation at least 0 6 15cm from adjacent surfaces Be sure no air ventilation slots are blocked DO NOT attempt installation and or operation without knowledge how to do so DO N...

Страница 9: ...h t i n g c o m 9 ARENA Q7 ZOOM User Manual ver 1 F I X T U R E O V E R V I E W 1 LCD Menu Function Display 2 FUSE 3 5pin DMX IN OUT 4 Safety Cable Attachment Points 5 powerCON IN OUT 6 MENU DOWN UP...

Страница 10: ...ting temperature for this fixture is 104 F 40 C Do not use the fixture under or above this temperature Maximum temperature of the external surface 185 F 85 C Before mounting the fixture to any surface...

Страница 11: ...odic safety inspection of all installation material and the device If you lack these qualifications do not attempt the installation yourself Improper installation can result in bodily injury Fixture i...

Страница 12: ...crew fitted through the center hole of the mounting yoke Be sure to attach a Safety Cable to the fixture using the safety cable rigging point on the back of the fixture as illustrated below SECURING R...

Страница 13: ...line with a Y style connector The order in which the fixtures are connected in a DMX line does not influence the DMX addressing For example a fixture assigned a starting DMX address of 1 may be placed...

Страница 14: ...together through serial linking The cable that should be used is two conductor shielded DMX cable with XLR input and output connectors Always be sure daisy chain your in and out data connections never...

Страница 15: ...pin XLR connectors for DATA transmission in place of 3pin 5pin XLR fixtures may be implemented in a 3pin XLR DMX line When inserting standard 5pin XLR connectors in to a 3pin line a cable adaptor must...

Страница 16: ...ll the fixtures simultaneously If you set each fixture to a different DMX address each unit will start to listen to the channel number you have set based on the quantity of control channels DMX channe...

Страница 17: ...e s main menu Once in the main menu you can navigate through the different functions and access the sub menus with the UP and DOWN buttons Once you reach a field that requires adjusting press the ENTE...

Страница 18: ...rd Theatre Architec TV Stage Set Dimming Curve Black Out Yes Hold Back Light On Off Turn LCD Display Back Light On Off White Balance Red 125 255 Set White Balance Green 125 255 Blue 125 255 Manual Col...

Страница 19: ...te 8 WHITE FINE 0 255 White FINE Adjustment 5 9 COLOR MACROS 0 4 Preset Color 1 5 8 Preset Color 2 9 12 Preset Color 3 13 16 Preset Color 4 17 20 Preset Color 5 21 24 Preset Color 6 25 28 Preset Color...

Страница 20: ...Preset Color 50 201 204 Preset Color 51 205 208 Preset Color 52 209 212 Preset Color 53 213 216 Preset Color 54 217 220 Preset Color 55 221 224 Preset Color 56 225 228 Preset Color 57 229 232 Preset...

Страница 21: ...an authorized Elation service technician Should you need any spare parts please order genuine parts from your local Elation dealer Please refer to the following points during routine inspections A det...

Страница 22: ...ONS 3 DMX Channel Modes 7 9 15 5pin DMX In Out 4 Button Control Panel LCD Menu Display powerCON Power In Out Power Link Up To 15 Units at 120V 28 Units at 230V SIZE WEIGHT Length 15 3 388mm Width 7 5...

Страница 23: ...t i n g c o m 23 ARENA Q7 ZOOM User Manual ver 1 PHOTOMETRIC DATA DIMENSIONAL DRAWINGS Please Note Specifications and improvements in the design of this unit and this manual are subject to change with...

Страница 24: ...O P T I O N A L A C C E S S O R I E S ORDER CODE ITEM TRIGGER CLAMP Heavy Duty Wrap Around Hook Style Clamp EWDMXSYSTEM Wireless DMX System 1 Transmitter 1 Receiver AC5PDMX5PRO 5 ft 1 5m 5pin PRO DMX...

Страница 25: ......

Отзывы: