background image


BioKing K1 User Manual                                                                                          www.ekoo.co.uk


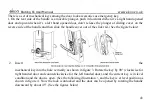
There is a set of mechanical keys among the door lock accessories as emergency key.   
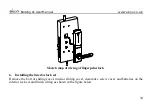
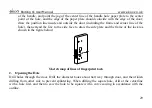
1. On the rear side of the handle is a movable plunger, push it downward when it’s a right hand opened 
door and upward when it’s a left hand opened door, don’t release the plunger of sliding cover on the 
reverse side of the handle and then slide the handle cover out of the slide rail. (See the figure below) 


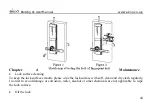
2.


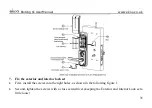
Insert 

the 

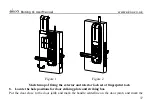
mechanical key into the hole vertically as shown in figure 3, Rotate the key by 90° (clockwise for 
right handed door and counterclockwise for the left handed door), and the current key is in level 
condition and the door is open. (See the following illustration

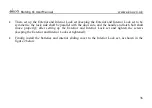
, and the key is at level position as 

shown in figure 4. Now the lock is unlocked and the door can be opened by rotating the handle 
downward by about 45°. (See the figures below) 


43 

Содержание BioKing K1

Страница 1: ...BioKing K1 r Manual ONE FINGER RULES ALL Use Thank you for purchasing this product Read this manual thoroughly before use Keep this manual for the convenience of future reference www ekoo co uk...

Страница 2: ...ny and any imitation and copy is an act of tort Upgrade Description As the continuous improvement and development of technology our company will continuously upgrade the product functions to meet the...

Страница 3: ...al www ekoo co uk 3 Table of Contents CHAPTER 1 OPERATING INSTRUCTIONS 4 CHAPTER 2 INSTALLATION INSTRUCTION 22 CHAPTER 3 EXCEPTION HANDLING 44 CHAPTER 4 MAINTENANCE 46 APPENDIX 1 PACKING LIST 47 APPEN...

Страница 4: ...ekoo co uk Chapter 1 Operating Instructions This fingerprint lock features of three kinds of functions i e fingerprint password key and can store 100 fingerprints 00 99 The surface structure is shown...

Страница 5: ...ack cover After a long beep 00 will appear on display long press administrative keys button Release the button the bank of It means a failure if the buzzer gives off fingerprint is initialized success...

Страница 6: ...23456 Operational Procedure Indication of the lock Remove the battery pack cover and press 0 will appear on the display 6 the administrative keys The buzzer will give off a long beep and the Input 8 d...

Страница 7: ...andom numbers from 1 9 Note The lock can only set up 9 groups Add access password 7 Operational Procedure Indication of the lock Input the admin password The buzzer will give off a long beep Input an...

Страница 8: ...dication of the lock Input the admin password The buzzer will give off a long beep Input only Group Number from 01 to 09 The buzzer will give off a long beep e g if 01337766 01887365 needs to be and t...

Страница 9: ...he lock Input the 8 digit admin password The buzzer will give off a long beep Press to confirm 0 will flicker on the display Input a 2 digit number from 00 to 99 The light of fingerprint screen will b...

Страница 10: ...int No 00 use method one Put master fingerprint on screen FP will present on the display and press to confirm than 0 will flicker on the display Input a 2 digit number from 01 to 99 The light of finge...

Страница 11: ...cedure Indication of the lock Input the 8 digit admin password The buzzer will give off a long beep Than press 0 will flicker on the display 11 Input the 2 digit number of the fingerprint The buzzer w...

Страница 12: ...ut master fingerprint No 00 on screen FP will present on the display Than Press 0 will flicker on the display Input the 2 digit number of fingerprint The buzzer will give off a long beep to need to de...

Страница 13: ...a long beep Press a registered finger on screen Green indicator light will be on The registered number will show on display The motor will start It means failure if the buzzer gives off 2 Press the ha...

Страница 14: ...ndle to open the door short beeps and appears on the display Note the lock is equipped with function of pseudo code several numbers can be input in front of the password and the door can only be opene...

Страница 15: ...of constant open How to quit the function of constant opening When the knob of interior lock set at the back of lock is rotated to the mark OFF the red part of the push button will appear and the lock...

Страница 16: ...ry time the door is unlocked to indicate the user to change the battery promptly Note Under low battery condition the old batteries should be exchanged promptly to avoid the inconvenience caused by po...

Страница 17: ...select Note the functions of the four keys at time stage are page up page down ESC OK Check Door Access Record 1 Press the keys of Page up and Page down to select the item of menu 2 Select door record...

Страница 18: ...r will flicker press Page up or Page down to increase or decrease the number and choose the right one Press OK again and unit of the year number will flicker press Page up or Page down to increase or...

Страница 19: ...erprint 2 Select Password and press OK to edit the password Than this will show on screen Set set Del delete How to Set Choose Set to set up a password press OK to confirm Use Page up and Page down to...

Страница 20: ...will last 10 seconds and the red light will flicker to remind the user to close the door properly 1 15 Tamper alarm If the exterior lock set outside is damaged by outside force the buzzer will give of...

Страница 21: ...er Manual www ekoo co uk 21 with password only the batteries of password need to be changed During fingerprint acquisition the finger shall be flattened against the fingerprint acquisition window a li...

Страница 22: ...the door Right hand door push inward If a person stands in front of the door the hinge of the lock is on the right and the person can enter the room only by pushing the door Left hand door push outwar...

Страница 23: ...BioKing K1 User Manual www ekoo co uk 23...

Страница 24: ...Maximum range 80mm Requirement of thickness The handle is about one meter high over the floor To ensure a smooth installation please make sure if the thickness of the door can meet the condition of th...

Страница 25: ...BioKing K1 User Manual www ekoo co uk Figure 1 25...

Страница 26: ...BioKing K1 User Manual www ekoo co uk Figure 2 26...

Страница 27: ...BioKing K1 User Manual www ekoo co uk 2 4 Tools for installation 2 5 Installation 27...

Страница 28: ...e The installation procedure takes right hand door push outward for example 2 6 Installation process 1 Mark lines and drilling locations on door Mark a level line a certain distance from the bottom e...

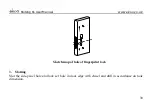
Страница 29: ...er line of the hole then extend the line to the side face to draw the side plate and the frame of the lock as shown in the figure below Sketch map of lines of fingerprint lock 2 Opening the Hole Drill...

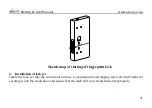
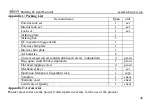
Страница 30: ...BioKing K1 User Manual www ekoo co uk Sketch map of hole of fingerprint lock 3 Slotting Slot the side panel hole and lock set hole in door edge with chisel and drill in accordance on hole dimension 30...

Страница 31: ...of slotting of fingerprint lock 4 Installation of lock set Insert the lock set into the wood door and use a countersunk head tapping screw KA4x25mm for securing it into the wood door and ensure that t...

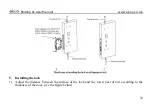
Страница 32: ...ioKing K1 User Manual www ekoo co uk 5 Installing the lock 1 Adjust the distance between the surface of the lock and the lower part of nut according to the thickness of the door see the figure below 3...

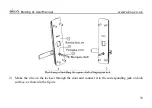
Страница 33: ...BioKing K1 User Manual www ekoo co uk 2 Make the wire on the lock set through the door and connect it to the corresponding jack on lock surface as shown in the figure 33...

Страница 34: ...tch map of wiring of fingerprint lock 6 Installing the interior lock set Remove the bolt of sliding cover interior sliding cover decorative screw cover and batteries on the interior lock set and finis...

Страница 35: ...k 7 Fix the exterior and interior lock set First install the screws into the right holes as shown in the following figure 1 Second tighten the screws with a cross screwdriver keeping the Exterior and...

Страница 36: ...ic the lock side shall be parallel with the door side and the handle and latch bolt shall move properly after setting up the Exterior and Interior Lock set and tighten the screws keeping the Exterior...

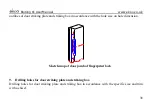
Страница 37: ...ure 2 Sketch map of fixing the exterior and interior lock set of fingerprint lock 8 Locate the hole positions for door striking plate and striking box Put the door close to the door jamb and mark the...

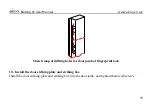
Страница 38: ...ing box in accordance with the hole size on hole dimension Sketch map of door jamb of fingerprint lock 9 Drilling holes for door striking plate and striking box Drilling holes for door striking plate...

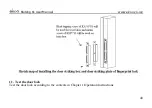
Страница 39: ...ekoo co uk Sketch map of drilling holes for door jamb of fingerprint lock 10 Install the door striking plate and striking box Install the door striking plate and striking box into the door jamb and t...

Страница 40: ...BioKing K1 User Manual www ekoo co uk 11 Test the door lock Test the door lock according to the contents in Chapter 1 Operation Instructions 40...

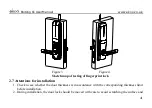
Страница 41: ...ing of fingerprint lock 2 7 Attentions for installation 1 Check to see whether the door thickness is in accordance with the corresponding thickness limit before installation 2 During installation the...

Страница 42: ...uld be installed after the indoor decoration to avoid pollution and damage 3 Install the door closer and door stopper before installing the door lock to avoid damaging the handle and bolts deadbolt 4...

Страница 43: ...e of the handle and then slide the handle cover out of the slide rail See the figure below 2 Insert the mechanical key into the hole vertically as shown in figure 3 Rotate the key by 90 clockwise for...

Страница 44: ...ce Lock surface cleaning To keep the lock surface smooth please wipe the lock surface with soft clean and dry cloth regularly In order to avoid damage or corrosion water alcohol or other chemicals are...

Страница 45: ...freely or can not maintain correct position professionals should be invited to add some mechanical lubricants to the lock cylinder Replace the lock face and handle If the lock face and handle have bee...

Страница 46: ...ate 1 Interior shim plate 1 AA batteries 8 Cross recessed raised countersunk head screws adaptation 4 grain Big square shaft 8x8xL adaptation 1 grain Flat head tapping screw 4 grain Mechanical keys 1...

Страница 47: ...r Striking plate Flat head tapping screw KA5 18 Flat head metric screw KM5 12 adaptation Mechanical keys Settled spindle Cross recessed raised countersunk head Big Square shaft Big square shaft spring...

Страница 48: ...rd Shixia Street Futian District Shenzhen 518048 China E mail info wenturegroup com Telephone 86 755 2221 7711 http www wenturegroup com UK 1 F Unit 18 Bessemer Park 250 Milkwood Road London SE24 0HG...

Отзывы: