Findclouds Manual 20
adjustments are activated now.
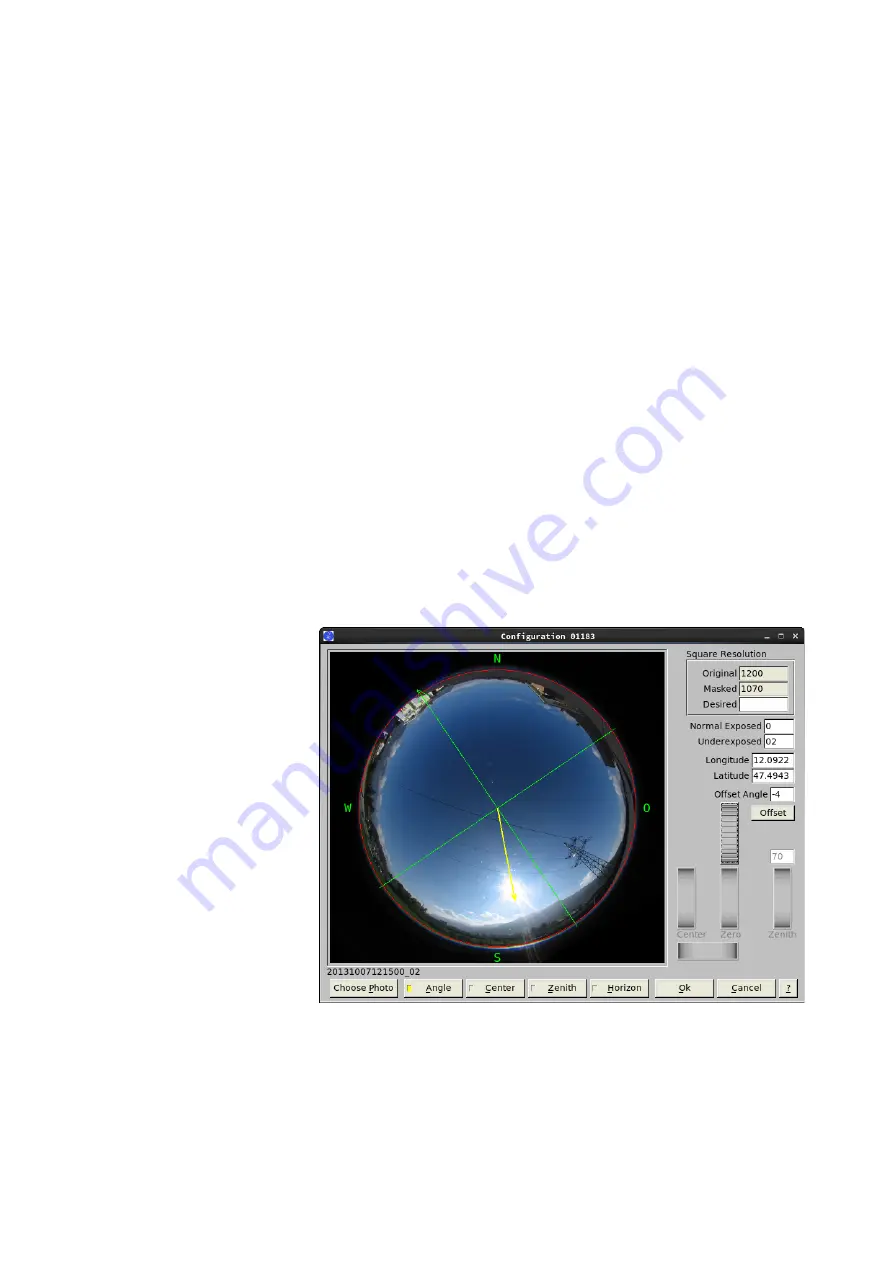
The screenshot shows current orientation of the image by a green wind rose and current size of
fisheye area by a red circle. Also there is a little yellow arrow that points to direction of calculated
sun position. For calculation of sun position the software uses Longitude/Latitude and the date and
time of the filename (shown bottom left under the photo).
The images are desired to be in the same direction like a map, with direction to north on upper
side (green arrow points to north) and also west and east side directed like a map. Because the
photos are taken from the sky, but a map is orientated to the earth, the software swaps the sides of
the image, when loading it. After that a cloud that is shown in the west in fact comes from the west
and also the sun moves to the right direction.
Looking at the screenshot above, it is easy to see by the sun pointer, that the Cloudcam is not
placed in the right direction and an angle offset must be rectified. Also there is another problem to
see - the fisheye area is not placed right to the middle, but there is an offset. So before rotating the
image, it must be centred by using button [Center], because an excentric rotation will move the
whole image to the wrong place.
This screenshot was made
after centring the image and
adjusting the size of fisheye
area. It shows ongoing
adjustment of the Cloudcams
offset angle. Using the angle
roller (the only one activated)
the wind rose was rotated to
the position it should have, if
the photo would be a map. In
the input field the value of
rotation is shown as -4
degrees, so the photo must
be rotated -4° in
(mathematical) positive direction. By pushing button [Offset] or selecting input field "Offset Angle"
and pushing enter key, this will be completed and the image will rotate.


