


- 13 -
Operation
4.4. Enrolment of a finger
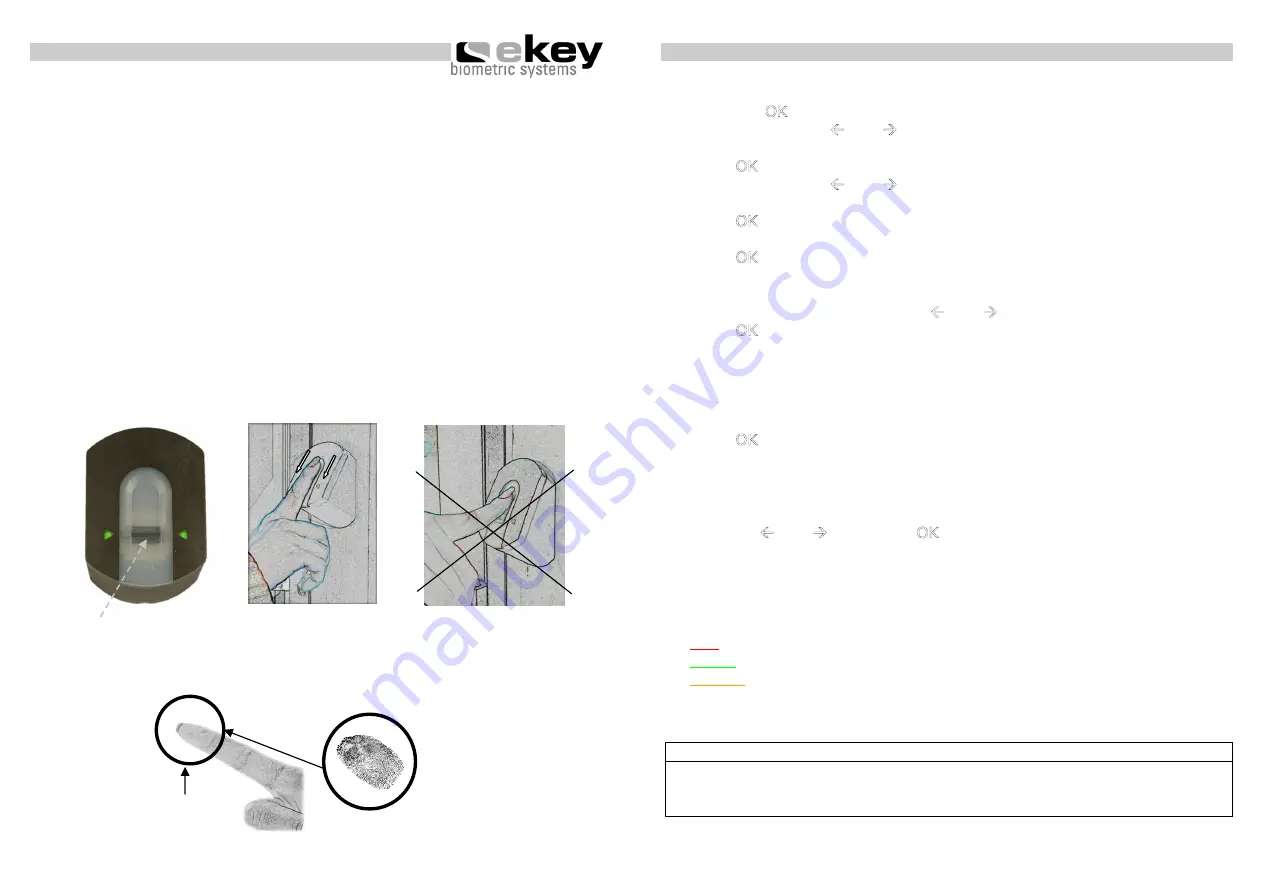
4.4.1. How to swipe a finger correctly over the sensor
In order for the reader to properly scan and recognize a particular finger,
the finger needs to be positioned and swiped correctly over the sensor as
outlined below:
a.
Locate the reader sensor between the 2 green illuminated arrows.
b.
Starting from the finger joint, place the finger flat over the sensor.
It is very important that the whole finger is placed flat over
the sensor and not just the tip
.
c.
Apply little pressure and start swiping the finger immediately all
the way down. The bigger the identified finger surface, the higher
is the probability that you are recognised again by the system.
Recommended
finger area
Sensor
-
14
-
Operation
4.4.2. How to enrol a finger
1.
Press the
OK
key in the inside unit.
2.
By using the keys
Å
and
Æ
enter the left number of the security code
(standard setting is 9)
3.
Press
OK
4.
By using the keys
Å
and
Æ
enter the right number of the security code
(standard setting is 9)
5.
Press
OK
6.
In the display „Eu“ (enrol user) is illuminated
7.
Press
OK
8.
The display shows “1“. A flashing dot next to the number signals that
this user number is already in use. Example: “1.” Assign the desired
user number by using the keys
Å
and
Æ
.
9.
Press
OK
10.
The display shows “F1”. F1 stands for finger 1. Please start to count
your fingers at the left hand with the little finger. The right little finger
has the number 10 (setting “F0” in the display). A flashing dot next to
the number signals that this user number is already in use. For
example for the right forefinger set „F7“.
11.
Press
OK
12.
In the version ekey
®
TOCAhome the display shows “EF”. Please
continue reading at the next point but one. In the version TOCAhome
3 you can now determine which relay (channel) should be activated by
the selected finger: “01” is shown. Set the desired channel by using
the keys
Å
and
Æ
and press
OK
. (Channel 1 is signalised in the
display by “01”.)
13.
The display shows “EF” (Enrol Finger). From now on you have 60 sec
to draw your finger over the sensor.
14.
The outside unit has a status display, which signals the state of
operation in different colours.
Red
The finger could not be scanned successfully
Green
Successful
scan
Orange
Operating state “enrolment”. The device is waiting for a
finger to be scanned.
Note:
Please try to swipe the finger’s biggest area possible over the
sensor - starting from the beginning of the finger joint. Doing
this you can achieve highest possible identification efficiency.


