background image

40

4

TROUBLESHOOTING

4 TROUBLESHOOTING

This page presents problems that can be corrected by the user.  If a
problem persists even after applying the suggested remedies, contact an
EIZO dealer.

n

 Problems caused by incorrectly setting of the termination switch

Problems

1) Misconvergence of colors.
2) Focus is dull.
3) PowerManager does not

work properly in VESA
setting.

4) Slight shadow appears on the

edges of the screen image or
text. (Only for the BNC
connections.)

n

 No picture

Problems

1) Indicator status: OFF

2) Indicator status: GREEN

3) Indicator status: GREEN

 (flashing)

4) Indicator status: YELLOW

5) Indicator status: YELLOW

 (flashing)

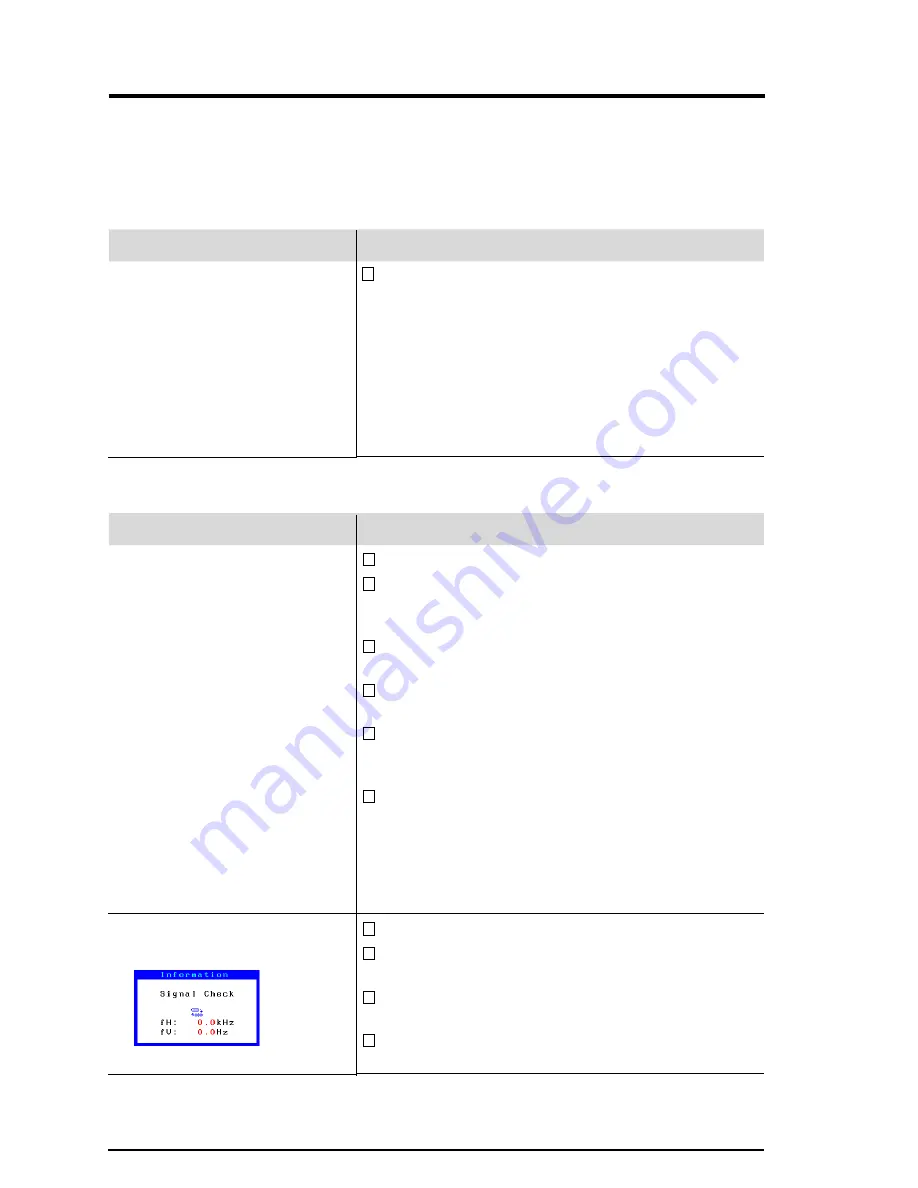
6) 

No signal detected

 error

message appears.

Points to check with possible solutions

The termination switch on the rear of the monitor
should be set to 75 

 position (default) for

connection to a single monitor.
If it is set to the 

∞ 

 position when using a single

monitor, some problems like 1) 

~

 4) may occur.

Check that the switch position is set to 75 

position.

Points to check with possible solutions

Check that the power cord is correctly connected.
Try pressing a key on the keyboard, or clicking the

mouse.  (The monitor may be in a power saving
mode.)

Check brightness and contrast settings.  Minimum

settings will cause screen to be blank.

Try pressing any keys on the front panel.  (The

monitor may be in “Advance Notice Mode”).

Try pressing a key on the keyboard, or clicking the

mouse.  (The monitor may be in a power saving
mode.)

Try pressing any keys on the front panel or switch

the monitor off and then on.  (The monitor may
be in “Off Timer Mode”.)

If the problem persists, switch off the monitor power
for a few minutes, then switch it back on and try
again.

Check that the PC is switched ON.
Check that the signal cable is properly connected
to the graphics board or PC.
Check that the graphics board is correctly inserted
in the PC.
Switch the signal input by pushing the BNC/ D-
Sub selection button on the front control panel.

Содержание FLEXSCAN F980

Страница 1: ...English User s Manual Color Display Monitor F980...

Страница 2: ...ENMANAGER 15 2 1 About ScreenManager 15 How to Use the ScreenManager 15 ScreenManager Menus 16 Shortcut Keys 18 Adjustment Lock 18 2 2 Imaging Adjustment Screen Menu 19 Contrast Brightness 19 Size 19...

Страница 3: ...any submitted material or information confidential unless prior arrangements are made pursuant to Eizo Nanao Corporation s receipt of said information Although every effort has been made to ensure tha...

Страница 4: ...as been adjusted specifically for use in the region to which it was originally shipped The performance of the product i e picture geometry picture positioning and color convergence and purity in the c...

Страница 5: ...pills into the cabinet unplug the monitor immediately Have the unit checked by a qualified service engineer before using it again Place the monitor on a strong stable surface A unit placed on an inade...

Страница 6: ...n to plug the power cord to the provided monitor connector and directly to a wall outlet By not doing so may result in fire or electric shock Handle the power cord with care Do not place the cord unde...

Страница 7: ...t block the ventilation slots on the cabinet Do not place books or any other papers on the ventilation slots Do not install the monitor in a closed space Do not use the monitor laying down or upside d...

Страница 8: ...c fields for example in the vicinity of a speaker except the optional i Sound unit or a high voltage transformer Magnetic fields can cause noise image shaking and other distortions Generally for maxim...

Страница 9: ...f the above listed items are missing or damaged please contact your local dealer for assistance The EIZO CRT Utility Disk contains the followings Windows 95 98 monitor information file EIZO ScreenMana...

Страница 10: ...Yellow PowerManager Mode 2 Yellow Off Timer Mode Flashing See page 34 AUTO SIZING Button Automatically centers the displayed image bringing the image borders into alignment with the monitor frame See...

Страница 11: ...ide After connecting secure the connection with the screw in fasteners 3 Plug the other end of the cable into the video connector on the rear of the PC Refer to the figures below Standard PC graphics...

Страница 12: ...itor to the PC first press the AUTO SIZING button on the front panel The AUTO SIZING function centers the displayed image aligning the image s borders with respect to the monitor frame When the timing...

Страница 13: ...ork with a given resolution and rate is to compare the vertical refresh rate of the graphics board to the monitor s range Refer to the graphics board manual for specification If the refresh rate is wi...

Страница 14: ...on should be made with an EIZO BNC cable available as an option Contact EIZO dealers for information about optional cables Example Selecting the active input The BNC D Sub selection button on the fron...

Страница 15: ...Making the adjustments and settings 1 Select the desired icon using the Arrow keys and then press the ENTER key to display the Sub menu 2 Use the Control pad the four Arrow keys and the ENTER key to...

Страница 16: ...e and color correction and Custom color with adjustment of color tone ScreenManager Menus ScreenManager consists of a main menu and six sub menus Screen Color PowerManager Others Information and Langu...

Страница 17: ...nManager menu position ScreenManager menu contrast Signal filter setting 1 Signal filter setting 2 Off Timer Reset to defaults Information This menu shows the current ScreenManager settings The menu c...

Страница 18: ...directions Adjustment Lock The ScreenManager operation can be disabled by holding down the AUTO SIZING button while switching on the monitor s power This will disable lock the ScreenManager and AUTO...

Страница 19: ...etting because a dark setting will result in eye strain due to high character contrast Adjusts Horizontal image size Vertical image size Position Adjusts Screen position Side Pin Balance Side Pincushi...

Страница 20: ...of a good focus level Moir is particularly noticeable when using a light gray or every other dot pattern background Although moir can not be eliminated it can be reduced with the moir reduction featur...

Страница 21: ...3 Color Adjustment Color Menu Outline EIZO monitors have incorporated two color adjustment modes standard and custom The Standard mode allows the adjustment of the color spectrum The Custom mode allo...

Страница 22: ...white This is the default setting for your EIZO monitor Function Color Correction Adjusts Color Correction Because of the differences in video signal output levels of graphics boards disparities can b...

Страница 23: ...20 to 30 seconds to compensate the color tempera ture from 4000 K to 10000 All other adjustments are off during compensation 3 When the compensation finishsed a long beep sounds and OK appears on the...

Страница 24: ...the balance but also the intensities of R G and B how bright they are which we call Gain and the saturation of R G and B how vivid or dull they are which we call Cutoff If only a quick setting is req...

Страница 25: ...hanges only the ending point the white level The Gain adjustment is used to fine tune the whites and light grays to a good balance Gain If an inappropriate adjustment is made corrections can be made b...

Страница 26: ...ng green PowerManager Mode 2 less than 3 W Power Indicator solid yellow When the USB hub is not connected As an ENERGY STAR Partner Eizo Nanao Corporation has determined that this product meets the EN...

Страница 27: ...m works with a screen saver software and Energy Saver for Macintosh which blanks the screen totally black screen Set the monitor to match the PC s power saving software as follows Monitor setting for...

Страница 28: ...which is the interval that the monitor will wait after receiving a power saving signal from the PC before entering into Mode 1 or Mode 2 VESA DPMS power saving method VESA DPMS utilizes four signals...

Страница 29: ...Macintosh EnergySaver blanks the screen and the time that the monitor enters Mode 1 4 Set the Mode 1 duration time which is the user definable time 0 60 minutes before the monitor enters Mode 2 EIZO M...

Страница 30: ...ngs at the monitor side What is EIZO MPMS EIZO MPMS EIZO Monitor PowerManager Signaling also enables to execute power saving at the monitor side EIZO MPMS recognizes the video signals from the PC when...

Страница 31: ...constantly checks the input signals and switches automatically in accordance with the Input Priority settings see chart on next page Once a priority is set whenever a change of signal is detected at t...

Страница 32: ...n off the beeper If the beepr is ON the monitor will generate beep signals as shown below If the beeper is OFF the monitor will not beep ScreenManager item selected ScreenManager parameter adjusted to...

Страница 33: ...on into the Off Timer Mode when the set On Period expires The energy consumption of the monitor in the Off Timer Mode is as low as the one of the monitor in PowerManger Mode 2 although no setting PC t...

Страница 34: ...e front panel located to the left of the power switch during the Advance notice Mode The monitor will continue to operate for an additional 90 minutes There will be another advance notice for 15 minut...

Страница 35: ...s size position geometry color PowerManager etc to their factory default settings Default settings are as follows Screen Contrast 100 Brightness 50 Moir OFF Color Standard 9 300 K PowerManager VESA DP...

Страница 36: ...or keyboard when utilizing the enclosed utility software ScreenManager Pro for USB To utilize the USB hub function or ScreenManager for USB the following system environment is required PC equipped wi...

Страница 37: ...be connected to the downstream ports of the monitor Please refer to the readme txt file for setup too Please make sure if the proper installation is completed by following the confirmation below Conf...

Страница 38: ...complied self powered hub USB Monitor Control Class Rev 1 0 complied Standard Downstream power supply 500 mA for each Max Communication speed 12 Mbps full 1 5 Mbps low USB ports Upstream port x 1 Down...

Страница 39: ...screen Making sure if the setup is completed click Advanced on the Settings tab in Display Properties and see if the EIZO tab is added For details about the program please refer to the Help menu in th...

Страница 40: ...en using a single monitor some problems like 1 4 may occur Check that the switch position is set to 75 position Points to check with possible solutions Check that the power cord is correctly connected...

Страница 41: ...he manual of the graphics board Points to check with possible solutions The CRT is not warmed up Allow 30 minutes for the monitor to stabilize Degauss the screen Use the degaussing feature in the Scre...

Страница 42: ...The signal cable might be damaged Please contact the dealer The monitor may be located close to a device that is generating a magnetic field Such devices include speakers other than the EIZO optional...

Страница 43: ...20 Change the horizontal and vertical dimensions of the display area Change the selected desktop or wallpaper pattern to any solid color pattern For detailed information on how to change these patter...

Страница 44: ...erlaced scan the image flickers more visibly when compared with a non interlaced scan Flicker The term flicker refers to noticeable shimmering that occurs when the image on the screen is redrawn refre...

Страница 45: ...lutions The monitor emits a humming noise when executing automatic degaussing at power ON This is not a problem The monitor beeps at any time This is not a problem See page 31 for full details The Adj...

Страница 46: ...solvents abrasive cleaners or alcohol ethanol methanol or isopropyl alcohol as these may cause damage to the cabinet or CRT Periodic cleaning is recommended to keep the monitor looking new and to pro...

Страница 47: ...b 13W3 and BNC 5 switchable Recommended Resolution 1600 dots 1200 lines Input Signal Sync H V Separate TTL Positive Negative H V Composite TTL Positive Negative Sync on Green 0 3 Vp p Negative Video A...

Страница 48: ...i...

Страница 49: ...rted Clock shorted shorted with shorted with shorted with 9 pin 9 pin 9 pin 5 H Sync Composite sync N A 6 N A N A N A 7 N A N A N A 8 N A N A N A 9 shorted with shorted with shorted with 4 pin 4 pin 4...

Страница 50: ...gespeichert Les deux signaux ci dessous ont t enregistr s en usine dans le microprocesseur du moniteur USB ports Upstream Downstream No Signal Comments 1 VCC Cable power 2 Data Serial data 3 Data Ser...

Страница 51: ...gen Dimensions mm inches FRONT VIEW VORDERANSICHT VUE DE FACE SIDE VIEW SETENANSICHT VUE DE C T TOP VIEW DRAUFSICHT VUE D EN HAUT 368 6 14 5 494 19 4 306 12 0 300 11 8 402 15 8 72 5 2 9 42 8 1 7 486 1...

Страница 52: ...RS ARISING OUT OF THIS AGREEMENT AND OR SALES GARANTIE LIMITEE Eizo Nanao Corporation EIZO et ses distributeurs agr s donnent l acqu reur une garantie couvrant les d fauts mat riels et ou de fabricati...

Страница 53: ...arung und oder dem Kauf entstehen k nnte GARANTIA LIMITADA Eizo Nanao Corporation EIZO y los distribuidores autorizados de EIZO garantizan al comprador original que el producto estar libre de defectos...

Страница 54: ...NFRONTI DELL ACQUIRENTE QUESTA NOTA VUOLE LIMITARE LA RESPONSABILIT DI EIZO E DEI DISTRIBUTORI AUTORIZZATI EIZO AL CONTENUTO DELL ACCORDO DI VENDITA GARANTIVILLKOR Eizo Nanao Corporation EIZO och EIZO...

Страница 55: ...f personal computers The labelling scheme was developed as a joint effort by the TCO The Swedish Confederation of Professional Employees Svenska Naturskyddsforeningen The Swedish Society for Nature Co...

Страница 56: ...lour generating layers of certain computer displays Cadmium damages the nervous system and is toxic in high doses The relevant TCO 99 requirement states that batteries the colour generating layers of...

Страница 57: ...lt die Anforderungen an die Ergonomie nach ZH1 618 10 80 durch die Ansteuerung mit der VGA Videokarte 1600 Punkte x 1200 Zeilen RGB analog 0 7 Vp p und mindestens 85 0 Hz Bildwiederholfrequenz non int...

Страница 58: ...rantee that interference will not occur in a particular installation If this equipment does cause harmful interference to radio or television reception which can be determined by turning the equipment...

Отзывы: