


8
Connecting Cables
Attention
• Check that the monitor and the PC are powered off.
• When replacing the current monitor with this monitor, be sure to change the PC settings for resolution and
vertical scan frequency to those that are available for this monitor. Refer to the compatible resolution table before
connecting the PC.
Note
• When connecting multiple PCs to the monitor, refer to the User’s Manual on the CD-ROM.
1.
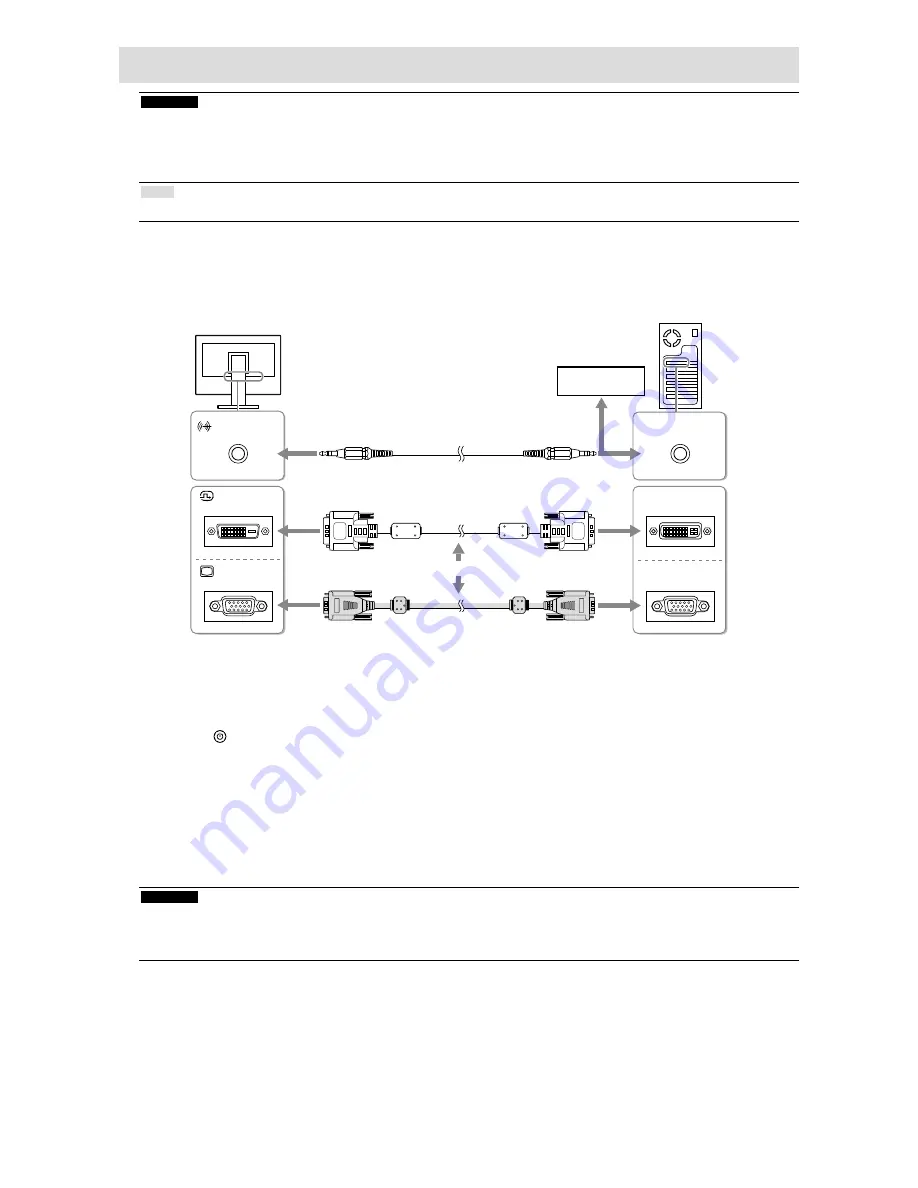
Connect the signal cables to the input signal connectors and PC.
Check the shape of the connectors, and connect the cables.
After connecting the signal cable, tighten the screws of the connectors to secure the coupling.
DVI
D-Sub
AUDIO OUTPUT
DVI
D-Sub
or
Digital connection
(DVI)
Analog connection
(D-Sub)
Signal cable FD-C39
(Option)
Signal cable MD-C87
(supplied)
2.
Plug the power cord into a power outlet and the power connector on the
monitor.
3.
Press to turn on the monitor.
The monitor’s power indicator lights up blue.
4.
Turn on the PC.
The screen image appears.
If an image does not appear, refer to “No picture” (page 11) for additional advice.
If using the FDX1501T-A proceed with installation and calibration of the touch panel driver.
Attention
• Turn off the monitor and PC after using them.
• For the maximum power saving, it is recommended that the Power button be turned off. Turning off the main
power switch or unplugging the power plug completely shuts off power supply to the monitor.
Stereo mini jack cable (supplied)
CD player, etc


