GB
GB
- 28 -
10. Charger indicator
Indicator status
Explanations and actions
Red LED Green LED
Off
Flashing
Ready for use
The charger is connected to the mains and is ready for use; there is no
battery pack in the charger
On
Off
Charging
The charger is charging the battery pack in quick charge mode. The char-
ging times are shown directly on the charger.
Important! The actual charging times may vary slightly from the stated
charging times depending on the existing battery charge.
Off
On
The battery is charged and ready for use.
The unit then changes over to gentle charging mode until the battery is
fully charged.
To do this, leave the rechargeable battery on the charger for approx. 15
minutes longer.
Action:
Take the battery pack out of the charger. Disconnect the charger from the
mains supply.
Flashing
Off
Adapted charging
The charger is in gentle charging mode.
For safety reasons the charging is performed less quickly and takes more
time. The reasons can be:
- The rechargeable battery has not been used for a very long time.
- The battery temperature is outside the ideal range.
Action:
Wait for the charging to be completed; you can still continue to charge the
battery pack.
Flashing
Flashing
Fault
Charging is no longer possible. The battery pack is defective.
Action:
Never charge a defective battery pack.
Take the battery pack out of the charger.
On
On
Temperature fault
The battery pack is too hot (e.g. due to direct sunshine) or too cold
(below 0° C).
Action:
Remove the battery pack and keep it at room temperature (approx. 20° C)
for one day .
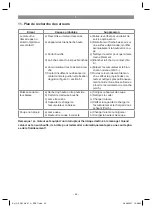
11. Troubleshooting
Fault
Possible causes
Remedies
Motor does not start
or comes to a stop
(loose connection)
a) Motor terminals disconnected
b) The mower is standing in high
grass
c) The mower housing is clogged
d) Safety switch is not inserted
e) Battery is not correctly inserted
f) Insufficient or no contact between
the handle and the handle fastener
(Fig. 3 / Section 5).
a) Have repaired by the Customer
Service Center
b) Start in low grass or on an area that
has already been mowed; change
the cutting height if necessary
c) Clean the housing so that the blade
moves freely
d) Insert safety switch (see 6.)
e) Remove the battery and reinsert
(see 5.)
f) Undo the handle connection, check
the contacts for dirt and carefully
clean with a brush. Tighten the
handle connection (see 5).
The motor perfor-
mance drops
a) The grass is too high or too damp
b) The mower housing is clogged
c) The blade is severely worn
d) Battery performance decrea-
sing
a) Correct the cutting height
b) Clean the housing
c) Replace the blade
d) Check the battery performance
and charge the battery if necessary
(see 5.)
Cutting is irregular
a) The blade is worn
b) Wrong cutting height
a) Replace or resharpen the blade
b) Correct the cutting height
Notice! For protection, the motor is equipped with a thermal switch which cuts out when the
motor is overloaded and switches on again automatically after a short cooling period
Anl_GP_CM_36_41_Li_SPK7.indb 28
Anl_GP_CM_36_41_Li_SPK7.indb 28
26.08.2021 10:06:01
26.08.2021 10:06:01
Содержание 34.132.76
Страница 126: ... 126 Anl_GP_CM_36_41_Li_SPK7 indb 126 Anl_GP_CM_36_41_Li_SPK7 indb 126 26 08 2021 10 06 07 26 08 2021 10 06 07 ...
Страница 127: ... 127 Anl_GP_CM_36_41_Li_SPK7 indb 127 Anl_GP_CM_36_41_Li_SPK7 indb 127 26 08 2021 10 06 07 26 08 2021 10 06 07 ...
Страница 128: ...EH 08 2021 01 Anl_GP_CM_36_41_Li_SPK7 indb 128 Anl_GP_CM_36_41_Li_SPK7 indb 128 26 08 2021 10 06 07 26 08 2021 10 06 07 ...


