GB
- 22 -
To ensure that items are properly packaged
and delivered when you send them to us,
please contact our customer service or the
point of sale at which the equipment was
purchased.
When shipping or disposing of batteries and
cordless tools, always ensure that they are
packed individually in plastic bags to prevent
short circuits and
fi
res.
To ensure that the battery pack provides long ser-
vice, you should take care to recharge it promptly.
You must recharge the battery pack when you
notice that the performance of the device drops.
Never allow the battery pack to become fully di-
scharged. This will cause it to develop a defect.
Installing the battery (Fig. 14)
Open the battery cover (Item 4). Then insert the
batteries in the mounts as shown in Fig. 14.
For optimum mowing results and battery power
performance it is always best to use batteries
with the same capacity of 2.5 Ah or higher. There
is also the option of using batteries with di
ff
erent
capacities in the two battery mounts A and B (Fig.
2) which are opposite each other.
Always make sure, however, that you only use
batteries of the same capacity in each separate
battery bank (Fig.15).
For example, you could use 2 x 4.0Ah batteries in
one battery bank while using 2 x 3.0Ah batteries
in the opposite battery bank.
Important!
Use only batteries which are charged to the same
level. Never combine full and half-full batteries. Al-
ways charge the two/all batteries simultaneously.
The equipment‘s operating time depends on the
battery with the lower charge level. The two/all
batteries must always be fully charged before use.
Close the battery cover by swinging it down, and
make sure that it latches in place correctly.
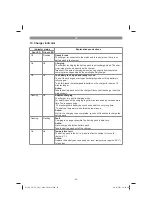
Battery capacity indicator (Fig. 12)
Press the button for the battery capacity indicator
(Fig. 12/Item A). The battery capacity indicator
(Fig. 12/Item B) shows the charge status of the
battery using 3 LEDs.
All 3 LEDs are lit:
The battery is fully charged.
2 or 1 LED(s) are lit:
The battery has an adequate remaining charge.
1 LED
fl
ashes:
The battery is empty, recharge the battery.
All LEDs blink:
The battery temperature is too low. Remove the
battery from the equipment, keep it at room tem-
perature for one day. If the fault reoccurs, this me-
ans that the rechargeable battery has undergone
exhaustive discharge and is defective. Remove
the battery from the equipment. Never use or
charge a defective battery.
Caution!
Do not park the lawn mower in the sun. Batteries
which have been inserted could heat up to inad-
missible levels.
6. Operation
Caution!
The lawn mower is equipped with a safety switch
to prevent unauthorized use. Directly before st-
arting up the lawn mover insert the safety plug
(Fig. 9/Item 12) and remove the safety plug again
when interrupting or terminating your work.
Important!
For safety reasons, it is not possible to start the
cordless lawn mower if the pitch angle is over
~60°.
Caution!
To prevent the equipment switching on acciden-
tally, the lawn mower is equipped with a safety
switch (Fig. 9/Item 8) which must be pressed
before the switching bar (Fig. 10/Item 1) can be
activated. The lawn mower switches itself o
ff
when the switching bar is released. The start time
can amount to several seconds (To make it easier
to start, tilt the lawn mower slightly at the back).
The speed will drop after a few seconds when in
idle mode and will rise again after a few second
when in working mode. Repeat this process se-
veral times so that you are sure that the machine
functions properly. Before you perform any repair
or maintenance work on the equipment, ensure
that the blade is not rotating, that the safety plug
(12) is disconnected and that the batteries (15)
have been removed.
Warning! Never open the chute
fl
ap when the
grass bag has been detached (to be emptied)
Anl_GE_CM_36_48_Li_M-Solo_SPK13.indb 22
26.10.2021 14:04:25

