24
[File]
->
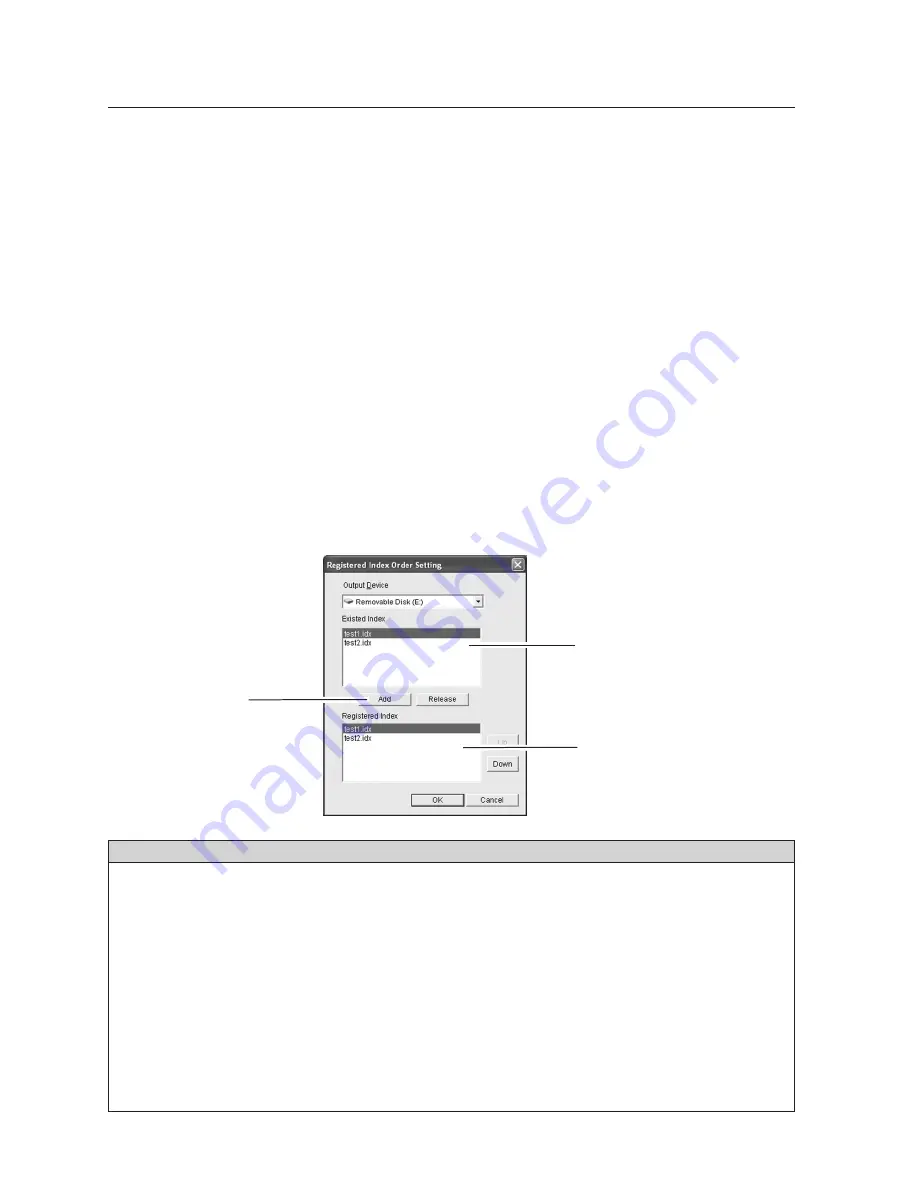
[Registered Index Order Setting]
Select Index files you wish to display with the projector from those stored in the USB
memory. Also arrange the files in the order to be displayed.
Note:
"The order to be displayed" means here is that the order of the thumbnails to be shown on
the screen when you select "Index" from the projector menu(See P10). Since Index files
are not linked each other, the files cannot be auto-played successively.
-
Select image files to be projected and arrange them in order
Parameter
Description
Output Device....................Specify a USB memory drive
Existed Index ....................Show stored index files.
Add ................................Add an index file selected from "Existed Index" to "Registered
Index". You can add up to 12 index files to " Registered Index". If
you add 13th file, the error message will appear.
Release ..............................Release the selected index file from the Registered Index.
Registered Index................Place index files in the order to be projected.
Up ......................................Switch the order of the selected index file with the previous file.
Down ................................Switch the order of the selected index file with the next file.
OK ......................................Save the setting of the registered index files.
Cancel ................................Close the dialog box without saving the setting.
All the index files stored on the USB memory are shown at the top of the window of the
"Registered Index Order Setting" screen. Selected files will be shown at the bottom of
the window.
Select a file to be projected and click "Add". The selected file will appear at the bottom
of the window. To delete the registered files, select a file to be deleted and then click
"Release".
Caution: If not registered, the Index files cannot be projected with Memory Viewer function even if
they are stored on a USB memory. When selecting "Index " from the Viewer menu of the
projector, its thumbnail does not appear on the screen.
Add button
All the files stored in the USB
memory.
The files to be projected with the
projector.
(Shown as thumbnails on the
screen)
3. Slide Converter
Содержание WL-10
Страница 2: ...2...
Страница 5: ...Chapter 1 Preparation 1 Read this chapter before use 5 English...
Страница 7: ...Chapter 2 Memory Viewer 2 7 English...
Страница 14: ...14...
Страница 15: ...Chapter 3 Slide Converter 3 15 English...
Страница 26: ......


