LC-XIP2000 Service
Manual Ver. A
5
------------------------------
1.1
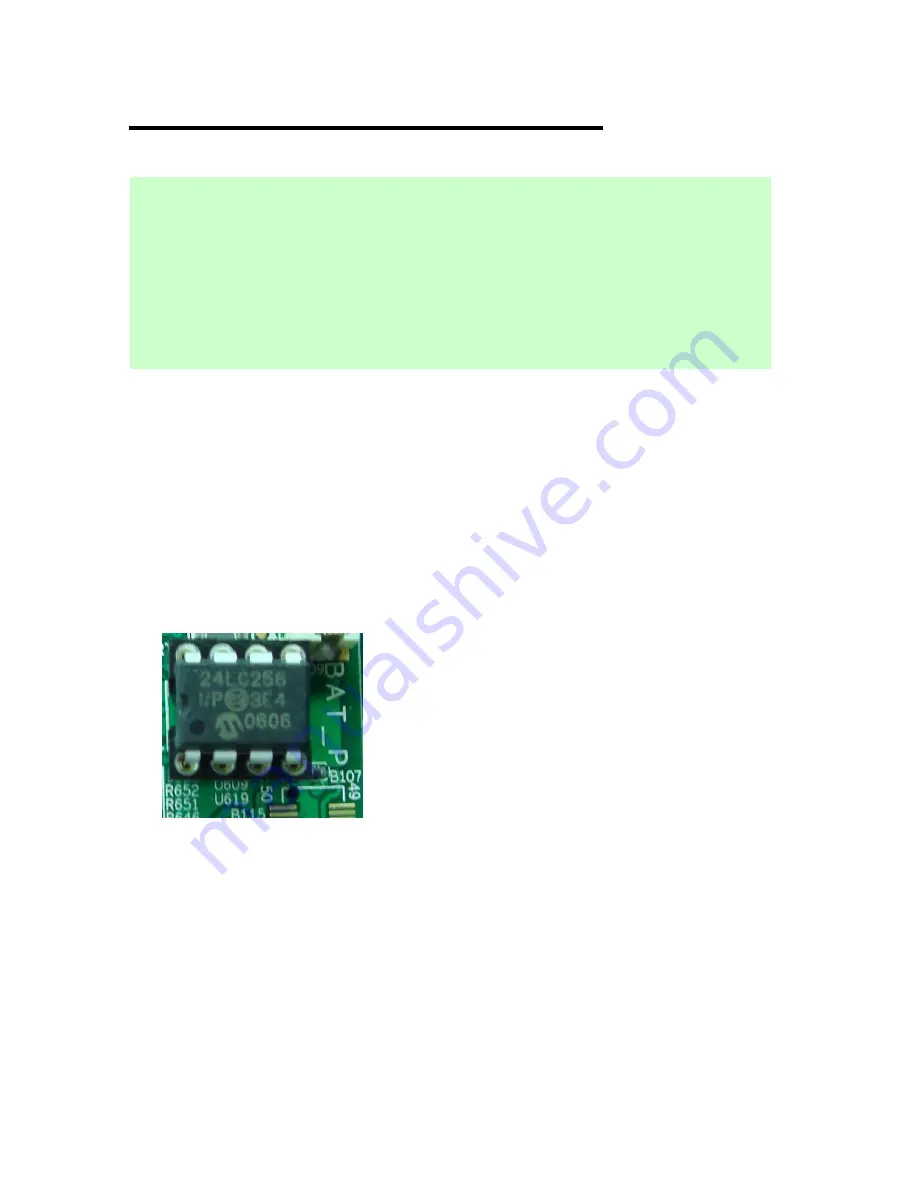
The color parameter is kept in 24LC256( locate at U619),
and the color parameter is different due to different optical engine.
1.2
EDI will provide a new 24LC256 with a new optical engine when you need to change an
optical engine. The color parameter settings of the 24LC256 have to match with the optical
engine in EDI factory.
1.3
When you replace an optical engine or main board, please always confirm the 24LC256 go
with its original optical engine.
2.1
Make sure the direction of 24LC256 on main board, the mark (*) at the left side.
3.1
Keystone calibration function is to help the projector execute the keystone function
automatically.
3.2
The C&B calibration function is to optimize the picture performance.
Cautions when replacing the Optical Engine and Main board :
◎
1. Make sure the IC# 24LC256 on main board U619 location always goes with its
original optical engine when you replace the main board or Optical Engine.
◎
2. Make sure the direction of the IC# 24LC256 on main board.
◎
3. Execute “Keystone calibration ” and “C&B calibration” when you replace Main
board every time. Otherwise the screen will become keystone distortion or miss gray
level. (please refer to page P45 and P46 )
Troubleshooting
U619
Содержание LC-XIP2000
Страница 1: ...LC XIP2000 Service Manual Ver A 1 LC XIP2000 LCD projector Service Manual Version A Feb 14 2007...
Страница 4: ...LC XIP2000 Service Manual Ver A 4 Chapter 1 Trouble shooting...
Страница 6: ...Troubleshooting...
Страница 7: ...LC XIP2000 Service Manual Ver A 7 Troubleshooting LED Lamp Indicator...
Страница 18: ...LC XIP2000 Service Manual Ver A 18 Chapter 2 M B Firmware Download...
Страница 24: ...24 Chapter 3 Disassembly...
Страница 25: ...25 Disassembly...
Страница 27: ...27 Disassembly Screws List...
Страница 32: ...32 5 Key Pad Disassembly Disassembly A Take off 4 M3 5 screws...
Страница 33: ...33 6 IO Case Disassembly Disassembly A Take off 2 M3 8 screws...
Страница 37: ...37 10 Inlet Fan Disassembly Disassembly A Take off Fan no screws...
Страница 43: ...43 Disassembly 16 Take out Exhaust Duct A Unscrew BM3x8 2 pcs to take off Exhaust Duct module as below picture...
Страница 45: ...45 Disassembly 18 Take out Plate_MB_GND A Unscrew BM3x8 to disassemble Plate_MB_GND part...
Страница 48: ...LC XIP2000 Service Manual Ver A 48 Chapter 4 Service mode and Calibration...
Страница 56: ...LC XIP2000 Service Manual Ver A 56 Chapter 5 RS232 Command...
Страница 58: ...LC XIP2000 Service Manual Ver A 58 RS232 Command RS232 command...
Страница 59: ...LC XIP2000 Service Manual Ver A 59 RS232 Command RS232 command...
Страница 60: ...LC XIP2000 Service Manual Ver A 60 RS232 Command RS232 command...


