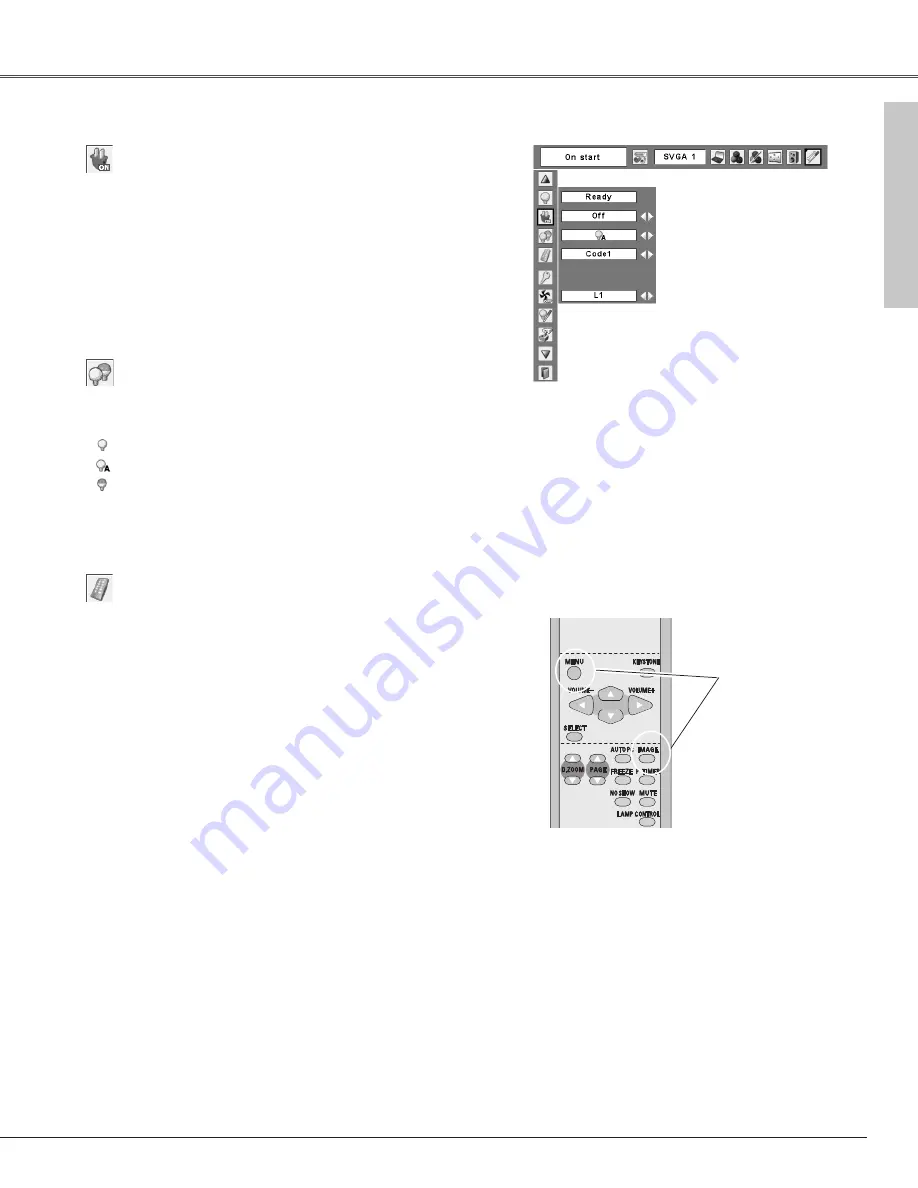
background image

45

Setting

On start

When this function is “On”, the projector will be
automatically turned on just by connecting the AC power
cord to a wall outlet.

Note:

Be sure to turn the projector off properly (see “Turning Off the 
Projector” on page 19).  If the projector is turned off in the incorrect
sequence, the On start function does not operate properly.

Setting

Lamp control

Remote control

This projector provides two different remote control codes;
the factory-set, initial code (Code 1) and the secondary code
(Code 2).  This switching function prevents remote control
interference when operating several projectors or video
equipment at the same time.  
When operating the projector in “Code 2”,  both the
projector and the remote control must be switched to
“Code 2”.

To change the code for the projector;

Select either “Code 1” or “Code 2” in this Setting Menu.

To change the code for the remote control;

Press and hold both the MENU and IMAGE buttons
together for 10 seconds or more.  After changing the code,
make sure the  remote control operates properly. 

Remote control

This function allows you to change brightness of the
screen.

Normal ....normal brightness 
Auto  ........brightness according with the input  signal 
Eco  ..........lower brightness reduces the lamp 

power consumption and extends the 
lamp life.

Press and hold
MENU and
IMAGE buttons
for 10 seconds or
more.

Содержание LC-XB23

Страница 1: ...MULTIMEDIA PROJECTOR OWNER S MANUAL MODEL LC XB23...

Страница 2: ...rench Italian Spanish Portuguese Dutch Swedish Finnish Polish Hungarian Romanian Russian Chinese Korean or Japanese p41 Logo Function The Logo function allows you to customize the screen logo with the...

Страница 3: ...Screen Menu 20 Menu Bar 21 Zoom and Focus Adjustment 22 Keystone Correction 22 Sound Adjustment 23 Remote Control Operation 23 Computer Input 25 Input Source Selection 25 Computer System Selection 26...

Страница 4: ...ined If the projector is to be built into a compartment or similarly enclosed the minimum distances must be maintained Do not cover the ventilation slot on the projector Heat build up can reduce the s...

Страница 5: ...tage points or short out parts that could result in a fire or electric shock Never spill liquid of any kind on the projector Do not install the projector near the ventilation duct of air conditioning...

Страница 6: ...roject an image Do not put the projector on either side to project an image Install the projector properly Improper Installation may reduce the lamp life and cause a fire hazard Installing the Project...

Страница 7: ...requency energy and if not installed and used in accordance with the instructions may cause harmful interference to radio communications However there is no guarantee that interference will not occur...

Страница 8: ...cators u Speaker i Air Intake Vent o Power Cord Connector 0 Terminals and Connectors 1 Lamp Cover 2 Air Intake Vents back and bottom 3 Air Filters 4 Adjustable Feet 5 Exhaust Vents 5 y 4 1 3 2 o 0 CAU...

Страница 9: ...video output from video equipment to VIDEO jack p16 r COMPUTER IN 2 MONITOR OUT This terminal is switchable and can be used for input from a computer and video equipment component or RGB scart 21 pin...

Страница 10: ...ojector on or off p18 19 r POWER indicator Emit a red light until the projector gets ready to be turned on It turns red when the projector is in the stand by mode It remains green while the projector...

Страница 11: ...ector and your computer with a USB cable to use these buttons p9 15 1 u D ZOOM ed buttons Zoom in and out the images p24 33 5 AUTO PC button Automatically adjust the computer image to its optimum sett...

Страница 12: ...new batteries Risk of explosion if a battery is replaced by an incorrect type Dispose of used batteries according to the instructions Open the battery compartment lid Install new batteries into the co...

Страница 13: ...9 8 8m 23 9 7 3m 300 6096 x 4572 43 3 13 2m 36 1 11 0m Inch Diagonal 4 6 1 4m For projector positioning see the figures below The projector should be set horizontally to the flat screen Center Install...

Страница 14: ...e projector is not in use When this projector is connected to an outlet with AC power cord it is in Stand by mode and consumes a little electric power Connecting the AC Power Cord Connect AC power cor...

Страница 15: ...put COMPUTER IN 2 MONITOR OUT When connecting the cable the power cords of both the projector and the external equipment should be disconnected from AC outlet Note Input sound to the COMPUTER COMPONEN...

Страница 16: ...supplied with this projector Note When connecting AUDIO OUT to external audio equipment the projector s built in speaker is disconnected See p61 for ordering optional parts External Audio Equipment Au...

Страница 17: ...When connecting AUDIO OUT to external audio equipment the projector s built in speaker is disconnected See p61 for ordering optional parts External Audio Equipment COMPUTER IN 1 COMPONENT IN COMPUTER...

Страница 18: ...projector PIN Code Input Dialog Box Turning On the Projector Basic Operation Enter a PIN code Select a number by pressing the Point 7 8 buttons and fix the number with the SELECT button The number wi...

Страница 19: ...cally by connecting the AC power cord to an AC outlet p45 Do not operate the projector continuously without rest Continuous use may result in shortening the lamp life Turn off the projector and give i...

Страница 20: ...e projector can be adjusted or set via the On Screen Menu Refer to the following pages regarding each adjustment and setting procedures Press the Point 7 8 buttons to select a Menu icon to adjust and...

Страница 21: ...ess Color Tint Color temp White balance R G B Sharpness Gamma Noise reduction Progressive p38 39 For video source Same function as computer menu Input Menu Used to select input source either Video or...

Страница 22: ...stment will be canceled If a projected picture has keystone distortion correct the image with Keystone adjustment Press the KEYSTONE button on the top control or on the remote control The keystone dia...

Страница 23: ...seconds Press the MUTE button on the remote control to cut off the sound To restore the sound to its previous level press the MUTE button again or press the VOLUME buttons Mute function is also effec...

Страница 24: ...o PC function For more detail see 27 AUTO PC button Press the D ZOOM buttons on the remote control to zoom in and zoom out the images For more detail see 33 D ZOOM buttons Press the P TIMER button on...

Страница 25: ...ve the pointer to RGB and then press the SELECT button 3 Input Menu Computer 1 Video Computer 2 COMPUTER button Computer 1 Computer 2 INPUT button Input Source Selection Direct Operation Menu Operatio...

Страница 26: ...urce this projector automatically detects the signal format and tunes to project a proper image without any additional setting Signal formats provided in this projector is shown on page 59 One of the...

Страница 27: ...e Fine sync Total dots Horizontal and Vertical of some computers cannot be fully adjusted with this Auto PC Adjustment function When the image is not provided properly with this operation manual adjus...

Страница 28: ...ons to adjust the horizontal picture position Horizontal Press the Point 7 8 buttons to adjust the vertical picture position Vertical Press the SELECT button to show H sync freq and V sync freq of the...

Страница 29: ...select Reset and press the SELECT button The confirmation box will appear and then select Yes All adjustments will return to their previous figures Mode free Vacant Mode Values of Total dots Horizonta...

Страница 30: ...Standard Real Blackboard Green Image 1 Image 2 Image 3 and Image 4 by pressing the IMAGE button on the remote control IMAGE button Dynamic Real Image 1 Image 2 Image 3 Normal picture level preset on t...

Страница 31: ...n to lighten the red tone and the Point 8 button to deepen the red tone From 0 to 63 White balance Red Press the Point 7 button to lighten the green tone and the Point 8 button to deepen the green ton...

Страница 32: ...to select and then press the SELECT button 2 Screen Menu Screen Menu icon Screen Size Adjustment Wide Provide the image to fit the screen size Normal True Provide the image in its original size When...

Страница 33: ...age size A projected image can be also compressed by pressing the D ZOOM button on the remote control Digital zoom To return to the previous screen size select a screen size from the Screen Size Adjus...

Страница 34: ...Input Menu Move the pointer to the source that you want to select and then press the SELECT button 3 When selecting Auto the projector automatically detects incoming video signal and adjusts itself to...

Страница 35: ...3 Computer 1 Video Computer 2 COMPUTER button Computer 1 Computer 2 INPUT button Input Source Selection Component RGB Scart 21 pin Direct Operation Menu Operation Move the pointer red arrow to Compute...

Страница 36: ...ECT button PAL SECAM NTSC NTSC4 43 PAL M PAL N The projector automatically detects incoming video signal and adjusts itself to optimize its performance If the projector cannot reproduce proper video i...

Страница 37: ...Image 3 and Image 4 by pressing the IMAGE button on the remote control Normal picture level preset on this projector Standard Picture level adjusted for the picture with fine tone Cinema Blackboard G...

Страница 38: ...ton at this item to display other items Image Adjust Menu icon Press the Point 7 button to lighten the color and the Point 8 button to deepen the color From 0 to 63 Press the Point 7 8 buttons to obta...

Страница 39: ...uction and Progressive cannot be selected when 480p 575p 720p 1035i or 1080i is selected p36 Store item Interlaced video signal can be displayed in a progressive picture Select one of the following Of...

Страница 40: ...int ed buttons and move the red framed pointer to the function that you want to select and then press the SELECT button 1 2 Move the red framed pointer to a function and press the SELECT button Screen...

Страница 41: ...ELECT button The keystone dialog box will appear Correct keystone with the Point ed buttons p22 Store store the keystone correction even when the AC power cord is unplugged Reset reset the keystone co...

Страница 42: ...0i When capturing the image that has been adjusted by the Keystone function the adjustment data is automatically reset and the projector captures an image without keystone adjustment When the Logo PIN...

Страница 43: ...ogo PIN code Logo PIN code can be changed to your desired four digit number Select Logo PIN code change with the Point d button and press the SELECT button Set a new Logo PIN code Be sure to note the...

Страница 44: ...Power management and this box will appear Choose one of three settings with the Point 7 8 buttons and go to the timer with the Point ed buttons and set time with the Point 7 8 buttons Power managemen...

Страница 45: ...rence when operating several projectors or video equipment at the same time When operating the projector in Code 2 both the projector and the remote control must be switched to Code 2 To change the co...

Страница 46: ...ty options Off the projector is not locked with the PIN code On1 require to enter the PIN code every time turning on the projector On2 require to enter the PIN code to operate the projector once the p...

Страница 47: ...YOU FORGET YOUR PIN CODE THE PROJECTOR CAN NO LONGER BE STARTED Select Off On1 or On2 with the Point 7 8 buttons and then move the red framed pointer to Quit with the Point d button Press the SELECT...

Страница 48: ...lock Logo PIN code lock and the lamp counter to the factory default settings Select Factory default and this box will appear Select Yes and the next box will appear Factory default Select Yes to acti...

Страница 49: ...blocked Is the projector not installed near the ventilation duct of air conditioning equipment which may be hot Install the projector away from the ventilation duct of air conditioning equipment Are...

Страница 50: ...alfunction of the projector RECOMMENDATION We recommend avoiding dusty smoky environments when operating the projector Usage in these environments may cause poor image quality When using the projector...

Страница 51: ...ive amount of cleaner Abrasive cleaners solvents or other harsh chemicals might scratch the surface 2 Follow these steps to clean the projector cabinet When the projector is not in use put the project...

Страница 52: ...e of the projector can become very hot Top Control CAUTION Screw Turn off the projector and disconnect the AC power cord Allow the projector to cool for at least 45 minutes Remove 2 screws of the lamp...

Страница 53: ...ontinuous use of the lamp with the LAMP REPLACE indicator lighted may increase the risk of lamp explosion A Lamp may explode as a result of vibration shock or degradation as a result of hours of use a...

Страница 54: ...See page 13 Check the projection lens to see if it needs cleaning See page 51 Moving the projector from a cool to a warm place may result in moisture condensation on the projection lens In such cases...

Страница 55: ...l the COMPUTER button or the VIDEO button on the remote control so that the Terminal function can be selected The Remote Control does not work Check the batteries Make sure no obstruction is between t...

Страница 56: ...age 1 Image 2 Image 3 Image 4 Screen Quit Yes No Systems displayed in the System Menu vary depending on an input signal Reset Yes No Sharpness 0 15 Computer Input Video Input Image 4 Sound Volume Mute...

Страница 57: ...n Countdown off Off Logo select On Off On Off Off On Off Normal Auto Eco Code 1 Code 2 Keystone Blue back Display Logo Ceiling Rear Power management On start Lamp control Remote control Quit Russian R...

Страница 58: ...ator emits a red light and the projector can be turned on The WARNING indicator keeps blinking Check and clean the air filters Projector Condition The projector is ready to be turned on with the POWER...

Страница 59: ...SXGA 6 1280 x 1024 SXGA 7 1280 x 1024 63 74 60 01 71 69 67 19 SXGA 10 1280 x 960 81 13 76 107 60 00 60 00 XGA 1 1024 x 768 XGA 4 1024 x 768 48 36 60 00 XGA 6 1024 x 768 XGA 7 1024 x 768 56 476 70 07...

Страница 60: ...nterface Video Input Jack RCA Type x 1 S Video Input Jack Mini DIN 4 pin x 1 Audio Input Jacks RCA Type x 2 Computer Input 1 Component Input Terminal Analog RGB Mini D sub 15 pin Terminal X 1 Computer...

Страница 61: ...s give the item name and Model No to the sales dealer Optional Parts Accessories Owner s Manual AC Power Cord Remote Control and Batteries VGA Cable Lens Cover with String PIN Code Label The specifica...

Страница 62: ...NPUT COMPONENT INPUT MONITOR OUTPUT TERMINAL ANALOG Terminal Analog RGB Mini D sub 15 pin 5 1 2 3 4 10 9 6 7 8 15 14 13 11 12 Configurations of Terminals Red R Cr Input Output Ground Horiz sync Green...

Страница 63: ...ct the service station PIN Code Number Memo Factory default set No 1 2 3 4 Factory default set No 4 3 2 1 Should the four digit number be changed the factory set number will be invalid Put the label b...

Страница 64: ...schland Tel 06126 9371 0 Fax 06126 9371 14 E Mail info eiki de Eastern Europe EIKI CZECH spol s r o Umeleck 15 170 00 Praha 7 Czech Republic Tel 42 02 20570024 42 02 20571413 Fax 42 02 20571411 E Mail...

Отзывы: