background image

25

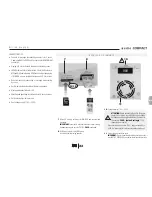
S w i t c h i n g   o n   t h e   s y s t e m

VERY IMPORTANT:

Before connecting the equipment to the power supply or mains, check that the correct
voltage has been selected using the selector on the bottom of the console. 

230 V~

(default voltage)

, 115 V~ (depending on country).

SWITCHING ON

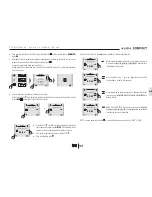
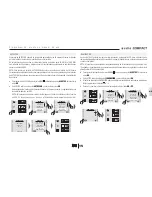
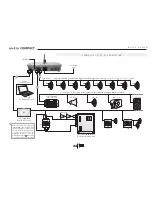
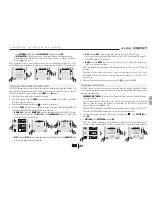
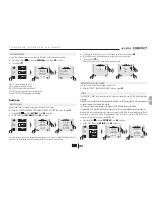
• To start up the system, press the top left key so that the console goes from OFF stand-by

to ON  .

LANGUAGE

• Select the language using the   and   keys.

Press 

OK

 to confirm and the   key to exit.

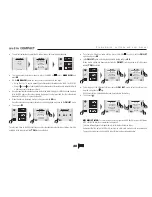
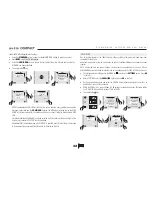
• After selecting the language the system requests the SET-UP or selection of the zones that are going

to be used.

ZONE 1

ZONE 3

1

1

ZONE 2

ZONE 1+2

1

0

SELECT

ACTIVE ZONES

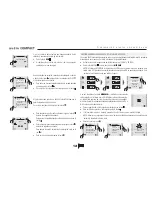
• In the example shown above, 

ZONE 3

 is added to 

ZONE 1

 and 

ZONE 2, 

that are the default zones.

The system also allows 

Z1 

and 

Z2 

to be combined into one single zone so that the 2 rear outputs

Z1

 and 

Z2

 operate at the same time, making a total of 100 W available for one zone provided that

each output has a different line of speakers.  In this case, music and messages will be played at
the same volume through both outputs.

So:
If 

ZONE 1

 or 

ZONE 2 

is activated, 

ZONE 1+2 

will be automatically disabled.

If 

ZONE 1+2

 is activated 

ZONE 1

 and 

ZONE 2

 are automatically disabled.

As a rule, if you are not sure

 we recommend activating the 3 zones individually.

• Once the zones have been selected, press the 

OK

 key to proceed with SET-UP, or press the   key

to return to the home screen.

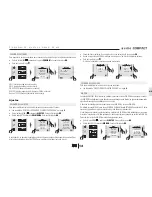
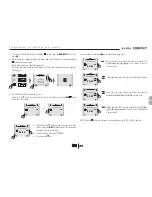
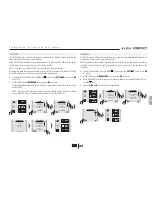
AUTOSCAN

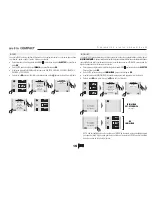
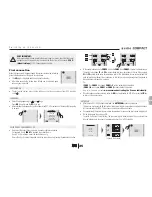
• After the zone SET-UP has been completed, the 

AUTOSCAN

 process commences.

This process memorises the 30 best radio stations according to the reception sensitivity and scans

for their names by FM/RDS. This process can take more than one minute.

• Once completed, the system is now initially programmed for use and the start screen is displayed.
• On the start screen the system is ON.

To switch it off, press the top left key. The console will go to stand-by mode. The console will not

lose the data (even in the event of a power cut) and will go to OFF stand-by.

A U T O S C A N

N E W

F M   L I S T

2 7 / 3 0

K I S S   F M

ZONE 1


FM

ZONE 2


FM

ZONE 3


FM

ZONE 1

ZONE 3

1

0

ZONE 2

ZONE 1+2

1

0

SELECT

ACTIVE ZONES

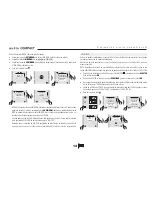
First connection

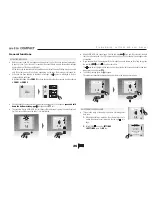
When first connected to the power supply, the system carries out an initialising
process that begins when it begins to receive power.
• The 

EGi

 logo is displayed and the unit goes to stand-by.

• After a few seconds the screen turns off and can be activated again

when any key is pressed.

L A N G U A G E

D E U T S C H

E N G L I S H

E S PA Ñ O L

F R A N Ç A I S

I TA L I A N O

P O RT U G U E S

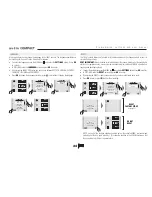
SELECTION OF ZONES AND SET-UP

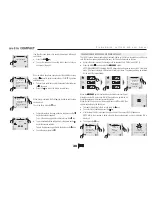
• Only select the zones that are going to be used or that are connected.

For example, if only 

ZONA1

 is required then select 

1

 only.

If only 2 or 3 is required, select the desired zone only.
If more than 2 or 3 zones are required, select the zones to be used, leaving the unwanted zone free.

(Console start screen)

YES 

 / NO

YES 

 / NO

YES / 


NO

YES / 


NO

en

Содержание 10401 COMPACT

Страница 1: ...M a n u a l d e i n s t r u c c i o n e s I n s t r u c t i o n M a n u a l ...

Страница 2: ..._______________________________________7 AUTOSCAN ______________________________________________________7 Programación ajustes y manual de uso Funciones generales ACTIVACIÓN DE AVISOS______________________________________________8 SELECCIÓN DE VOLUMEN DE AVISO _____________________________________8 CONTROL Y APAGADO DE LA MÚSICA POR ZONA_____________________________9 CONTROL DE LAS FUENTES DE SONI...

Страница 3: ...frontal protectora Pulse PUSH para abrir o cerrar la tapa 5 Pulsador de encendido ON Stand by 6 Micrófono de avisos unidireccional Electret 7 Entrada memoria de tarjetas micro SD para DIN DON y mensajes pregrabados 8 Entrada memoria USB para reproducción de música MP3 9 Tapa protectora del cableado 10 Selector de voltaje 110 V 230 V 11 Rejilla de electroventilador y ventilación 12 Toma de corrient...

Страница 4: ...eta micro SD con los contactos hacia abajo y presionar hasta activar el CLIC de seguridad 8 Entrada de memoria USB para reproducción de música MP3 Introducir con los contactos hacia arriba CLIC CARACTERÍSTICAS Consola de avisos y música para 3 zonas 2 autoamplificadas 2 x 50 W y 1 activa para conexión MILLENNIUM Reproducción de 3 canales de música seleccionables por zona Radio FM RDS con lista de ...

Страница 5: ... móvil CD DVD 1205 1204 1204 1307 Alimentador 15 V K12G IN K13G 2 40730 2 4 5 6 1 1305 1 Amplificador MILLENNIUM cualquier amplificador EGi con entrada PIN Antena FM 100 V 40 W Z3 Z1 Z2 E s q u e m a d e c o n e x i ó n 6 Entrada a través de Jack 3 5 mm estéreo Z3 NOTA La salida Z3 o ZONA 3 equivale a una salida MILLENNIUM con un canal de música y un canal de avisos para poder activar y controlar ...

Страница 6: ...eguir adelante con el SET UP o pulse la tecla para volver a la pantalla inicial AUTOSCAN Una vez confirmado el SET UP de zonas pasa a realizar el proceso de AUTOSCAN Este proceso memoriza las 30 mejores emisoras por sensibildad de recepción y busca el nombre de éstas a través de FM RDS Este proceso puede durar más de un minuto Una vez terminado el sistema queda programado inicialmente para que Ud ...

Страница 7: ...nviar el aviso a través del micrófono Si desea que el aviso se quede con el micrófono abierto durante largo tiempo pulse a la vez la tecla ovalada y la tecla A continuación el símbolo comenzará a parpadear y podrá dejar de pulsar ambas teclas para hablar cómodamente durante el tiempo que desee pulsación larga PTL Para finalizar el mensaje vuelva a pulsar la tecla El sistema desactivará el aviso fi...

Страница 8: ...s una salida MILLENNIUM con salidas fijas que sólo se pueden modificar desde los mandos 1204 ó 1205 Una vez seleccionadas las fuentes de audio y el volumen pulse la tecla para salir del MENU CONTROL DE LAS FUENTES DE SONIDO La consola 10401 dispone de fuentes de sonido incorporadas que facilitan su ubicación en cualquier lugar y evitan tener que añadir equipos externos auxiliares Para seleccionar ...

Страница 9: ...TA USB MP3 MENSAJE FM MANUAL AJUSTES VERSION Para poder seleccionar y escuchar una emisora pulse la tecla MENU y seleccione la opción FM LISTA y pulse OK En la opción FM LISTA seleccione la emisora deseada y pulse la tecla OK Cuando se selecciona una emisora de FM LISTA se escuchará en todas las zonas donde esté seleccionado FM FM LISTA HIT FM MAXIMA FM RNE 3 ONDA CERO CAD 100 KISS FM Para borrar ...

Страница 10: ...3 Si pulsa PLAY el sistema empieza a reproducir música en las zonas que haya seleccionado MP3 El contador de tiempo empieza a correr y podrá elegir entre varias opciones Para parar la reproducción pulse la tecla STOP Para salir pulse la tecla Modo normal Reproduce todas las canciones de la memoria a lo largo de todas las carpetas y subcarpetas hasta volver a la primera canción y parar USB COLD PLA...

Страница 11: ...ecla EMISIÓN DE MENSAJES GRABADOS DE LA TARJETA MICRO SD La consola 10401 permite emitir mensajes cuñas o archivos pregrabados en la tarjeta micro SD activables manualmente por el usuario Para ello proceda de la siguiente manera Active las zonas por las que desea emitir el mensaje p ej ZONA 1 y ZONA 3 Pulse la tecla MENU y seleccione la opción MENSAJE NOTA Al entrar en MENSAJE el reproductor de US...

Страница 12: ...modificar el volumen de una o todas las zonas seleccione la zona y pulse OK Dentro de la pantalla de ZONA modifique el volumen con las 2 teclas superiores derecha Para salir pulse la tecla Al salir de la pantalla el volumen se queda memorizado SELECCIONA ZONA 1 ZONA 2 ZONA 3 TODAS ZONA 2 RADIO FM MP3 AUX NINGUNA VOLUMEN DE LOS AVISOS Para poder modificar el volumen de los avisos en cada zona Lea e...

Страница 13: ...de largo tiempo de reproducción cada vez que quiera dar un aviso la consola emitirá la totalidad del tiempo del archivo seleccionado ECUALIZAR Una de las grandes cualidades de la consola 10401 es la posibilidad de poder ajustar los tonos agudos y graves por cada zona de manera independiente Además de permitir ecualizar por zona el software le permite a su vez ecualizar las 2 zonas de manera conjun...

Страница 14: ...lo hagan el sintonizador memorizará el número del dial AUTOSCAN CREANDO LISTA FM 27 30 KISS FM MENU FM LISTA USB MP3 MENSAJE FM MANUAL AJUSTES VERSION ZONA 1 FM ZONA 2 FM ZONA 3 FM AJUSTES VOL MUSICA VOL AVISO DIN DON ECUALIZAR AUTOSCAN ILUMINACION ZONA 1 FM ZONA 2 FM ZONA 3 FM AJUSTES VOL MUSICA VOL AVISO DIN DON ECUALIZAR AUTOSCAN ILUMINACION ILUMINACIÓN La consola 10401 permite el ajuste de ret...

Страница 15: ...l estado inicial de fábrica MUYIMPORTANTE Alpasaralestadoinicialdefábricalaconsolaborrará todaslasemisoraspresintonizadas las zonas dadas de alta los volúmenes de música los volúmenes de aviso el DIN DON seleccionado los ajustes de ecualización el idioma y la iluminación Para seleccionar el proceso de inicialización pulse la tecla MENU y seleccione la opción AJUSTES Para confirmar pulse OK En AJUS...

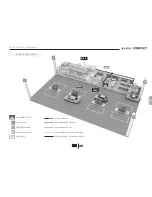
Страница 16: ...e altavoces ZONA 1 Surtidores gasolinera Línea de altavoces ZONA 2 Tienda Línea de altavoces ZONA 3 Bar y oficina OPCIONAL BUS línea general ZONA 3 Bar y oficina OPCIONAL Consola COMPACT 10401 Proyectores 0604 02 Altavoz de techo 06050 Mandos 1205 y 1204 Amplificador 1309 1 1 3 2 G A S O L I N E R A es ...

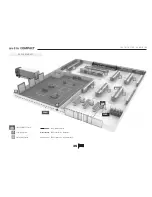
Страница 17: ... n s t a l a c i ó n 230 V ZONA 1 ZONA 2 Consola COMPACT 10401 Proyectores 0604 02 Altavoz de techo 06050 Línea red 230 V Línea de altavoces ZONA 1 Almacén Línea de altavoces ZONA 2 Tienda supermercado S U P E R M E R C A D O ...

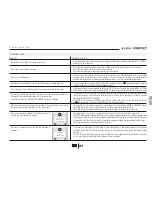
Страница 18: ...sea activar Puede ser debido a una mala colocación de las memorias USB o micro SD a que estén mal fragmentas que tengan muchos archivos con extensiones no ejecutables para la consola o que se ha bloqueado con ERROR ACCESO UNIDAD SOLUCIÓN Pulse la tecla OK cuando aparezca el ERROR o apague la consola durante 2 ó 3 segundos de la tecla stand by y vuelva a encenderla Coloque bien las tarjetas USB y m...

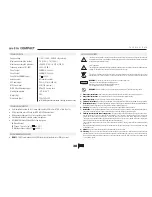
Страница 19: ...o 1 Lea las instrucciones Antes de utilizar su nueva unidad por favor lea todas las instrucciones de seguridad y operación 2 Conserve estas instrucciones Para futuras referencias y resolución de problemas conserve estas instrucciones 3 Tenga en cuenta todas las advertencias Todas las advertencias en este manual deben ser consideradas 4 Siga las instrucciones Siguiendo las instrucciones presentes e...

Страница 20: ...__________________25 AUTOSCAN _____________________________________________________25 Programming settings and user manual General functions ACTIVATING MESSAGES ____________________________________________26 SELECTING MESSAGE VOLUME _______________________________________26 CONTROLLING AND SWITCHING OFF MUSIC BY ZONES _______________________27 CONTROLLING SOUND SOURCES ____________________________...

Страница 21: ...3 Menu access keys 4 Front protection cover Press PUSH to open or close the cover 5 ON Stand by button 6 Electret unidirectional microphone 7 Micro SD memory card input for DIN DON and pre recorded messages 8 USB memory input to play MP3 music 9 Cabling protection cover 10 Voltage selector 110 V 230 V 11 Electric fan and ventilation grille 12 230V or 115 V input connection plug 13 Audio output for...

Страница 22: ...e SD micro card with the contacts facing downwards and push until the SAFETY CLICK is activated 8 USB memory input to play MP3 music Insert with contacts facing upwards CLICK CHARACTERISTICS Console for message broadcasting and music for 3 zones 2 auto amplified 2 x 50 W and 1 active zone for MILLENNIUM connection Playing of 3 music channels that can be selected by zones FM RDS radio with list of ...

Страница 23: ...D DVD 1205 1204 1204 1307 15 V Feeder K12G IN K13G 2 40730 2 4 5 6 1 1305 1 MILLENNIUM amplifier any EGi amplifier with PIN input FM antenna 100 V 40 W Z3 Z1 Z2 W i r i n g d i a g r a m 24 Input via 3 5 mm stereo jack Z3 NOTE The Z3 or Zone 3 output is the equivalent of a MILLENNIUM output with one music channel and one message channel to be able to activate and control the1204 and 1205 control u...

Страница 24: ...n selected press the OK key to proceed with SET UP or press the key to return to the home screen AUTOSCAN After the zone SET UP has been completed the AUTOSCAN process commences This process memorises the 30 best radio stations according to the reception sensitivity and scans for their names by FM RDS This process can take more than one minute Once completed the system is now initially programmed ...

Страница 25: ... microphone If you need maintain the message with the microphone open to remain on for a long time press the oval key and the key at the same time The symbol will begin to blink and you can stop pressing both keys and speak for however long you wish Long press PTL To end the message press the key again The system will deactivate message mode and return to the previous music mode MENU FM LIST USB M...

Страница 26: ...IUM output with fixed outputs that can only be changed via the 1204 or 1205 control units After selecting the audio sources and volume press the key to exit the MENU CONTROLLING SOUND SOURCES The 10401 console has some built in sound sources that allow you to place it anywhere This way it is not necessary to add external devices auxiliaries To choose music between the sound sources follow the next...

Страница 27: ...ETTINGS VERSION MANUAL FM ONDA CERO 99 4 ZONE 1 FM ZONE 2 MP3 ZONE 3 FM MENU FM LIST USB MP3 MESSAGE MANUAL FM SETTINGS VERSION To select and listen to a radio station press the MENU key and select the FM LIST option and press OK In the FM LIST option select the required radio station and press OK When a radio station has been selected from the FM LIST it will be played in all of the zones where F...

Страница 28: ...COLD PLAY MAGIC 00 03 If you press PLAY the system begins to play music in the zones for which the MP3 has been selected The timer starts and several options are available To stop the music press the STOP key To exit press the key Normal mode All the songs in the memory are played from all the folders and sub folders until it returns to the first song and stops USB COLD PLAY MAGIC 00 03 Another op...

Страница 29: ...RD RECORDED MESSAGES The 10401 console allows broadcasting messages jingles or the files pre recorded on the SD micro card that can be manually activated by the user For this option proceed as follows Activate the zones to which the message is to be broadcast e g ZONE 1 and ZONE 3 Press the MENU key and select the MESSAGE option NOTE When MESSAGE is entered the USB player stops and opens up the mi...

Страница 30: ...f the zones at the same time To change the volume for one or all of the zones select the zone and press OK In the ZONE screen change the volume using the 2 keys at the top right To exit press the key When you exit the screen the volume will be memorized SELECT ZONE 1 ZONE 2 ZONE 3 ALL ZONE 2 RADIO FM MP3 AUX NONE MESSAGE VOLUME VOL PAGING To modify the volume of the messages in each zone Read the ...

Страница 31: ...DON is selected each time that there is a message to be broadcast the console will play the whole of the selected file time EQUALIZING One of the great features of the 10401 console is the possibility of adjusting treble and bass tones separately for each zone Apart from being able to carry out equalization by zones the software allows you to equalize 2 zones together NOTE Remember that you cannot...

Страница 32: ...When no name is provided the tuner memorizes the dial frequency AUTOSCAN NEW FM LIST 27 30 KISS FM MENU FM LIST USB MP3 MESSAGE MANUAL FM SETTINGS VERSION ZONE 1 FM ZONE 2 FM ZONE 3 FM SETTINGS VOL MUSIC VOL PAGING CHIME EQUALIZER AUTOSCAN BACKLIGHT ZONE 1 FM ZONE 2 FM ZONE 3 FM SETTINGS VOL MUSIC VOL PAGING CHIME EQUALIZER AUTOSCAN BACKLIGHT BACKLIGHT The 10401 console s LCD screen backlight can ...

Страница 33: ...ta entered and the changes made to return it to its initial factory settings VERY IMPORTANT When it returns to its initial settings the console deletes all of the preset radio stations the registered zones music volumes message volumes selected DIN DON equalization language and backlight settings To select the reset process press the MENU key and select the SETTINGS option Press OK to confirm In S...

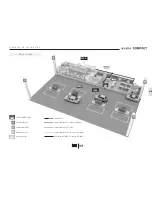
Страница 34: ...1 Loudspeaker line Petrol pumps ZONE 2 Loudspeaker line Shop ZONE 3 Loudspeaker line Bar and office OPTIONAL ZONE 3 General line BUS S Bar and office OPTIONAL 10401 COMPACT Console 0604 02 Projectors 06050 Ceiling loudspeaker 1205 and 1204 control units 1309 1 Amplifier 1 3 2 P E T R O L S T A T I O N en ...

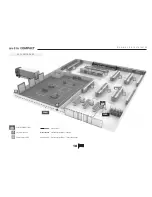
Страница 35: ... t i o n e x a m p l e s 230 V ZONE 1 ZONE 2 10401 COMPACT Console 0604 02 Projectors 06050 Ceiling speaker 230 V Mains power line ZONE 1 Speaker line Warehouse ZONE 2 speaker line Supermarket shop S U P E R M A R K E T ...

Страница 36: ...ask you which ZONES you wish to activate It may be due to the USB or micro SD memories being incorrectly inserted or to incorrect fragments or to the fact that there may be a lot of files with extensions that the console cannot execute or the console may have crashed with a DRIVE ACCESS ERROR SOLUTION Press the OK key on ERROR screen or switch off the console for 2 or 3 seconds using the stand by ...

Страница 37: ...r moisture WARNING To avoid spread of fire do not use candles or other types of flames near to the product 1 Read these instructions Before using your new unit please read all of the safety and operating instructions 2 Keep these instructions Keep these instructions for future reference and troubleshooting 3 Heed all warnings All of the warnings in this manual must be heeded 4 Follow all instructi...

Страница 38: ... 79 50003 Zaragoza Spain Tel 34 976 40 53 53 Fax 34 976 40 53 54 e mail info egiaudio com ATENCIÓN TÉCNICO COMERCIAL TECHNICAL SALES SERVICE Tel 34 976 40 46 77 e mail sat_consultas egiaudio com DPTO DE EXPORTACIÓN EXPORT DEPARTMENT Tel 34 976 40 53 56 Fax 34 976 40 53 54 e mail export egiaudio com DISTRIBUIDOR DISTRIBUTOR DELEGACIONES SALES OFFICES Delegación Centro C Juan de Mariana 20 local 3 2...

Отзывы: