background image


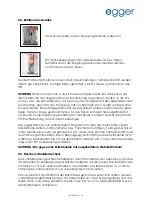
ATTENTION: 

The components A and B have to be connected according to the print-

ing on the unit and the applied color marking. Perforate bottom of container with 

sharp-pointed object in order to let air come in when producing. Turn on the unit at 
the operation button. Put a reception bowl under the mixing head and press push-
button. Keep the push-button pressed until the test silicone has been produced 
completely and both components come out homogeneoulsy at the mixing head. 


The egger ESG 2 is now ready to operate. Put negative form under the opening of 
the mixing canula and press push-button or foot-operated switch. As long as the ma-
terial is not cured in the mixing canula (approx. 4 minutes) several gaskets can be 

filled in succession. After having finished the filling process do not remove the mixing 
canula. Do only remove the mixing before the next duplication by means of a 90° 
turn to the right. 

ATTENTION: Never produce against a mixing canula with cured material! 
 

5.3 Change of bottles/cans 


Remove the quick-coupling/bottle adaptor from the unit by means of tearing up-
wards the lock-up. Screw quick-coupling/bottle adaptor onto the new bottles/cans 

and connect as described above. Observe the correct coordination of the compo-
nents according to the color. 
Observe the contents of the containers at any time! They must not be emptied com-
pletely, as otherwise air gets into the system and the unit has to be deaerated under 

great effort. A minimal filling of 2 - 3 cm has to remain in the cans. 


6  Care and maintenance 


Disconnect the unit from mains supply before care and maintenance! 
Cleaning is effected with a mild cleaning liquid. 
Wipe away silicone remainders from the unit. Keep coupling plug and mixing head 
clean. The cleaning liquid must not get into the unit. 

Repairs on the egger ESG 2 may only be executed by experts. Disconnect the unit 
from mains supply at any rate. 
Egger company is only responsible for the safety, reliability and performance of the 
unit, if 

- the unit is exclusively used for the corresponding field of application. 
- operation is only carried out by personnel trained accordingly. 
- the unit is operated in accordance with these working instructions. 
- extensions, new adjustments, changes or repairs are executed by persons author-
ised by the company. 


As we are currently developing our products, we reserve the right for technical 
changes. 


7  Service / Customer service 


The manufacturer gives a device warranty of 24 months starting from the date of 
purchase. For weat and tear parts (e. g. tooth wheels, etc.) and modifictaions on the 
device as well we grant a guarantee of 6 months, corresponding to the German Citi-
zen’s Copde of Law § 477. 


NOTE:

 In case of improper handling of the egger ESG 2 all warranty and liability 

claims will become extinct! 


Page 11 of 16 

Содержание ESG 2

Страница 1: ...eitsbewusst arbeiten 3 Installation 3 1 Lieferumfang 3 2 Leistungsmerkmale 3 3 Ersatzteile Zubeh r 4 Bedienung 4 1 Bedien und Kontrollelemente 5 Inbetriebnahme 5 1 Bef llen des Ger tes 5 2 Flaschen Ka...

Страница 2: ...leitung lesen und bei even tuellen Unklarheiten beim Hersteller r ckfragen Das Ger t nur an zugelassene Steckdosen anschlie en siehe Leistungsmerkmale Abschnitt 3 2 Ger t nur an einem trockenen Arbeit...

Страница 3: ...hkan len S 50 System 40 Stk Art Nr 25151 Mischkan len S 50 System100 Stk Art Nr 25152 3 4 Ger t aufstellen und anschlie en Das egger ESG 2 entspricht dem aktuellen Stand der Technik und den anerkannte...

Страница 4: ...chalter Ort Linke Seite des Ger tes Funktion Durch das Dr cken wird der Mischvorgang gestartet 5 Inbetriebnahme 5 1 Vorbereitung der Silikonbeh ltnisse Es k nnen Materialreservoirs 1 Liter Flaschen od...

Страница 5: ...am Mischkopf befestigen Das egger ESG 2 ist nun betriebsbereit Negativform unter die Auslauf ffnung der Mischkan le stellen und Drucktaster bzw Fu schalter bet tigen Solange das Silikon in der Mischk...

Страница 6: ...t das Ger t in bereinstimmung mit dieser Bedienungsanleitung verwendet wird Erweiterungen Neueinstellungen nderungen oder Reparaturen durch von ihr er m chtigte Personen ausgef hrt werden 7 Service Ku...

Страница 7: ...on 3 1 Equipment 3 2 Technical data 3 3 Spare parts Equipment 3 4 Setting up connecting the unit 4 Operating instructions 4 1 Operating and controlling elements 5 Bringing the machine into service 5 1...

Страница 8: ...standard plug sockets as described in chapter 3 2 Make sure that the de vice is only used on a dry working place Please observe the working instructions of the materials on which you work The unit has...

Страница 9: ...in perfect technical condition Observe the manual Set up the device horizontally and bring it in a perfect position Please make sure that the device has a solid base Check if the device is in technica...

Страница 10: ...aptor ATTENTION Colored bottle adaptor onto the bottle filled with colored silicone mass component B CUBITAINER Take off canister lids and screw optional connection hoses ATTENTION Keep the two silico...

Страница 11: ...of the containers at any time They must not be emptied com pletely as otherwise air gets into the system and the unit has to be deaerated under great effort A minimal filling of 2 3 cm has to remain i...

Страница 12: ...n case of damage or other malfunctions You may also contact egger Otoplastik Labortechnik GmbH Ayb hlweg 59 D 87439 Kempten Telefon 49 0 8 31 5 81 13 60 Fax 49 0 8 31 5 81 13 14 E mail sales egger lab...

Страница 13: ...Seite 13 von 16 Page 13 of 16...

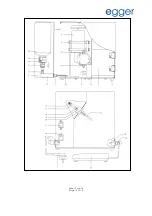
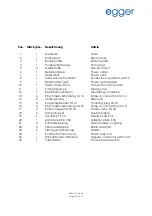
Страница 14: ...nser 13 4 Einschraubverbindung G1 4 Screw in connection G1 4 14 2 Verl ngerung Extension 15 2 Kupplungsstecker G1 4 Coupling plug G1 8 16 2 Einschraubverbindung G1 8 Screw in connection G1 8 17 2 R ck...

Страница 15: ...t foot operated switch M1 Zahnradpumpe Gear pump CB Betriebskondensator Operating condenser S1 Netzschalter mit Beleuchtung Power switch with lights S2 Taster START mit Beleuchtung Push button with li...

Страница 16: ...Notizen Notes Seite 16 von 16 Page 16 of 16...

Отзывы: