22
23
5.5 Time to splice
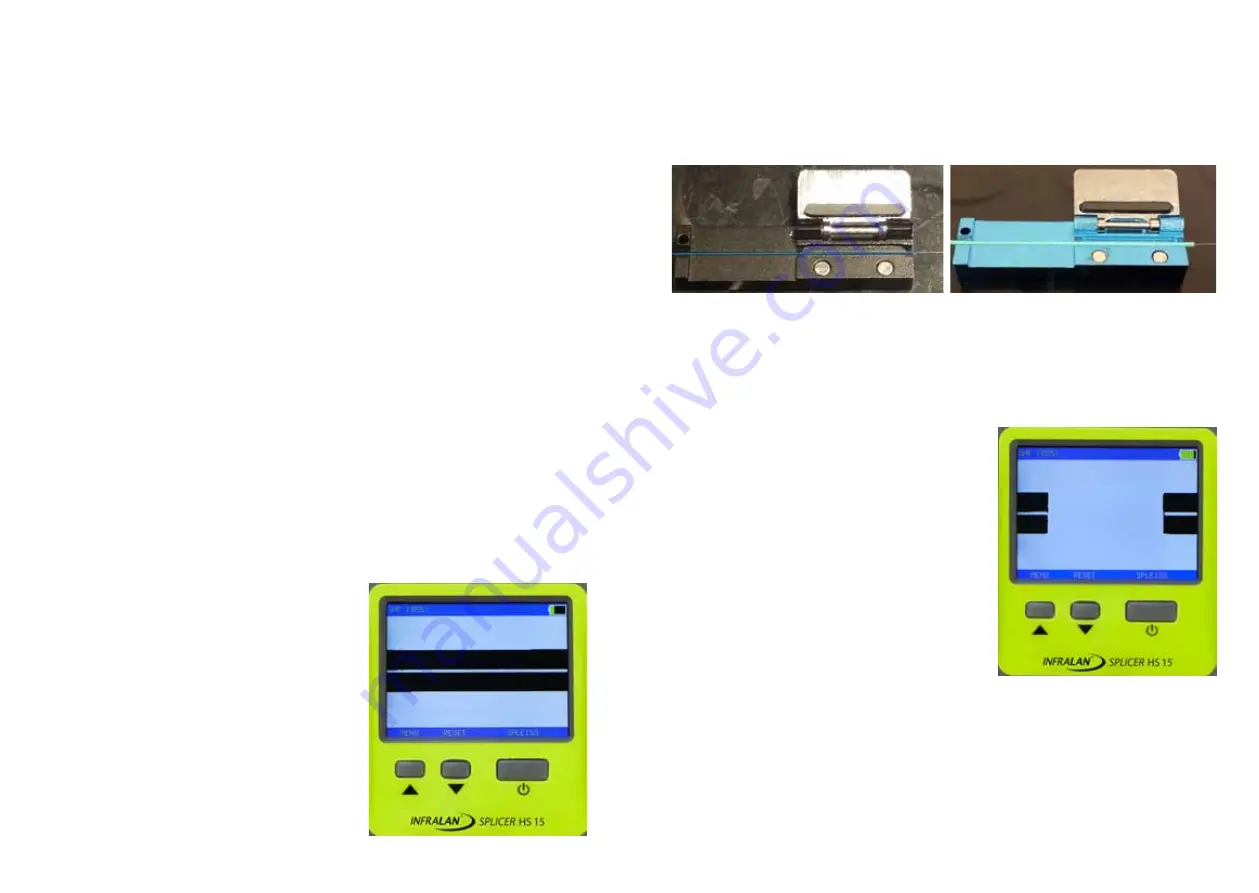
1. Place the fiber in the fiber holders (250µ fiber in the black holders and 900µ fibers/pigtails in
the blue holders). The fiber should stick out approx. 3-4cm.
a. Don’t forget to put on a heat shrink tube over one of the fiber ends before you start, when you
use the version with oven.
2. Strip and clean the fiber and place it in the fiber holder
Figure 2
Figure 3
Figure 4
3. Place the fiber holder with the fiber into the cleaver and cleave it
4. Place the fiber holders in the splicer. Push down the bracket which holds the fibers in place in
the V-groove
5. If needed, press „RESET“.
The fiber ends should be seen in the display, like this when ready for splicing (figure 5)
2. Close the lid of the Infralan® Splicer
3. Press the “SPLICE”-button (large button). The fibers
will move together and spliced. The whole process will
be shown in the display and takes around 10 sec. An
automatic pull-test will be performed after the splicing.
4. Finally the splicer will show the estimated splice loss
(in dB and in green color) or, if the process failed, “Bad
splice” (if so, re-do the operation from “strip and cleave”
at point 5.5)
5.6 Operation of the Oven
1. Open up the oven (with the little arm on the left hand
side of the oven)
2. Lift up the bracket over the V-grove and then open up
both fiber holders.
3. Push the splice protection (heat shrink tube) over the
spliced part and place the fiber/tube in the center of the oven. Lock the fiber (and close the
oven lid) with the oven arm.
4. Start the oven by pressing the „Oven“ button. The oven is preset for a 60 sec. operation can be
set in many combinations (see in the Menu-System).
5. The INFRALAN® Splicer is ready for another splice while the oven is in operation (start from
above again). Press „Reset“ if the oven operation is not needed.
The splicer will also start automatically if the power supply is connected. Simply press any button
to leave charging-mode. Make sure that the unit is properly charged if operated by the internal
battery-pack. Charge the unit at least 6-8 hours before using it the first time.
Turn on the Infralan® Splicer by pressing down the “POWER”-button (large button below the
display).
The splicer starts in “ready-mode” after a few seconds. Before beginning to splice it is important
to verify that the electrodes are in good (operational) condition. The electrodes are quite easily
oxidized due to environmental conditions (like dirt in the air and/or moisture). The splicer has
probably been stored for a while and lately in transport.
Such oxide can be cleaned (burned off) by using the “CLEAN ELECTRODES” function.
5.2 Start with the Calibration
Begin all work with a “Calibrate”. This is needed to adapt the splicer to its present environment
(adapt to temperature, moisture etc).
5.3 Singlemode or Multimode
It´s very important to setup the correct fiber-type in the splicer before doing the calibration. For
example select Singlemode fiber in the “Menu” if you are using a Singlemode fiber.
1. Press the „Menu-button“
2. Select with the „down arrow“ to the „SETUP“ menu
3. Choose „SETUP“, by pushing the large button (SELECT).
4. Select with the „down arrow“ the „FIBER TYPE“
5. Select „FIBER TYP“.
6. Choose your fiber type: SINGLEMODE, MULTIMODE or OM1
5.4 How to Calibrate
1. Strip one fiber which you are about to splice (strip it to 5-6cm ).
2. Clean the fiber with alcohol(99%), Isopropyl (99%) or similar
Make sure not to touch the fiber with anything after cleaning as it will become dirty. Place the
stripped and cleaned fiber across the V-groove.(see figure 1).
3. Having placed the fiber in the V-grove enter the
“Menu” again and step with “down arrow”
to CALIBRATE. Select it (large button) and the splicer will
perform a calibration.
This is seen on the display as the splicer will ignite the
spark and shine through the fiber with various strength.
The operation is finished after some 10 seconds and the
display will show “OK” if the Calibration was done proper-
ly. If not, the display will show the text:
“CALIBRATE AGAIN”.
Figure 1


