background image


Translation of original operating 

manual 

EFA Trimmer 


OM NO.: 001 580 629 

18 of 22 

Version 13.11.2020 


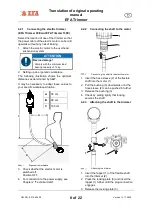
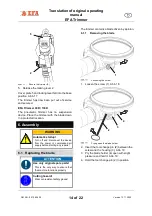
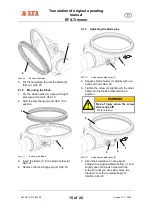
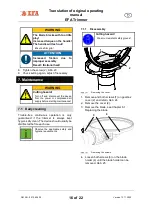
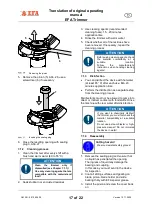
4.  Screw on the blade holder together with 

the blade 

7.2  Sharpening the blade 


ATTENTION 

Incorrectly sharpened blades lead to 
production losses and endanger the 
user. 


Cutting hazard! 

Wear cut-resistant safety gloves! 

If the trimmer is operated without a sharpening 
unit (special accessory), the blade is sharpened 
with whetting steel. 

7.2.1 

Whetting 


Sharpening the blade 

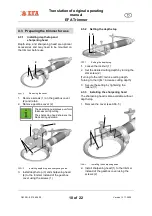
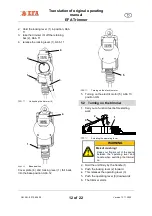
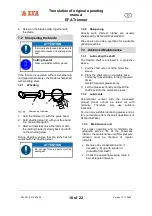
1.  Hold the trimmer (1) with the guide hand,  

2.  Hold whetting steel (2) with your free hand 

in a horizontal position 

3.  Start and carefully move the trimmer with 

the rotating blade (3) slowly back and forth 
on the whetting steel 

During  whetting,  ensure  that  the  knife  has  full 
contact with the whetting steel. 


ATTENTION 

Do  not  use  force  as  parts  could  be 
damaged!  

7.2.2 

Sharpening 

Heavily  worn  trimmer  blades  are  usually 
sharpened by Schmid & Wezel GmbH. 

We can also provide a quotation for a suitable 
grinding machine. 

7.3  Advanced Maintenance 

7.3.1 

Lubricating the shaft 

The  flexible  shaft  is  enclosed  in  a  protective 
sleeve.  

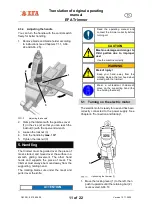
1.  Pull the shaft core out of the protective 

sleeve 

2.  Place the shaft core on a suitable base 

and spray from all sides, turning it several 
times. 
Use EFA special grease spray 

3.  Let the grease set briefly and push the 

shaft back into the protective sleeve. 

7.3.2 

Lubricants 

Unintentional  contact  with  the  processed 
product  (food)  cannot  be  ruled  out  with 
certainty. 

Therefore, 

only 

use 

suitable 

lubricants.  

You can buy suitable lubricating grease and oil 
for your machine from the sales department of 
Schmid & Wezel. 

7.3.3 

Maintenance unit 

For  proper  operation  and  to  maintain  the 
adequate  service  life  of  the  pneumatic 
trimmer, the maintenance unit (filter pressure 
reducer)  must  be  checked  at  regular 
intervals. 


Remove any condensation and, if 
necessary, fill up with special oil 
(available from S&W). 


Check the operating pressure (max. 6 
bar) at regular intervals. 


Содержание EFA 130D

Страница 1: ...Trimmer EFA 90E Trimmer EFA 130E Trimmer EFA 90D Trimmer EFA 130D A copy of this manual must be given to all personnel working with this tool Schmid und Wezel GmbH Maschinenfabrik Maybachstraße 2 D 75433 Maulbronn Germany Telephone 49 0 7043 102 0 Fax 49 0 7043 102 78 E mail efa verkauf efa germany de Website address www efa germany de ...

Страница 2: ...1 Place of work 7 4 2 Installation 7 4 2 1 Connecting the electric trimmer 8 4 2 2 Connecting the shaft to the motor 8 4 2 3 Attaching the shaft to the trimmer 8 4 2 4 Connecting the pneumatic trimmer 9 4 2 5 Filter pressure reducer 9 4 3 Preparing the trimmer for use 10 4 3 1 Installing depth stop and sharpening head 10 4 3 2 Setting the depth stop 10 4 3 3 Installing the sharpening head 10 4 3 4...

Страница 3: ...ning process 17 7 1 3 Disinfection 17 7 1 4 Reassembly 17 7 2 Sharpening the blade 18 7 2 1 Whetting 18 7 2 2 Sharpening 18 7 3 Advanced Maintenance 18 7 3 1 Lubricating the shaft 18 7 3 2 Lubricants 18 7 3 3 Maintenance unit 18 8 Maintenance 19 8 1 1 Repair by After Sales Service 19 8 2 Repairs 20 9 Transport and storage 20 10 Return of waste electrical equipment 20 ...

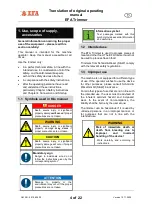
Страница 4: ...are not taken Mandatory sign Danger to individuals who do not follow the instructions given by the corresponding symbol ATTENTION Damage to property or the environment may occur if the proper precautions are not taken Information symbol Text passages marked with this symbol provide essential information and useful tips 1 2 Intended use The EFA Trimmer is used to process pieces of meat and other fo...

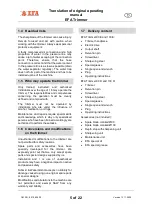
Страница 5: ...and knowledge which is why only specialized persons who have been trained accordingly are authorized to perform these tasks 1 6 Conversions and modifications on the trimmer Unauthorized modifications to the trimmer are not permitted for safety reasons Spare parts and accessories have been specially developed for the trimmer We expressly point out that we only accept spare parts and special designs...

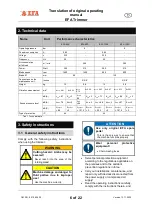
Страница 6: ...ations in force Carry out installations maintenance and repair only with devices disconnected from the power supply or compressed air supply Read the operating instructions carefully comply with the instructions therein and Name Unit Performance characteristics EFA 90E EFA 90D EFA 130E EFA 130D Operating pressure bar 6 6 Current consumption A 0 85 0 85 Voltage v 230 230 Frequency Hz 50 50 Air cons...

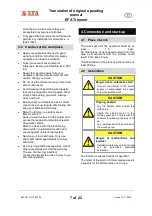
Страница 7: ...lade facing downwards in a protected location and secure against unintentional restart Service your tools with care Only use sharp and undamaged blades to ensure safe work Use only original EFA accessories Use of other accessories will void the warranty The use of other tool inserts or accessories presents a risk of injury to you and other persons 4 Connection and start up 4 1 Place of work The wo...

Страница 8: ... values to your specific workplace situation Ergonomic workplace 3 Check whether the electric motor is switched off Position OFF 4 For connection to the power supply see Chapter 2 Technical data 4 2 2 Connecting the shaft to the motor Connecting the shaft to the electric motor 1 Insert the hose sleeve 2 of the flexible shaft into the motor 1 2 Pull the bushing 3 downwards until the hose sleeve 2 c...

Страница 9: ...tor the maintenance unit must be set to 1 2 drops of oil per minute or one drop of oil for approximately 15 cuts A faulty compressed air connection and a high proportion of water in the compressed air may cause water to escape at the connection point Therefore ensure that the hose connection is correct and that the water content in the compressed air is low drain the water separator regularly If n...

Страница 10: ...g operation Installing depth stop and sharpening head 3 Install depth stop 3 and sharpening head 4 to the trimmer instead of the gearbox cover using the screws 1 4 3 2 Setting the depth stop Setting the depth stop 1 Loosen the locknut 1 2 Set the desired cutting depth by turning the star screw 2 Turning to the left reduce cutting depth Turning to the right increase cutting depth 3 Secure the setti...

Страница 11: ...olds and supports the piece of meat The trimmer must always be moved away from the supporting holding hand The rotating blade cuts under the meat and pulls it over the knife ATTENTION Read the operating manual and connect the trimmer correctly before turning on CAUTION Machine damage and danger to third parties due to improper use Use the machine correctly WARNING Risk of injury Keep your hand awa...

Страница 12: ...se position Abb 12 Turning on the electric motor 5 Turning on the electric motor 5 Abb 13 position ON 5 2 Turning on the trimmer 1 Carry out a function test before starting work Actuating the operating lever WARNING Risk of crushing Keep your fingers out of the space between the operating lever and handle when switching the trimmer on 2 Hold the unit firmly by the handle 1 3 Push the locking lever...

Страница 13: ...utting process ATTENTION Improper handling will lead to increased wear 5 3 Turning off Release the switch lever The locking lever switches the trimmer off automatically by a return spring the trimmer is then secured against unintentional restart 5 4 Procedure for non utilization The trimmer is protected against unintentional restart by various safety devices EFA Trimmer 90E 130E 1 Check whether th...

Страница 14: ...tartup Turn off and disconnect the device from the power or compressed air supply before starting any repairs 6 1 Replacing the blade ATTENTION Use only original spare parts This is the only way to ensure that the machine functions properly Cutting hazard Wear cut resistant safety gloves The trimmer contains a blade driven by a pinion 6 1 1 Removing the blade Loosening the screw 1 Loosen the screw...

Страница 15: ...bb 21 4 Remove the tool change pin 2 Abb 19 6 1 3 Adjusting the blade play Adjusting the blade play 1 5 Squeeze blade holder 1 slightly with one hand and hold Abb 22 6 Tighten the screw 2 slightly with the other hand until the blade holder remains in position WARNING Risk of injury when the screw driver slips off Work carefully Adjusting the blade play 2 7 Insert the screwdriver in the gap 3 betwe...

Страница 16: ...rom the power or compressed air supply before starting maintenance 7 1 Daily cleaning Trouble free continuous operation is only guaranteed if the trimmer is always kept hygienically clean The device should usually be disinfected before each use Observe the applicable safety and hygiene requirements 7 1 1 Disassembly Cutting hazard Wear cut resistant safety gloves Removing the cover 1 Remove and bo...

Страница 17: ...low the manufacturer s instructions when handling cleaning agents 7 1 3 Disinfection You can disinfect the device with hot water at least 85 C after each use Min 20 minutes application time Perform the disinfection as a separate step from the cleaning process Disinfectants must not be allowed to come into direct or indirect contact with foodstuffs Rinse the machine with clear water after disinfect...

Страница 18: ...re usually sharpened by Schmid Wezel GmbH We can also provide a quotation for a suitable grinding machine 7 3 Advanced Maintenance 7 3 1 Lubricating the shaft The flexible shaft is enclosed in a protective sleeve 1 Pull the shaft core out of the protective sleeve 2 Place the shaft core on a suitable base and spray from all sides turning it several times Use EFA special grease spray 3 Let the greas...

Страница 19: ...oes not start Parts of the motor or transmission are defective Return to manufacturer for service Motor and shaft are running however the blade does not rotate Worn coupling Return the device to the manufacturer Poor cutting result Blade is blunt Sharpen blade Chapter 7 2 Motor switch is set to ON however the shaft does not rotate The motor is defective Return the motor to the manufacturer No powe...

Страница 20: ...in different package sizes from the sales department of Schmid Wezel 8 2 Repairs CAUTION Danger of malfunctions and injuries Only authorized specialist personnel may carry out repairs WARNING Cutting hazard Turn off and disconnect the device from the power or compressed air supply before starting any repairs ATTENTION Use only original spare parts This is the only way to ensure that the machine fu...

Страница 21: ...Translation of original operating manual EFA Trimmer OM NO 001 580 629 21 of 22 Version 13 11 2020 ...

Страница 22: ...Translation of original operating manual EFA Trimmer OM NO 001 580 629 22 of 22 Version 13 11 2020 ...

Отзывы: