Visit our website at
www.edvotek.com
OPERATION MANUAL
EDGE
™
Integrated Electrophoresis System
4
Specifications:
• LED Wavelength: 470 nm +/- 10 nM
• LED Life: 50,000 hours
• Input voltage: 100-240V AC, 50/60 hz
• Output voltage: Selectable at 100V or 150V DC
• Dimensions: 17 cm (w) x 17 cm (l) x 15 cm (h)
• Operating conditions: 4 °C to 37 °C,
75% maximum humidity
Guarantee:
The unit is guaranteed against any defect in material or
workmanship for three years. The warranty period is from
the date of receipt, and within this period all defective
parts will be replaced free of charge provided that the
defect is not the result of misuse, accident or negligence.
Servicing under this guarantee should be obtained from
EDVOTEK®.
Notwithstanding, the description and specification(s) of the
units contained in the User’s Manual, EDVOTEK® hereby
reserves the right to make such changes as it sees fit to the
units or to any component of the units. This Manual has
been prepared solely for the convenience of EDVOTEK®
customers and nothing in this Instruction Book shall be
taken as a warranty, condition or representation concern-
ing the description, merchantability, fitness for purpose or
otherwise of the units or components.
Contact Information:
For technical, sales or servicing information, contact:
EDVOTEK, Inc.,
1121 5th Street NW
Washington, DC 20001
1.800.EDVOTEK (1.800.338.6835)
Fax: 202.370.1501
[email protected] • www.edvotek.com
Troubleshooting:
The EDGE™ does not power on:
•
Check that the power cord is fully plugged into the
EDGE™ base and that the cord and outlet are func-
tional.
•
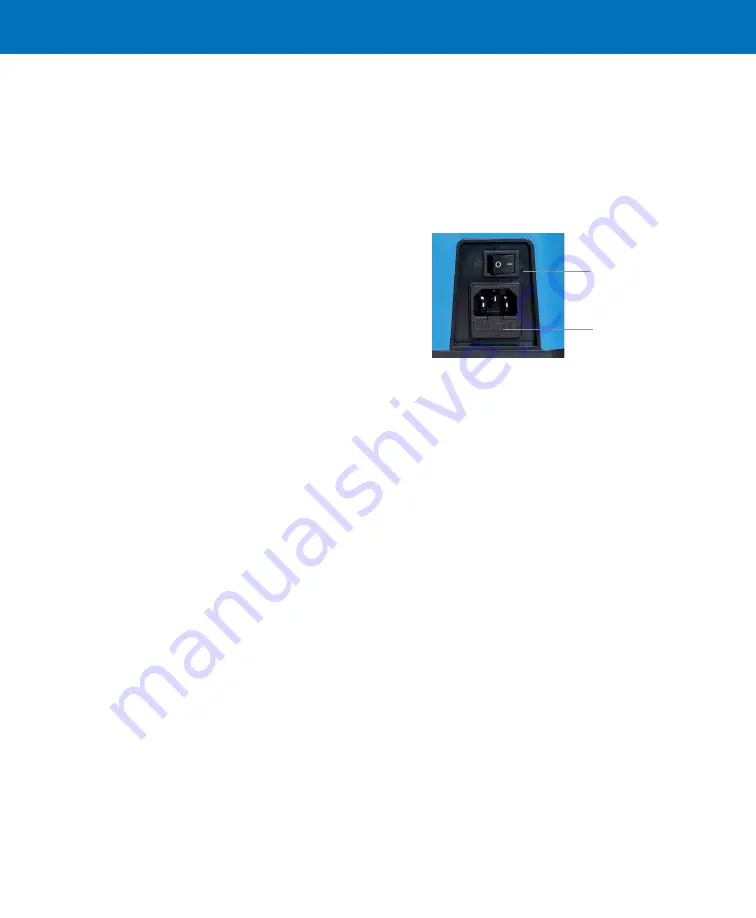
Confirm that the power switch on the rear of the
EDGE™ base is turned on.
•
Inspect the fuse and replace if needed. The fuse is
located directly under the power plug on the rear of
the EDGE.
The START/STOP indicator LED does not stay lit and/or
the experiment does not run:
•
Ensure that the lid is fully closed.
•
Press firmly on the electrophoresis tank to ensure
that it is firmly seated and that both electrodes are
making contact with the base.
•
Check that the correct buffer has been used and that
the gel is fully submerged in buffer.
•
Ensure that the timer has not reached zero. Increase
the remaining time and try running the experiment
again.
The gel tray will not fit into the chamber:
•
The tray is designed to fit only one way. Rotate the
tray 180˚ and try again.
•
The EDGE™ uses custom 10 x 7 cm trays that differ
from existing Edvotek electrophoresis accessories.
Please ensure that you are using the proper electro-
phoresis trays.
No DNA bands are present on the gel:
•
Check that the blue light is turned on by pressing the
paddle switch
•
Ensure that SYBR® Safe, or comparable blue
light-compatible, DNA stain was added to the gel.
Consider a post-electrophoresis stain like EDVOTEK®
FlashBlue™ stain.
•
Verify that the gel has run properly. This can often be
confirmed by the migration of a loading dye included
in the experimental samples.
The gel has run crooked, or the DNA samples are at an
angle:
•
Ensure that the gel tray is aligned properly in the
buffer chamber. The tray should sit flush against the
bottom of the chamber and against one wall of the
chamber to ensure it is straight.
•
Check that the electrodes are intact and that there is
no visible corrosion on either electrode.
Power Switch
Fuse


