22
Version of 26 April 2016
Contrast:
Here you can set the Contrast
Saturation:
Here you can set the Saturation
Exit the ‘A/V Setting’ menu pressing the EXIT button.
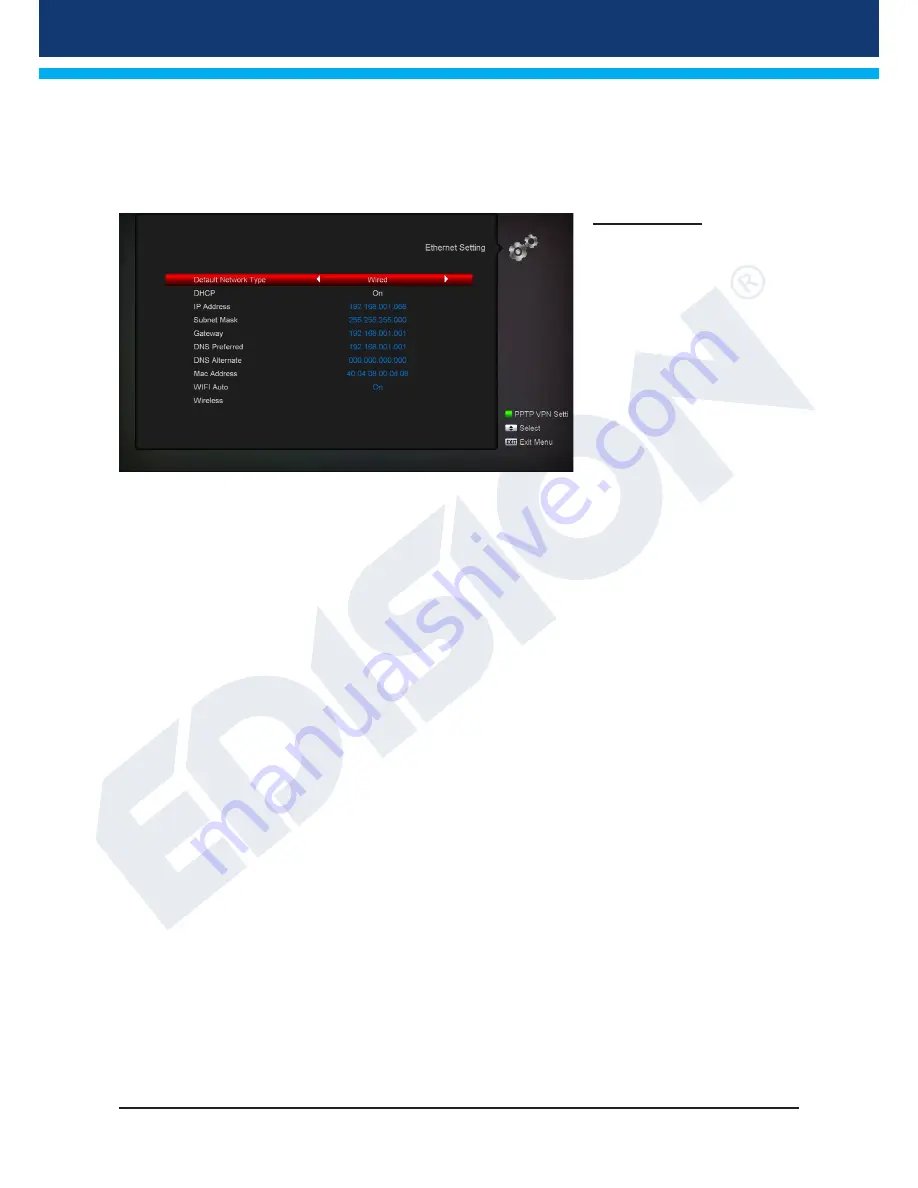
Ethernet Setting
Menu functions and settings:
Tip:
The items IP Address,
Subnet Mask, Gateway, DNS
Preferred and DNS Alternate are
available only if item ‘DHCP’ is
set to ‘OFF’.
DHCP:
If you install a DHCP
server on your network, you
can automatically provide an IP
address to your receiver. For
this purpose, select ‘On’. If you
are not using a DHCP on your
network, you can manually enter
the corresponding values in the following points.
IP Address:
Type here a free IP address within your network.
Subnet Mask:
Enter the subnet mask corresponding to your network.
Gateway:
Enter here the IP address of the Internet gateway.
DNS Preferred:
Here you can enter the IP address of a DNS server.
DNS Alternate:
Enter here the IP address of an alternate DNS server.
Tip:
Use the numbered buttons on the remote control to enter the numbers.
Exit the ‘Network Local Settings’ menu pressing the EXIT button.
http Update:
Manual update
Menu functions and settings:
URL:
Enter the file address that includes the new software of the receiver. Navigate between letters using
the left/right buttons. In order to enter the information, use the numbered or letter buttons. Access to specific
symbols is provided only through the zero (0) button. Use the green button to select between uppercase and
lowercase letters. To erase a symbol, press the yellow button.
Update mode:
At this point, you can determine the software area to be updated. You can choose between
‘So Bootloader’, ‘Software with channel list & Settings’, ‘Software without channel list’ or ‘Settings”’
(channel list).
Use the EXIT button to exit the ‘Manual Update’ menu.


