81
Practical Use of the PR-50
Using Scheduler to Control Presenter
You can use the Scheduler function to play the clips you want at any time you like. You can also
program it to stop playback and shut down the PR-50 at the desired time as well.
You can also synchronize the PR-50 with the time data from a network time server and have the time
adjusted automatically (p. 105).
You can click the [Clock] button to open the “Schedule Editor” screen and make settings for the
schedule.
Adding Schedules
Click the [Add] button at the lower left of the “Schedule Editor” screen to create a new schedule.
Deleting Schedules
In the “Schedule Editor” screen, select the schedule you want to delete, then click the [Delete] button
at the lower left of the “Schedule Editor” screen.
Setting the Schedule
1.
Click the [Clock] button at the upper left of the Presenter screen.
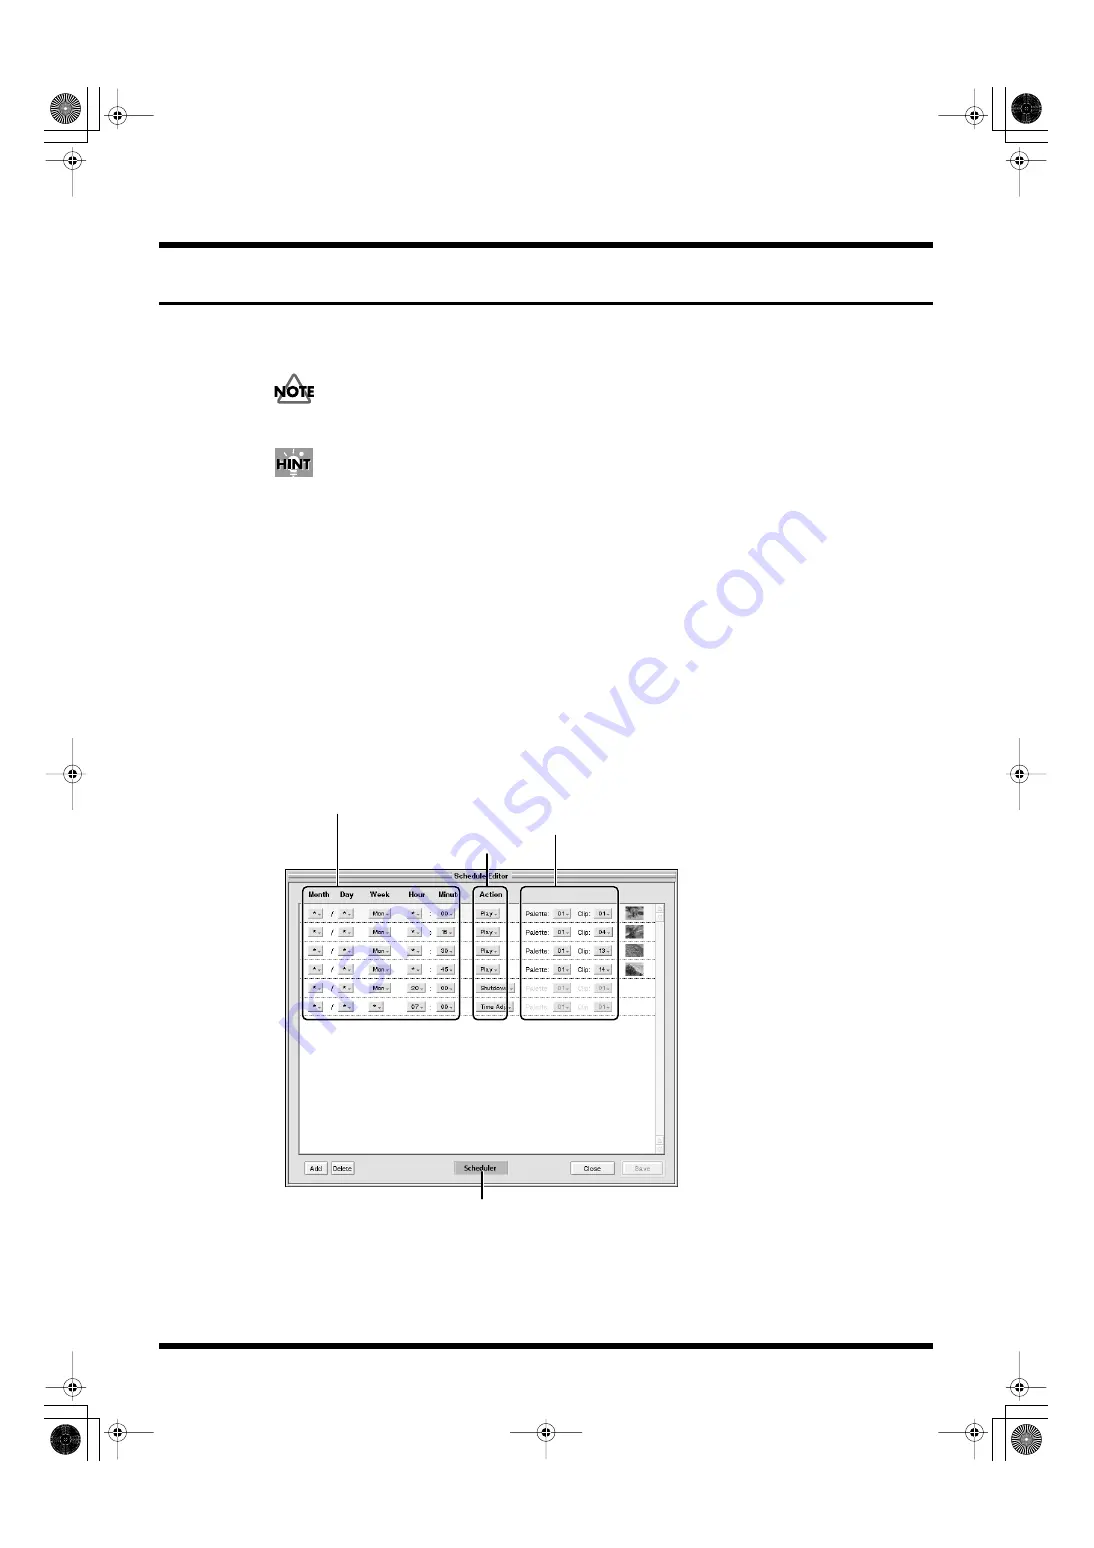
The “Schedule Editor” screen appears.
fig.scheduler01.eps
2.
Click below “Month” and select the month.
If the month is not to be specified, select “*” (for example if you only want to specify the day of the week).
3.
Select the “Day,” “Week,” “Hour,” and “Minute” in the same manner.
If this information is not to be specified, select “*” (“*” cannot be selected for “Minute”).
Selects the month, Day, Week, Hour and minute
[Scheduler] button
Selects the palette and clip
Selects the operation
PR-50_e.book 81 ページ 2006年11月2日 木曜日 午後6時29分
Содержание PR-50
Страница 129: ...MEMO PR 50_e book 129 ページ 2006年11月2日 木曜日 午後6時29分 ...
Страница 130: ...MEMO PR 50_e book 130 ページ 2006年11月2日 木曜日 午後6時29分 ...


