78
Practical Use of the PR-50
3.
After the sound of the drive spinning abates, click the [Import] button at the lower right of the
Edit Mode screen.
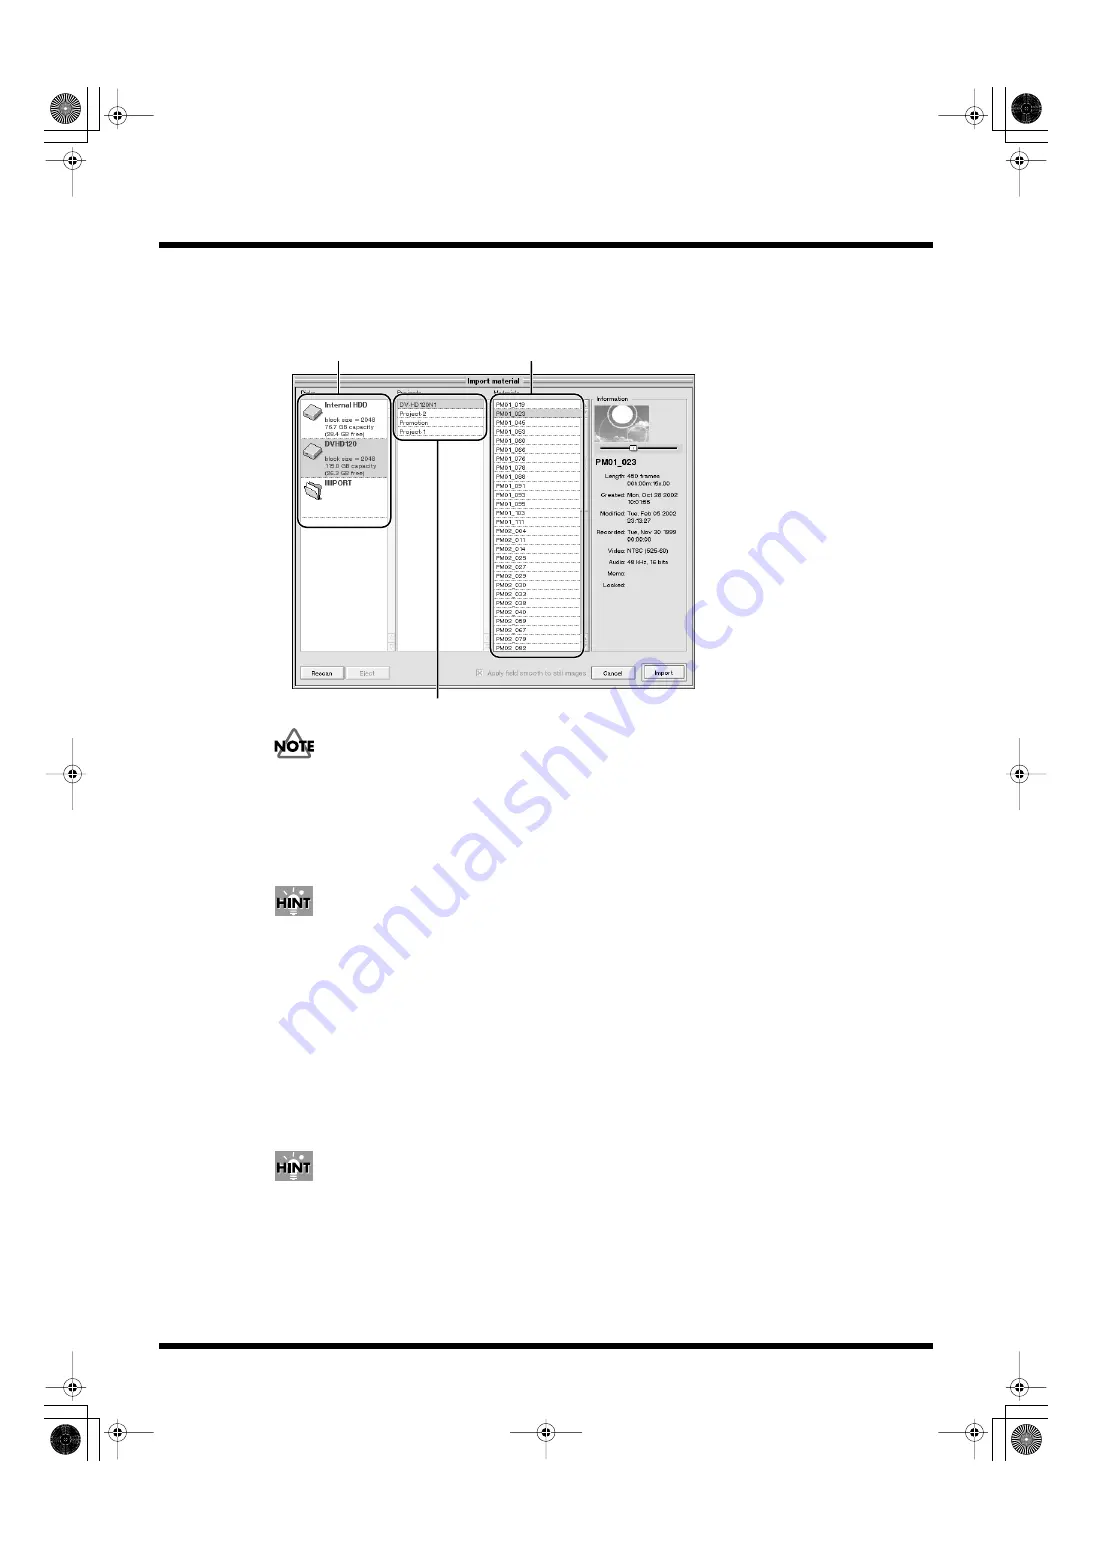
The “Import material” dialog is displayed.
fig.import02.eps
If the disk does not appear in the screen, click the “Rescan” button in the dialog.
4.
Select the disk you want to import from the “Disks” list.
5.
Select the material you want to import in the “Materials” list, then click the [Import] button.
To select multiple materials, hold down the [Shift] key as you select.
You can cut down on interlacing problems when selecting still images by importing with “Apply
field smooth to still images” checked at the bottom center of the dialog.
6.
Select the disk in the “Disks” list and click the [Eject] button.
If you select a CD, the disk tray opens; remove the disk from the tray.
Remove the card from the card reader.
7.
If you want to continue importing from other disks, insert a disk as described in Step 1.2
above, and after the sound from the drive’s spinning abates, click the [Rescan] button.
8.
When you have finished importing, eject the disk as described in Step 6 above, then press
[Cancel] to close the dialog.
• When you use the above procedure in “Import material here,” which appears after you select a
clip in the “Clips” list or Palette window and then right-click, you can import and use the
material as a clip at that position.
• Materials copied from computers connected to a network (p. 104) are copied to the “IMPORT”
folder in the “Disks” list. Load these materials from the “IMPORT” folder.
Select a disk
Select a directory
Select materials
PR-50_e.book 78 ページ 2006年11月2日 木曜日 午後6時29分
Содержание PR-50
Страница 129: ...MEMO PR 50_e book 129 ページ 2006年11月2日 木曜日 午後6時29分 ...
Страница 130: ...MEMO PR 50_e book 130 ページ 2006年11月2日 木曜日 午後6時29分 ...


