


Hints and Tips Handbook
12
Eden
Greenhouses
Customer
Helpline
+44
(0)1242
676625
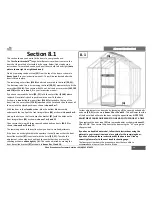
Section
8.1.1
If
you
have
hung
your
doors
and
they
are
not
fitting
correctly
within
the
aperture,
this
section
will
take
you
through
the
steps
needed
to
line
up
the
doors
correctly.
If
the
aperture
of
the
doorway
is
not
square
and
plumb
this
will
hamper
the
way
the
sliders
(114)
work
and
lead
to
various
issues.
These
steps
will
work
on
all
models.
We
recommend
that
you
remove
the
doors
before
attempting
this.
1,
2
and
3
of
the
following
steps
must
be
carried
out
simultaneously
as
they
are
dependant
on
each
other.
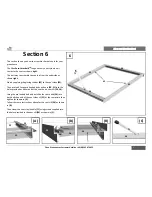
1.
Make
sure
that
the
front
base
sections
(18)
are
level.
2.
Make
sure
that
the
door
posts
(16)
are
not
bowed
but
straight
all
the
way
up
by
placing
a
level
or
straight
edge
to
check.
Another
way
to
check
this
is
to
measure
from
the
centre
of
the
bolt
channel
on
both
door
posts,
checking
they
are
the
same
distance
apart
all
the
way
down.
(I.e.
parallel)
1
1
2
3.
Make
sure
that
the
lintel
(20,
21)
is
level.
4.
Once
the
previous
steps
have
been
carried
out
and
the
door
aperture
is
now
level
and
square,
we
can
now
reattach
the
door(s)
as
detailed
in
section
8.1
of
this
Hints
and
Tips
Handbook
as
well
as
the
instruction
manual
provided
with
your
greenhouse.
Leave
the
3
nuts
and
bolts
(50,
51)
,
which
connect
the
front
base
section
(18)
to
the
base
slide
bracket
(97),
loose.
4
3
5
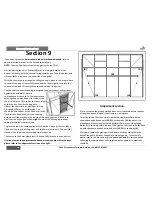
5
05.
With
the
doors
now
hung
and
the
3
nuts
and
bolts
(50,
51)
which
connect
the
front
base
section
(18)
to
the
base
slide
bracket
(97)
loose,
step
inside
the
greenhouse
and
shut
the
door(s)
hard.
This
will
allow
the
bottom
sliders
to
find
their
own
position,
(parallel
to
the
lintel)
.
Once
happy
with
the
doors,
tighten
the
3
nuts
and
bolts
(50,
51)
to
secure.


